Along with our SSO (Single Sign-On) integration, Moqups also offers automatic provisioning with SCIM (System for Cross-domain Identity Management).
SCIM allows IT departments to automate their user identity management process within an IDP. To set up SCIM you will need to generate an API Token in Moqups, and then add this to your IDP. You’ll find instructions for each of our supported IDPs below.
Who can use this feature?
All Moqups Unlimited accounts can set up SCIM with their IDP.
To set up a SCIM integration, you’ll need Admin privileges for both Moqups and your chosen IDP.
SCIM for OneLogin
To set up SCIM for OneLogin, you will first need to generate an API Token in Moqups, and then configure Automatic Provisioning in OneLogin itself.
-
Generate an API Token:
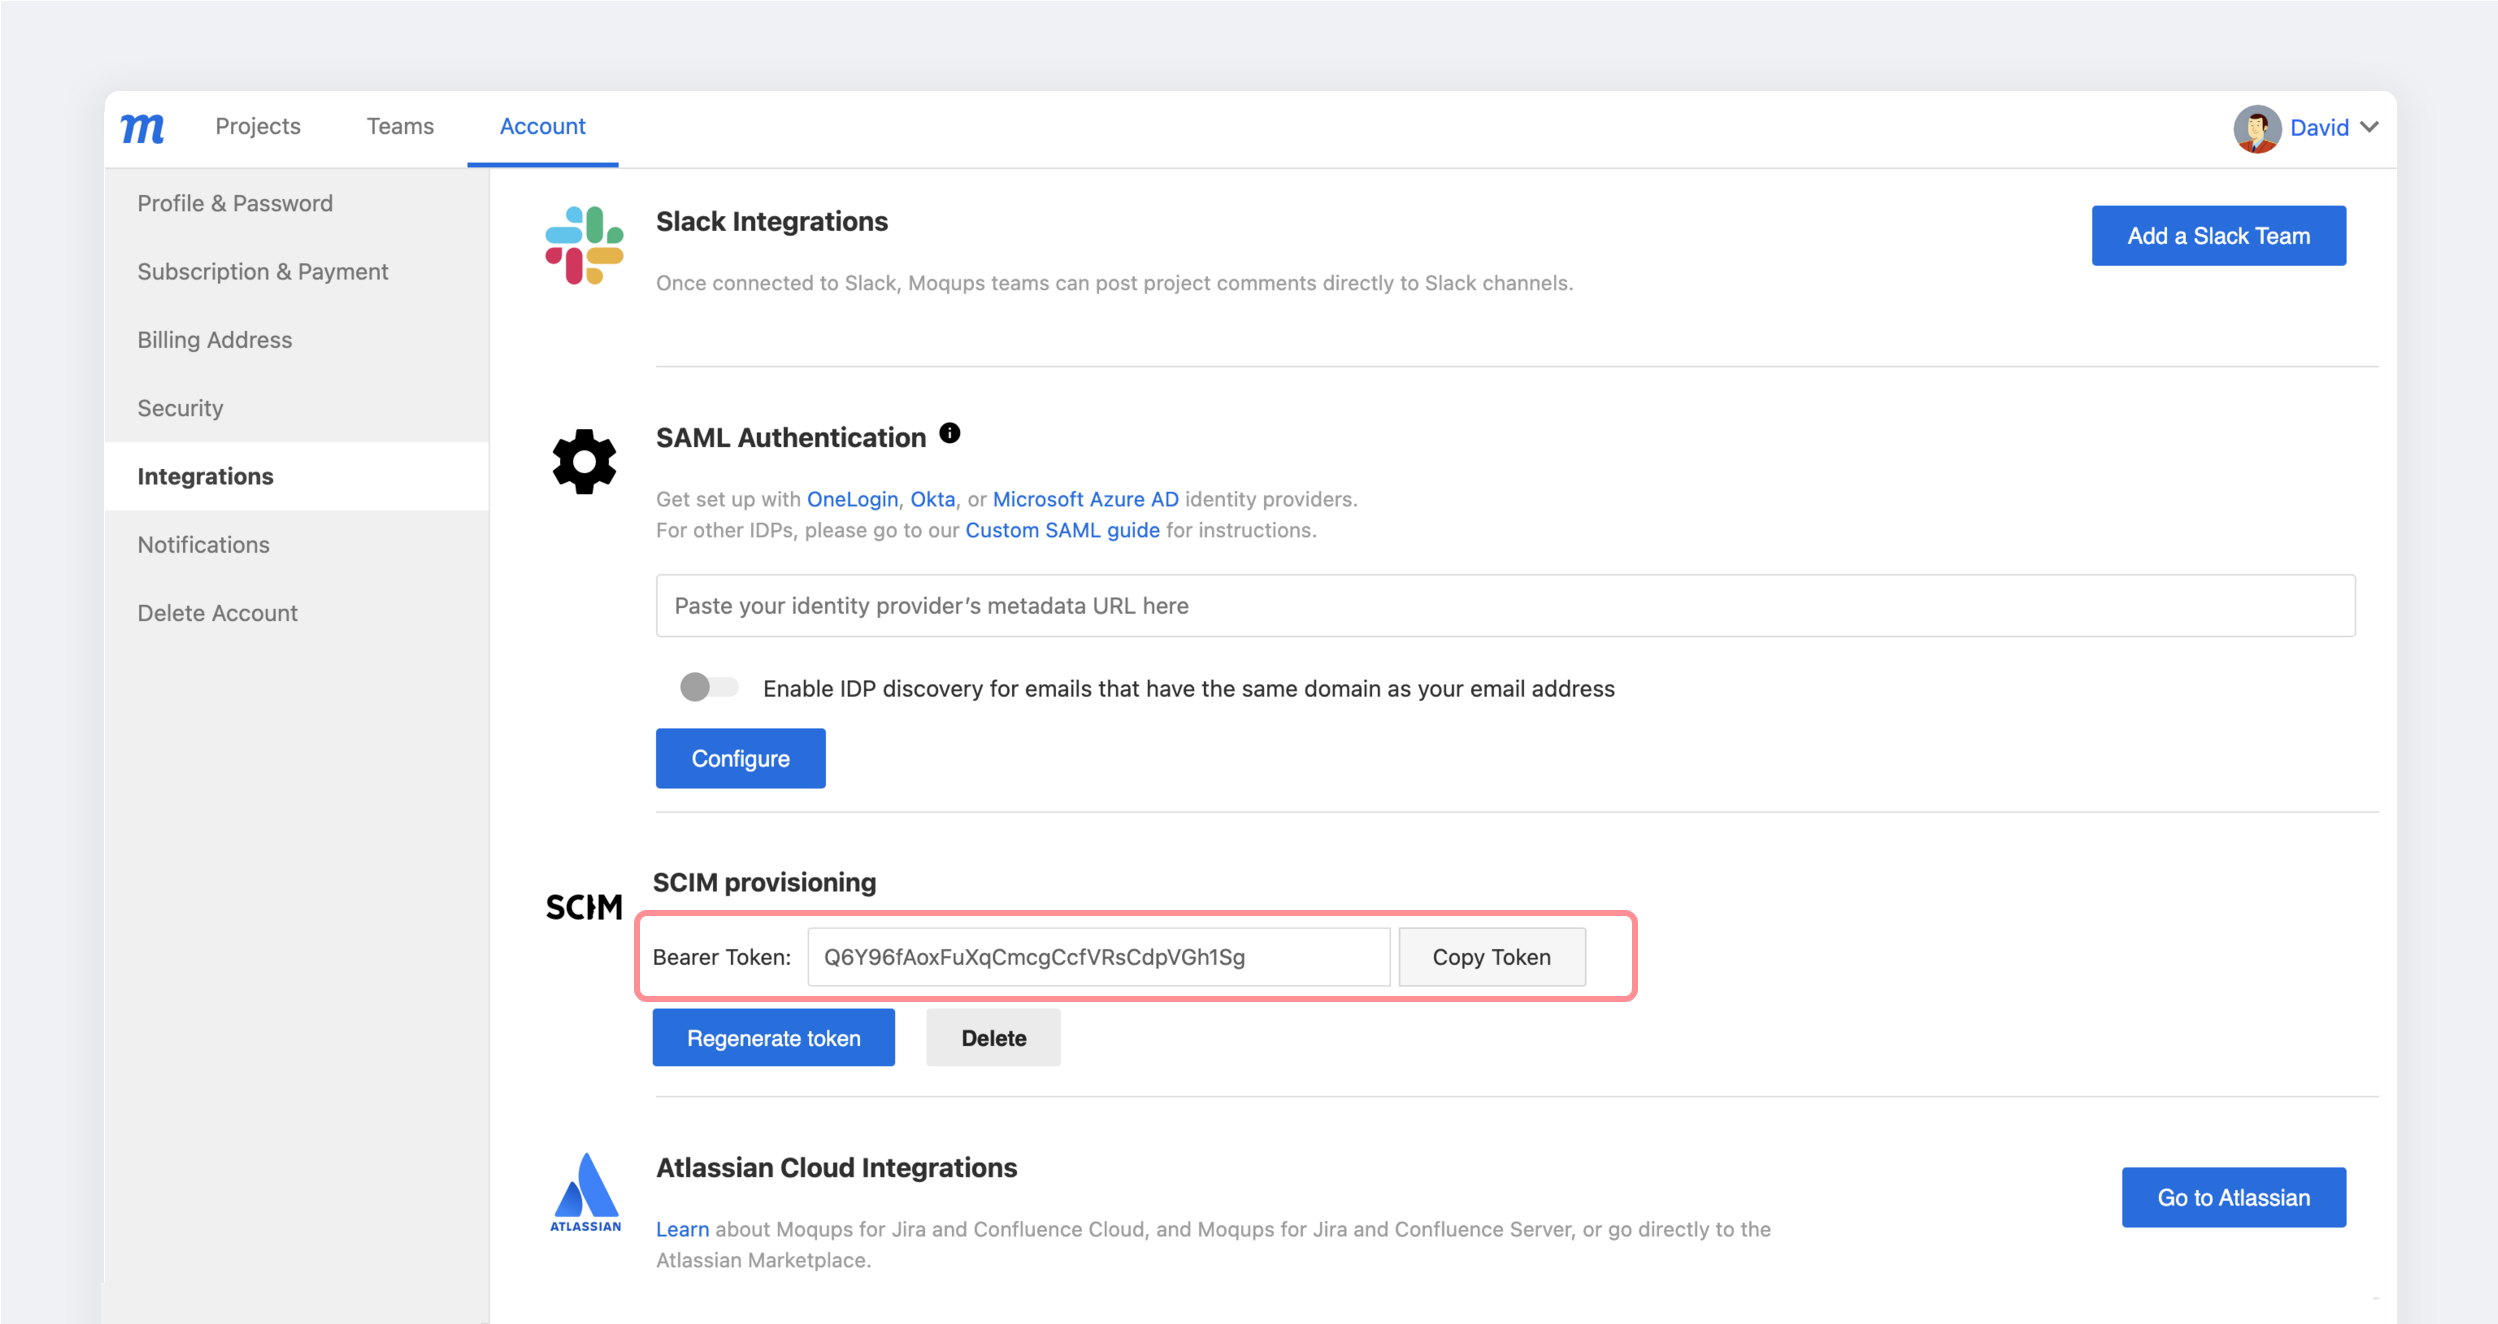
- Go to the Integrations tab on your Moqups Dashboard’s Account page.
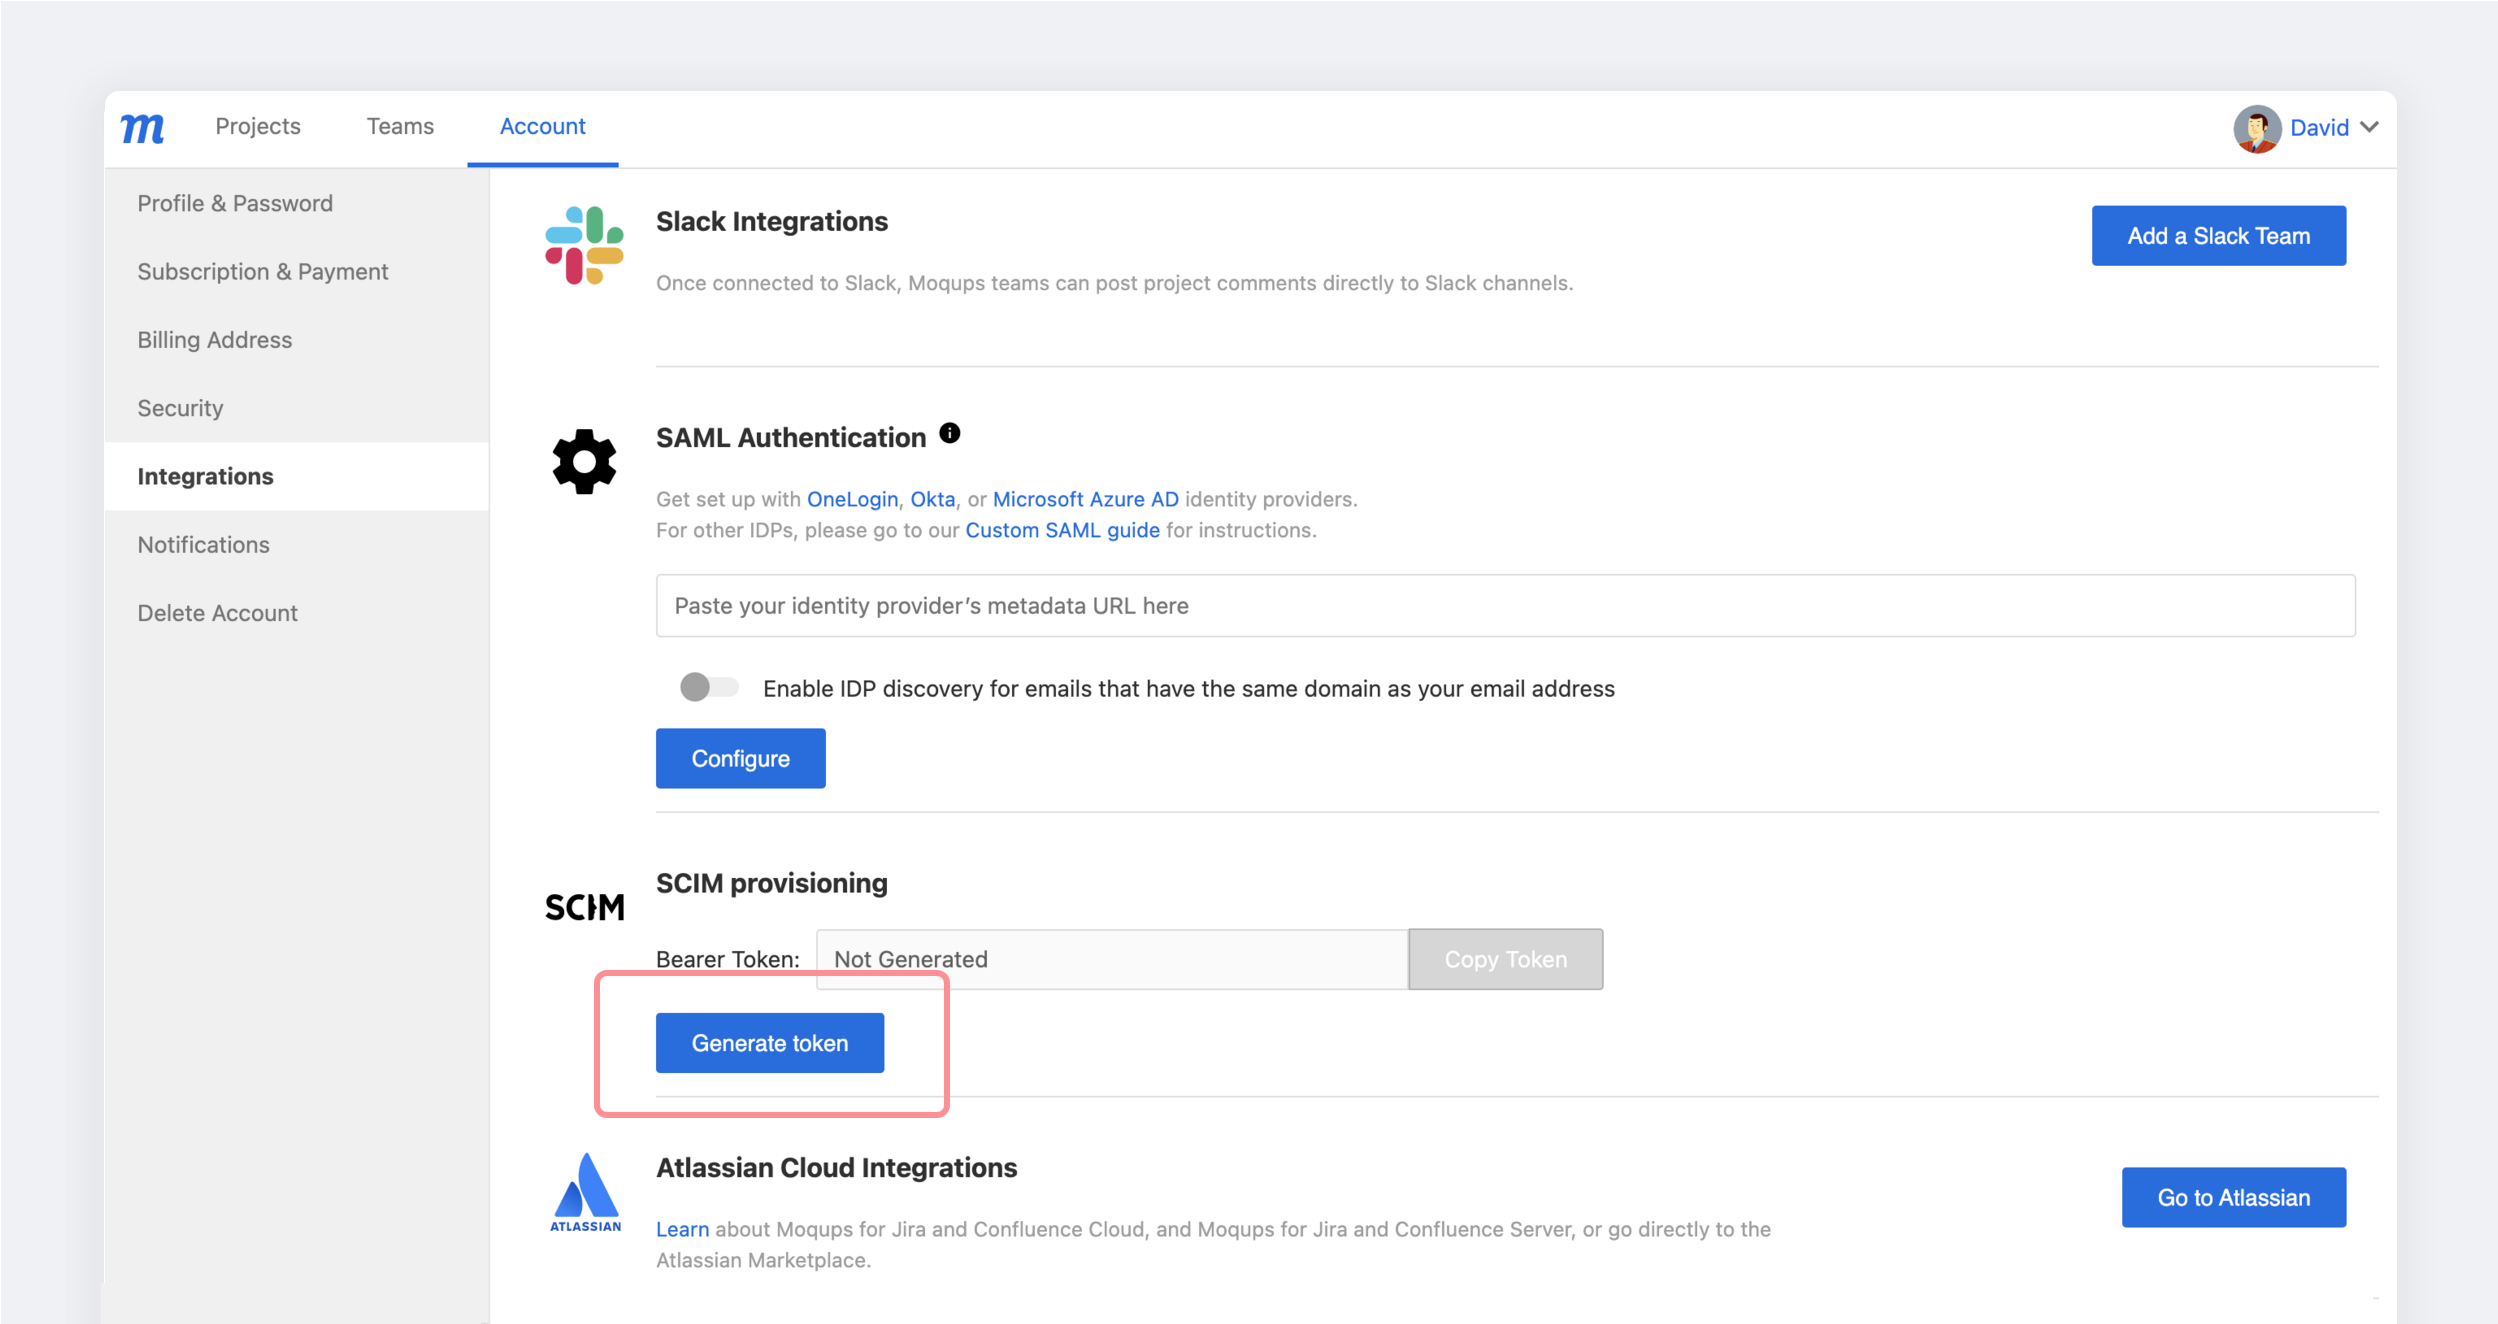
- In the SCIM Provisioning section of your Integration tab, click the Generate token button.

- Copy the API Token to your clipboard. You'll need this to complete the process in OneLogin.
-
Configure Automatic Provisioning in OneLogin:
-
To configure SCIM provisioning, you'll need your API Token from Moqups.
-
Open the Moqups app in OneLogin.
-
Go to the Configuration Tab for the Moqups app.
-
Under API connection, enter your API Token in the SCIM Token field.
-
Click the Enable option.
-
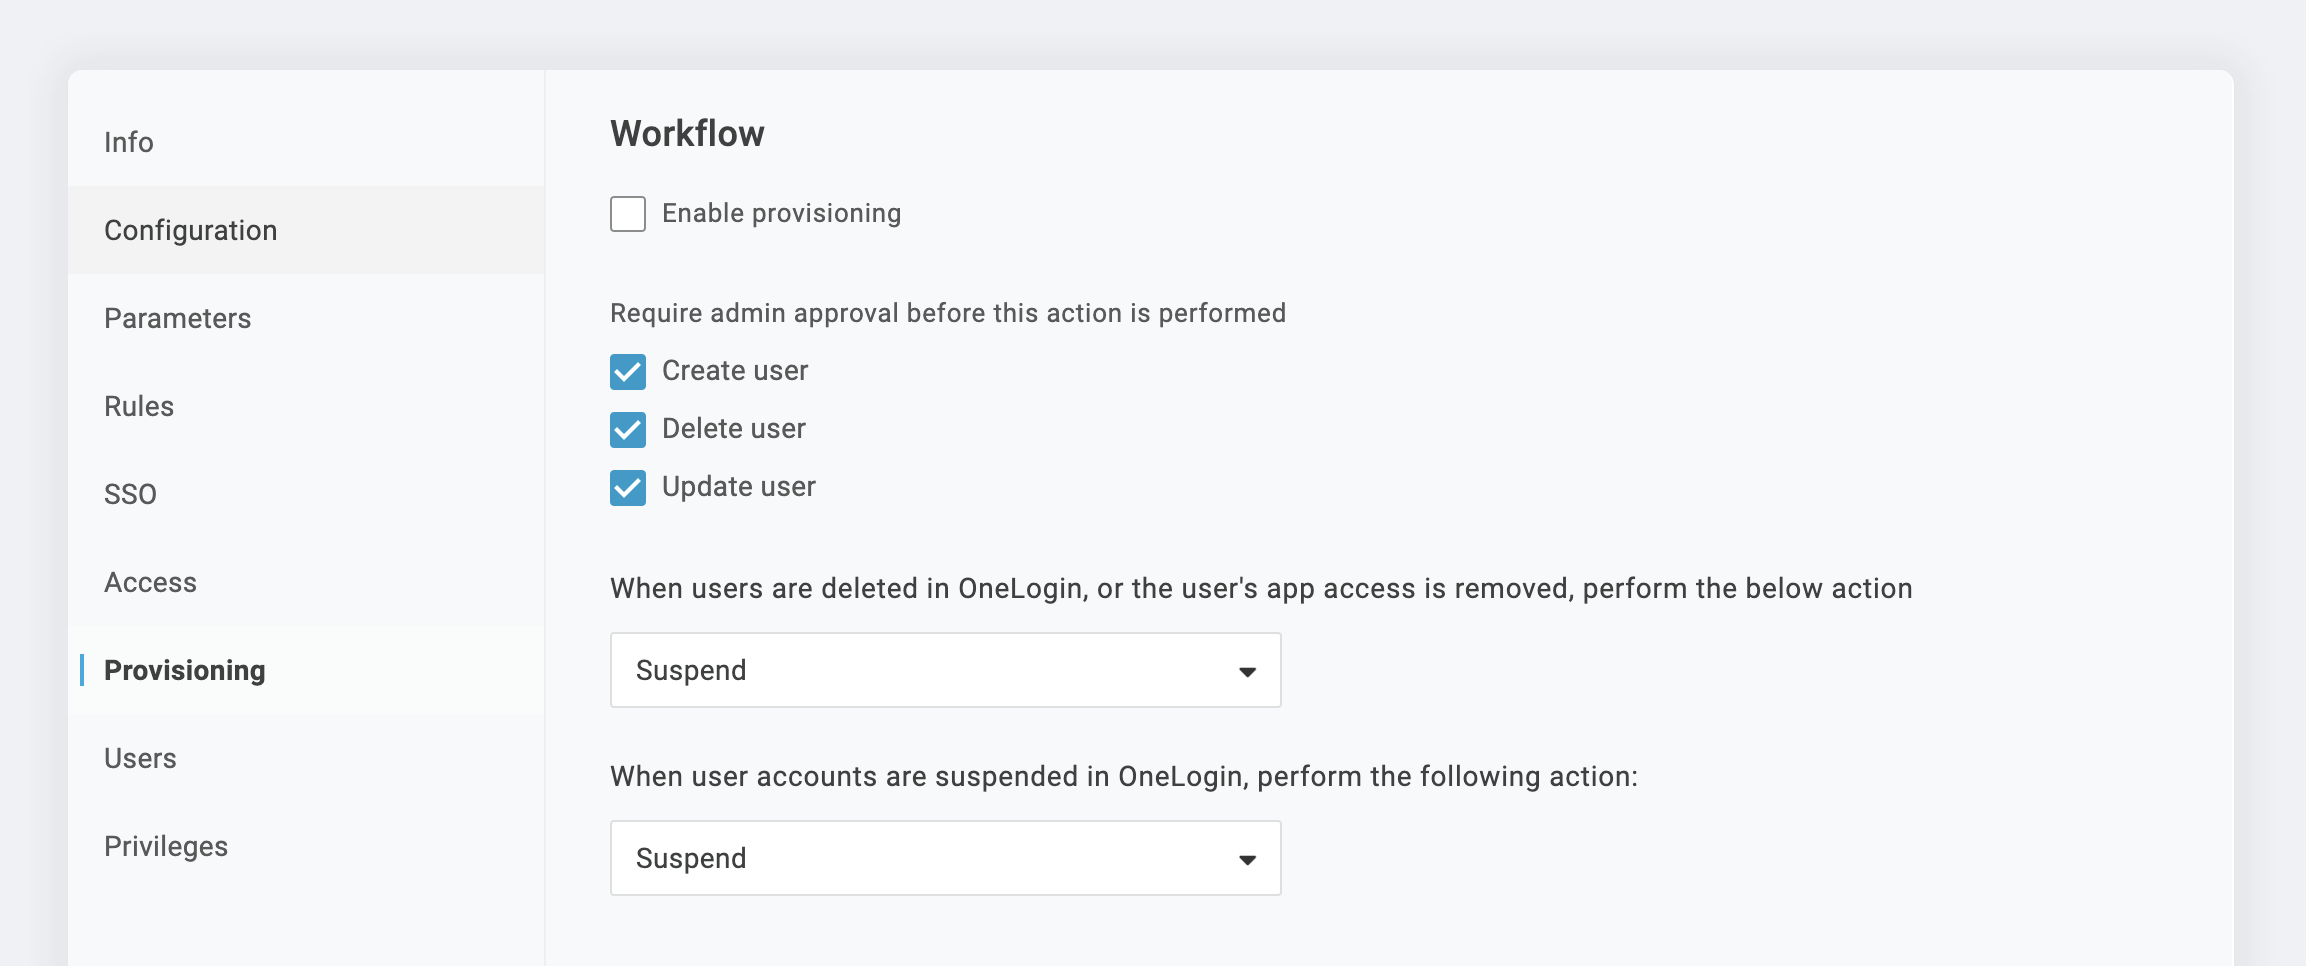
Go to the Provisioning tab and check the box next to Enable provisioning.
-
Select which provisioning actions you want to require admin approval for. You can choose to enable this for:
- Create user
- Delete user
- Update user
-
From the dropdown, select the appropriate action for When users are deleted and for When user accounts are suspended in OneLogin.
-
SCIM for Okta
This section provides an overview and the steps required to configure SCIM in both Moqups and Okta.
Features
The following provisioning features are supported by the Moqups integration with Okta:
- Create Users: New users created through Okta will also be created in Moqups.
- Import Users: Users created in Moqups can be imported into Okta, and either matched against existing Okta users or created as new Okta users.
- Update User Attributes: Updates made to the user's profile through Okta will be pushed to Moqups.
- Deactivate Users: When an organization deactivates a user through Okta, that user loses access to the entirety of that organization’s Moqups account, including their dashboard, projects, and teams. However, the user still retains access to their own, personal Moqups account.
- Reactivate Users: User accounts can be reactivated in Moqups.
Currently, Moqups does not support the following Okta provisioning features, but we may in the future:
-
Remove users *
-
Import / Push Groups
-
Sync password
* Removing users (as opposed to deactivating them) is supported by Moqups, but not by Okta.
Requirements
SCIM-based user provisioning is available to Moqups customers on our Unlimited Plan.
Step-by-Step Configuration Instructions
To set up SCIM for Okta, you will first need to generate an API Token in Moqups, and then configure Automatic Provisioning in Okta itself.
-
Generate an API Token:
-
Make sure that you are subscribed to a Moqups Unlimited Plan.
-
Go to the Apps and Notifications tab on your Moqups Dashboard’s Account page.
-
In the SCIM Provisioning section of your Integration tab, click the Generate token button.
-
Copy the API Token to your clipboard. You'll need this to complete the process in Okta.

-
-
Configure Automatic Provisioning in Okta:
-
To configure SCIM provisioning, you'll need your API Token from Moqups.
-
Open the Moqups app in Okta.
-
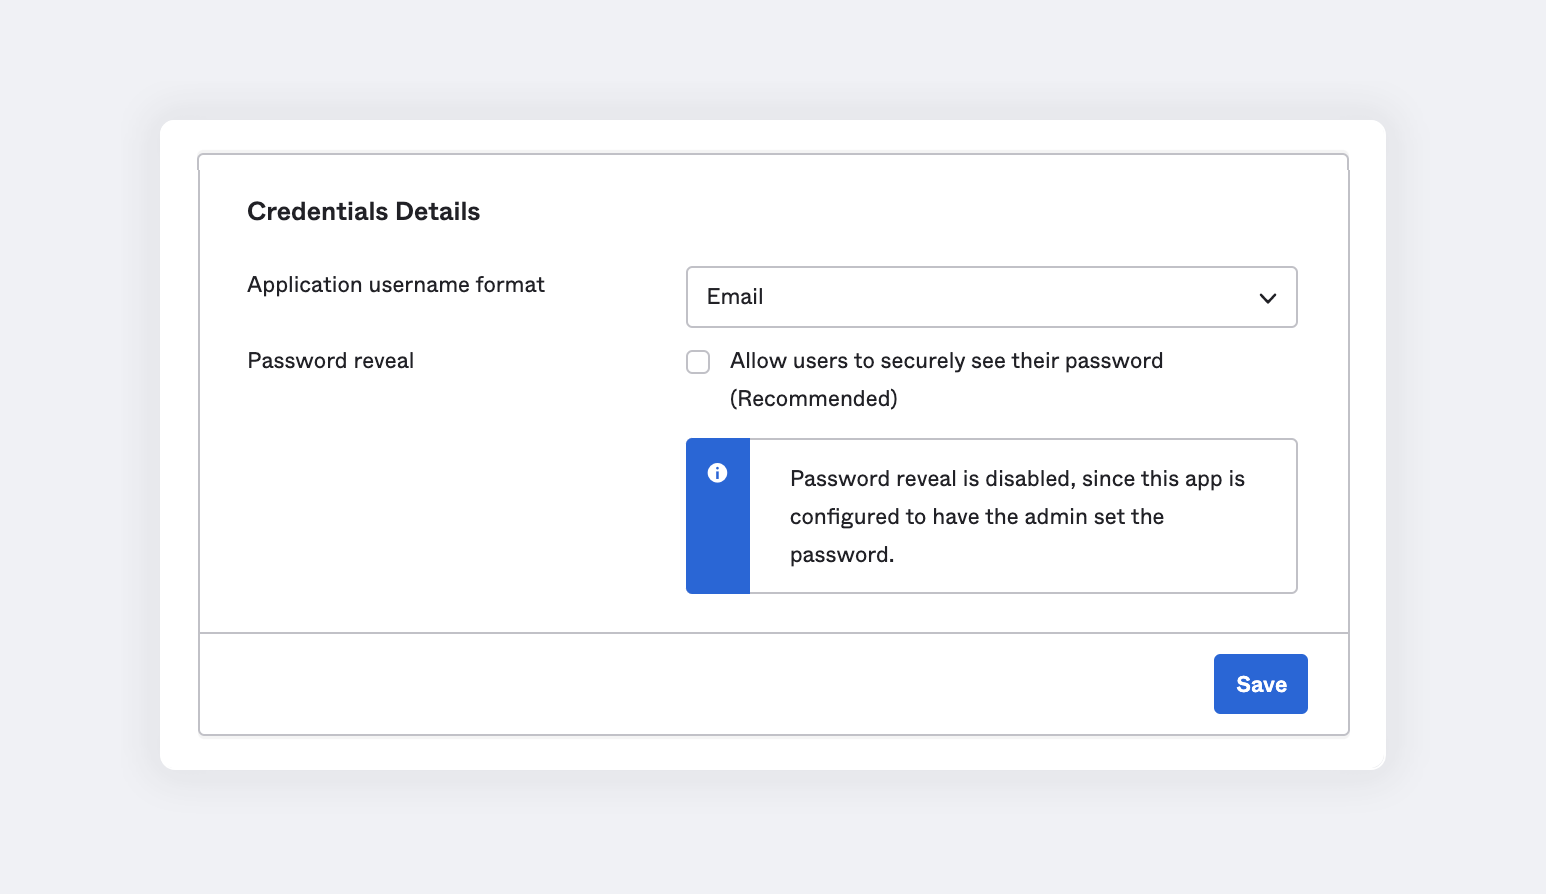
Select the Sign On tab and click Edit.
-
Choose Email for the Application username format.
-
Click Save to apply.
-
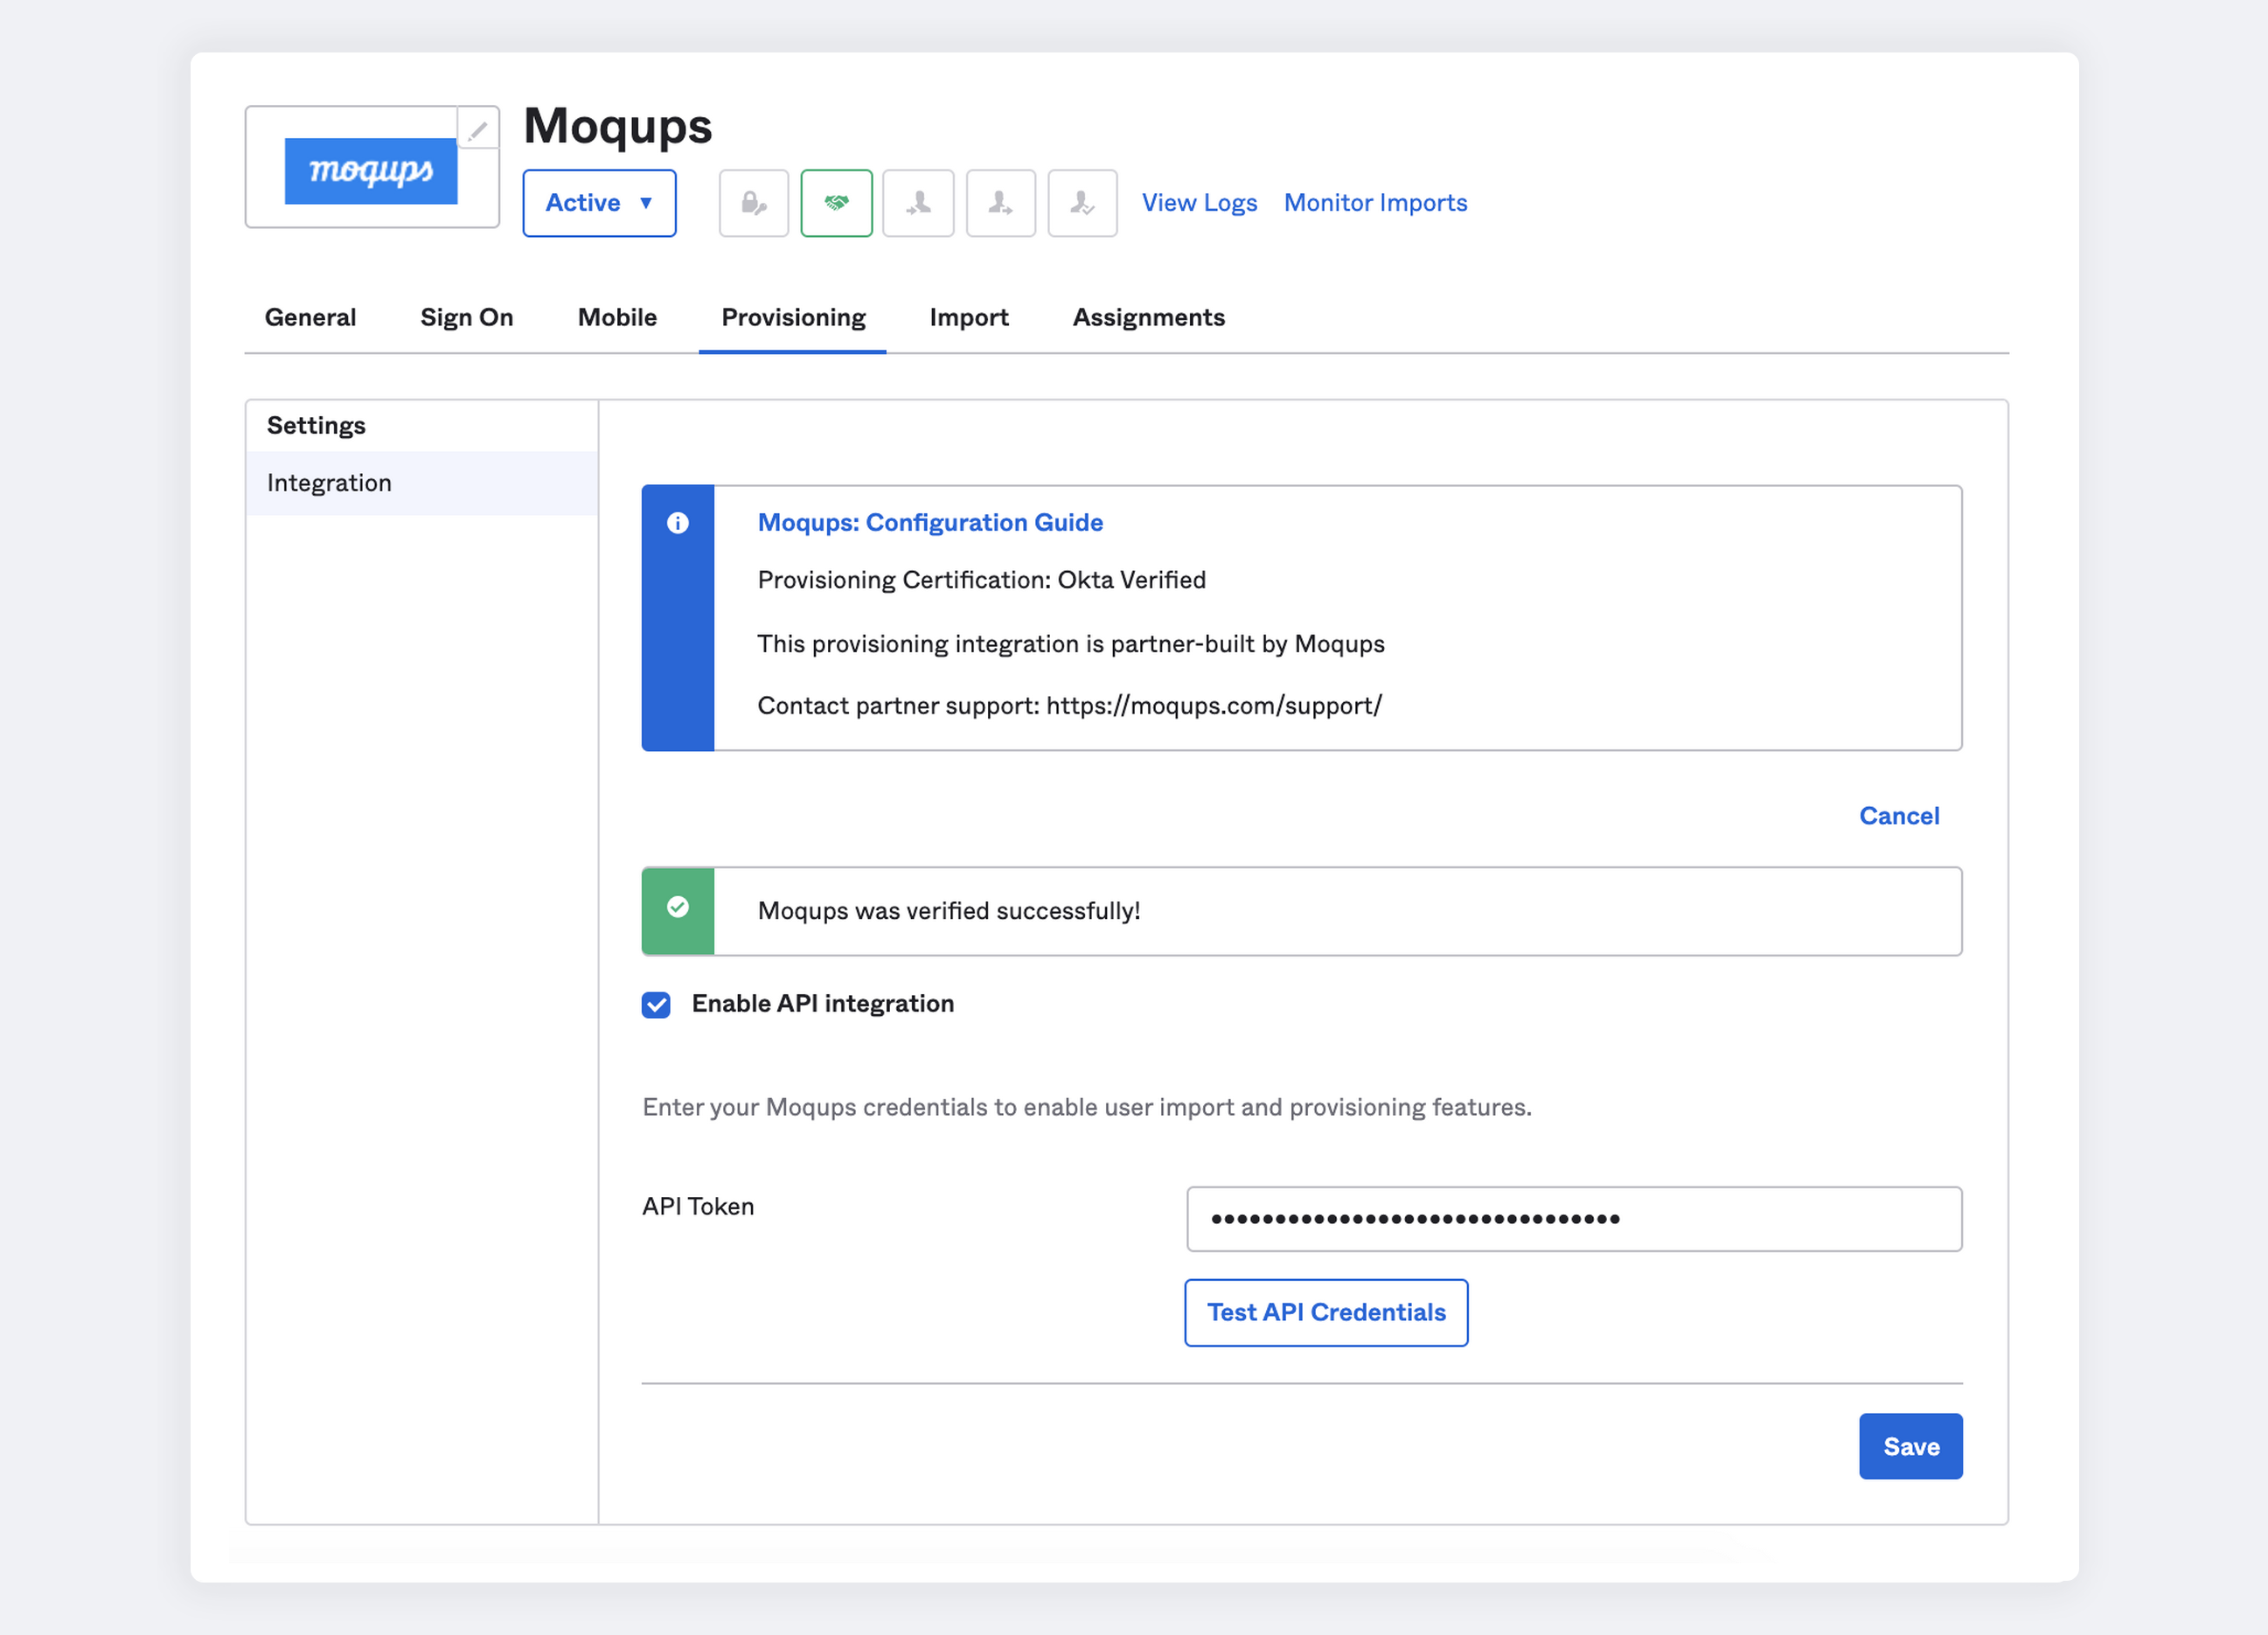
Go to the Provisioning tab in the Moqups app.
-
In the Settings panel on the left, select Integration.
-
Click Configure API Integration
-
Select the Enable API Integration checkbox
-
Enter the API Token provided by Moqups
-
Click Test API Credentials to ensure it's set up correctly.
-
When you get a success message, click Save to apply.
-
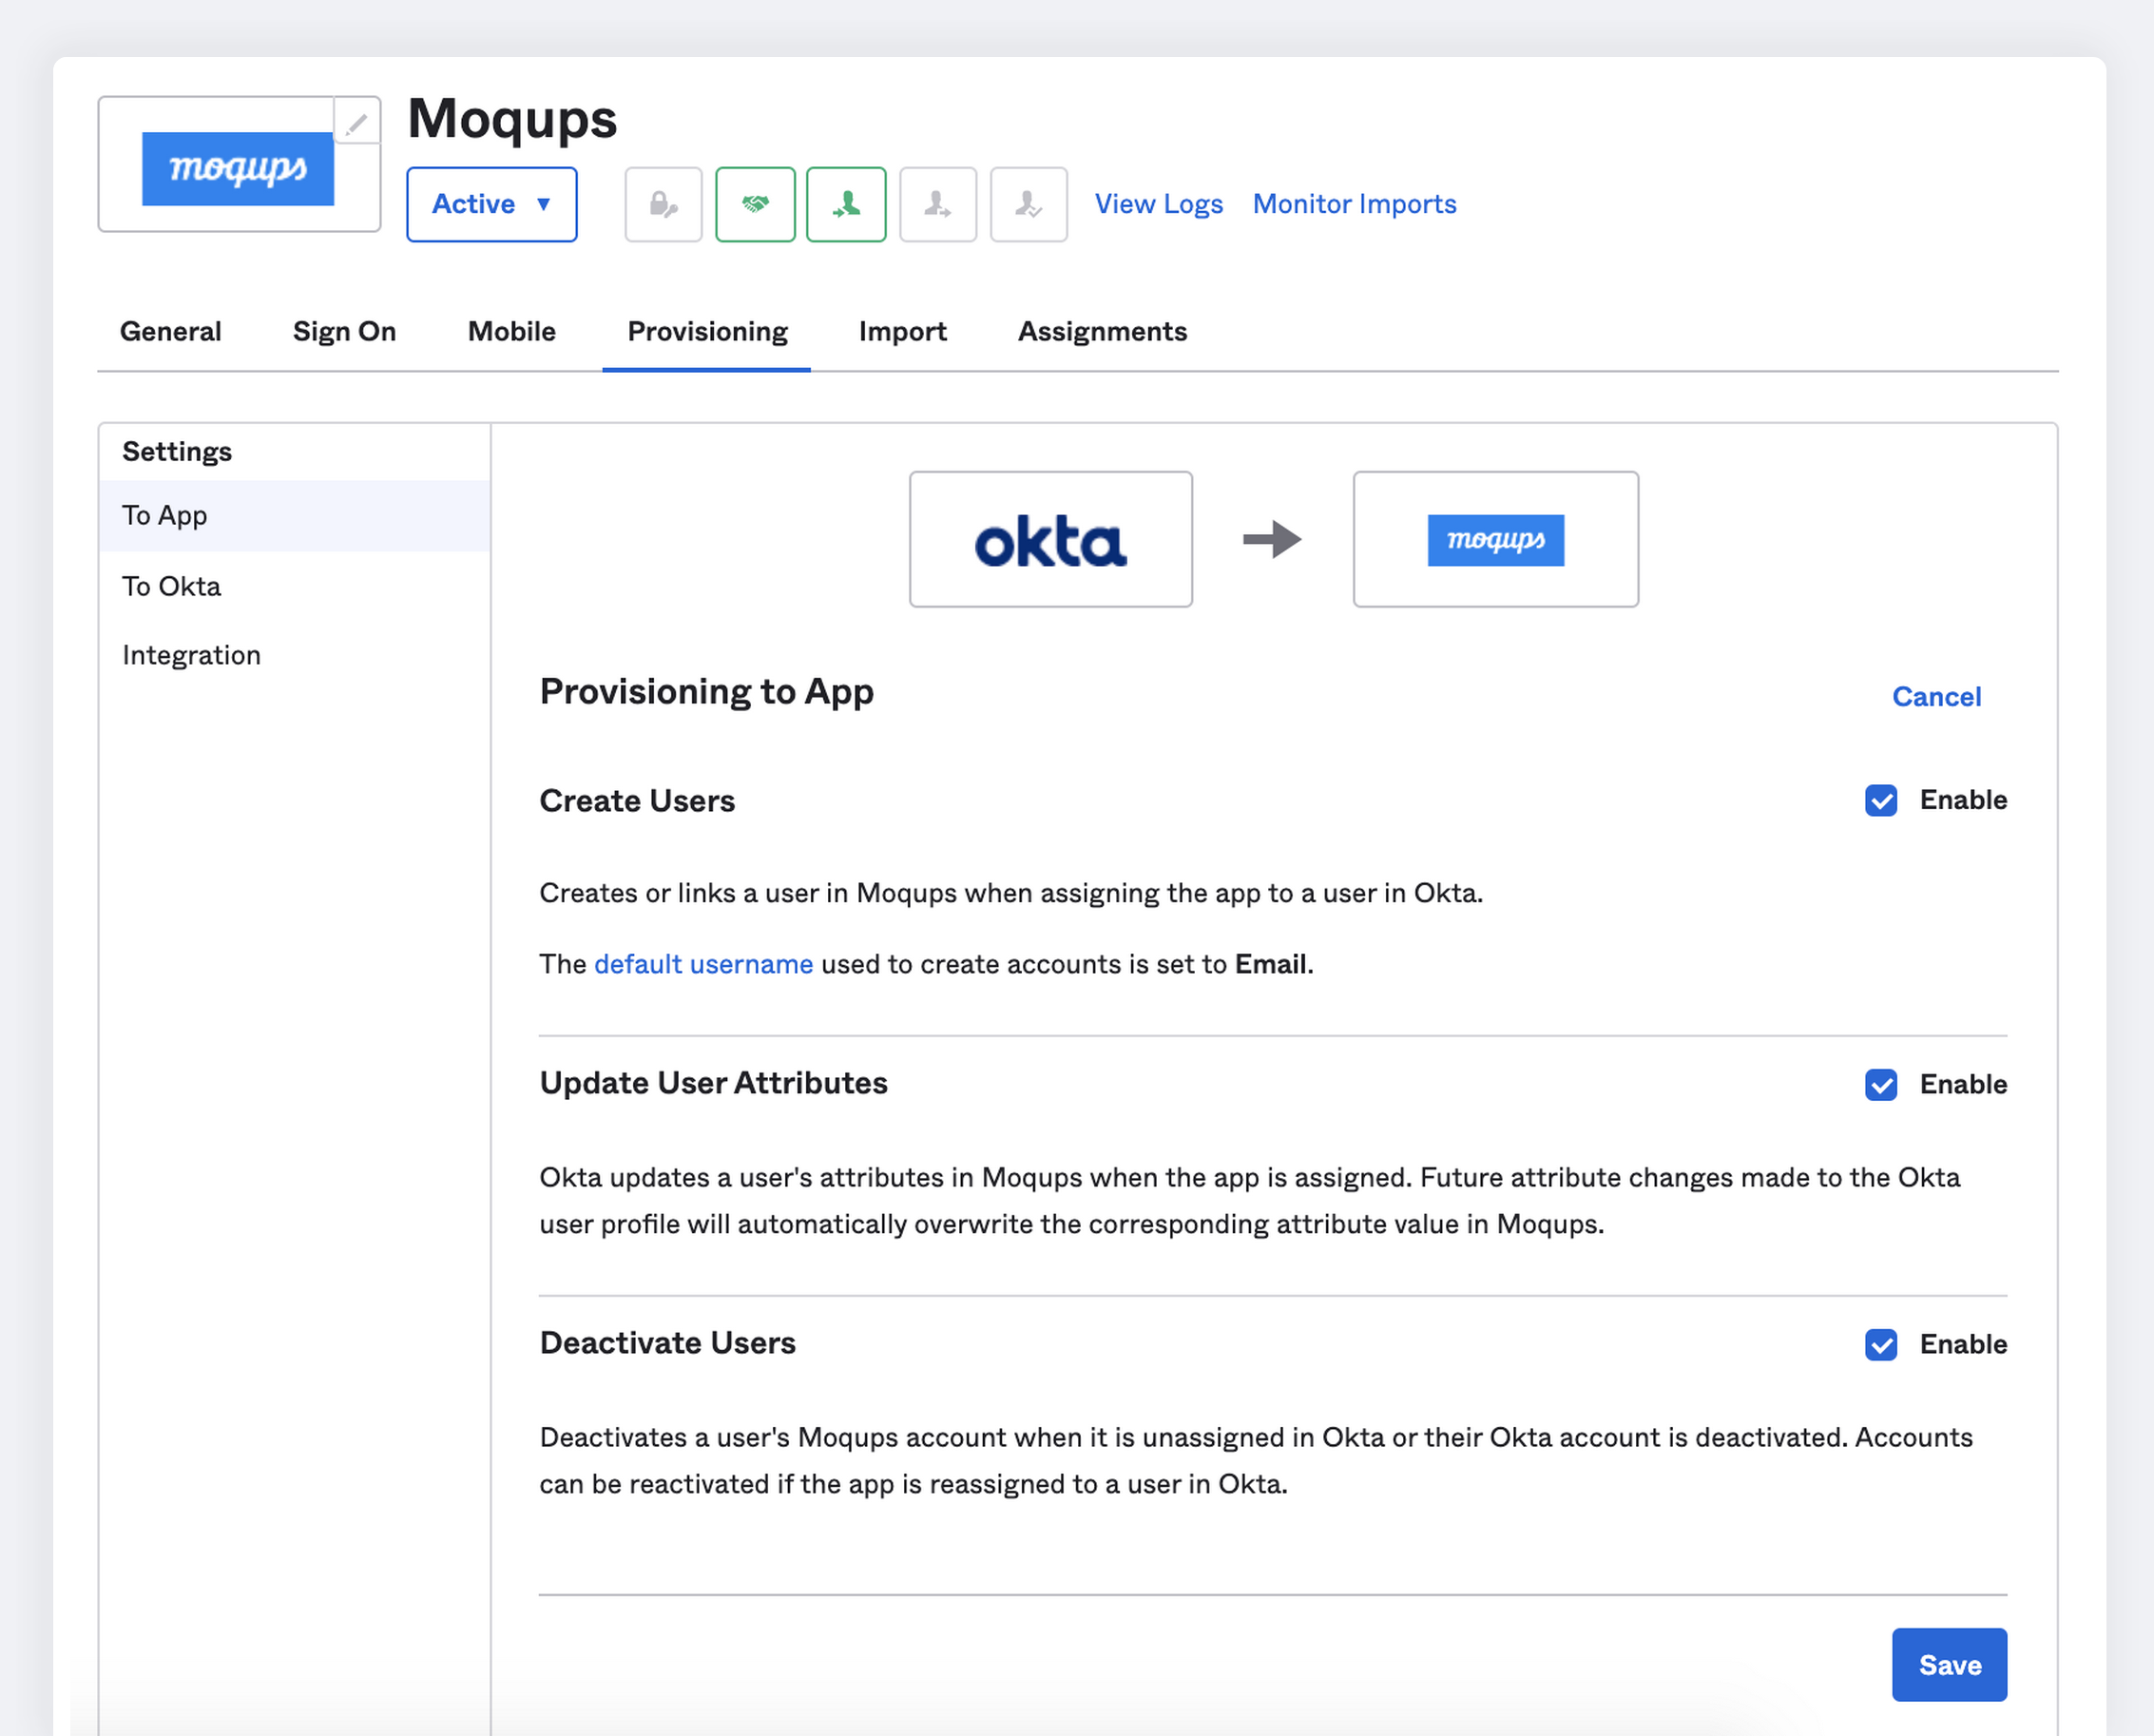
Select the To App tab in the Settings panel.
-
Choose the Provisioning Features that you want to enable.
-
Click Save to apply.
-
Troubleshooting Tips
If you have questions or difficulties with your Moqups/Okta SCIM integration, please reach out to us at support@moqups.com.
SCIM for Microsoft Azure AD
This section provides an overview and the steps required to configure SCIM in both Moqups and Azure AD. When configured, Azure AD automatically provisions and de-provisions users to Moqups using the Azure AD Provisioning service.
For important details on what this service does, how it works, and frequently asked questions, see Automate user provisioning and deprovisioning to SaaS applications with Azure Active Directory.
Features
The following provisioning features are supported by the Moqups integration with Okta:
- Create Users: New users created through Azure AD will also be created in Moqups.
- Sync Users: Keep user attributes synchronized between Azure AD and Moqups.
- Deactivate Users: Remove users in Moqups when they do not require access anymore.
- Single Sign-On: Set up SSO to Moqups (recommended)
Requirements & Prerequisites
SCIM-based user provisioning is available to Moqups customers on our Unlimited Plan.
To configure SCIM in both Moqups and Azure AD, you must also have the following prerequisites:
- An Azure AD tenant.
- A user account in Azure AD with permission to configure provisioning (for example, Application Administrator, Cloud Application administrator, Application Owner, or Global Administrator).
- An Admin account with Moqups.
Step-by-Step Configuration Instructions
Step 1: Configure Moqups to support provisioning with Azure AD
To set up SCIM for Azure, you will first need to generate an API Token in Moqups, and then configure Automatic Provisioning in Azure itself.
Generate an API Token:
-
Go to the Integrations tab on your Moqups Dashboard's Account page.
-
In the SCIM Provisioning section of your Integration tab, click the Generate token button.

-
Copy the API Token to your clipboard. You'll need this to complete the process in Azure.
Step 2: Add Moqups from the Azure AD application gallery
Add Moqups from the Azure AD application gallery to start managing provisioning to Moqups. If you have previously setup Moqups for SSO you can use the same application. However it's recommended that you create a separate app when testing out the integration initially. Learn more about adding an application from the gallery here.
Step 3: Configure automatic user provisioning for Moqups in Azure AD
This section guides you through the steps to configure the Azure AD provisioning service to create, update, and disable users in Moqups based on user assignments in Azure AD.
-
To configure SCIM automatic provisioning, you'll need your API Token from Moqups.
-
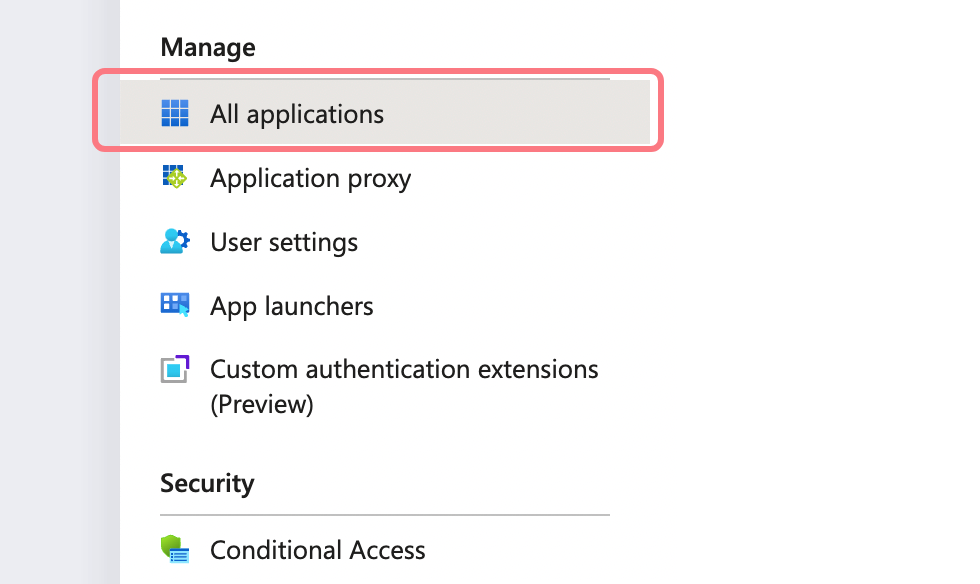
Sign in to your Azure Portal and go to Enterprise Applications > All Applications:

-
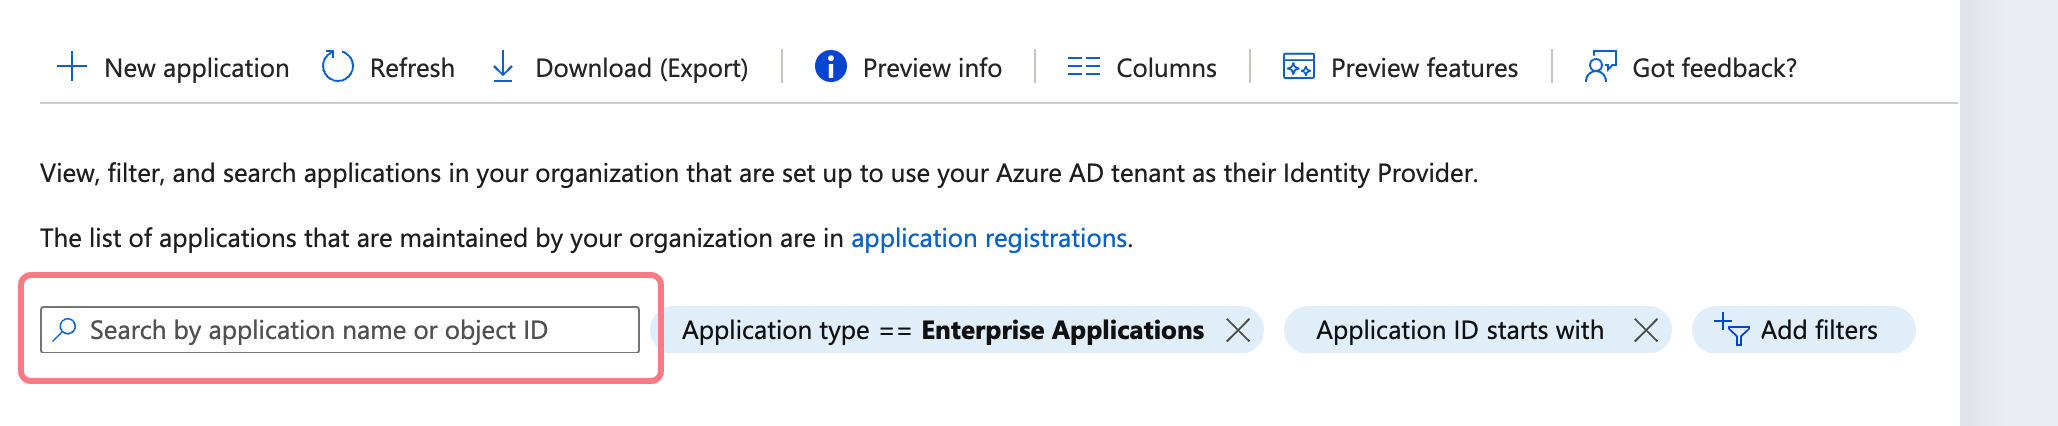
In the applications list, select Moqups:
-
Go to the Manage section and select the Provisioning tab:
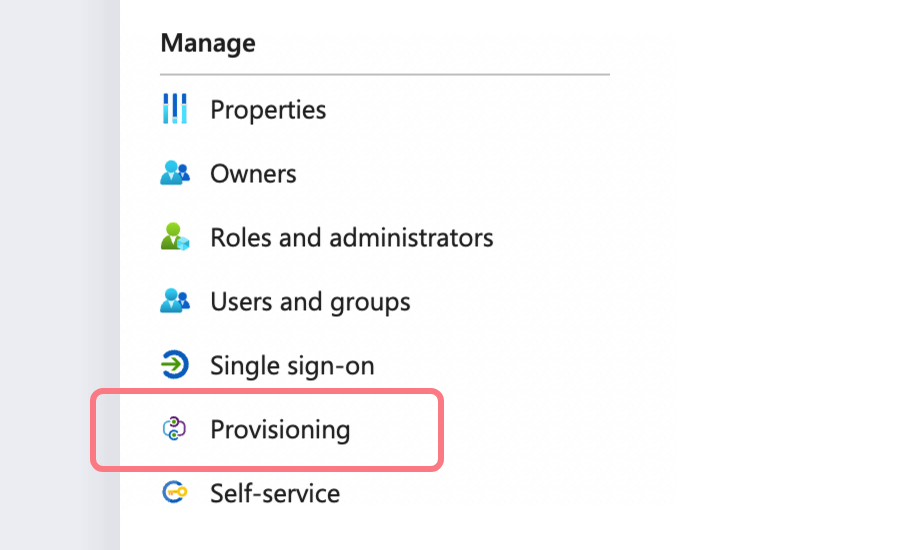
-
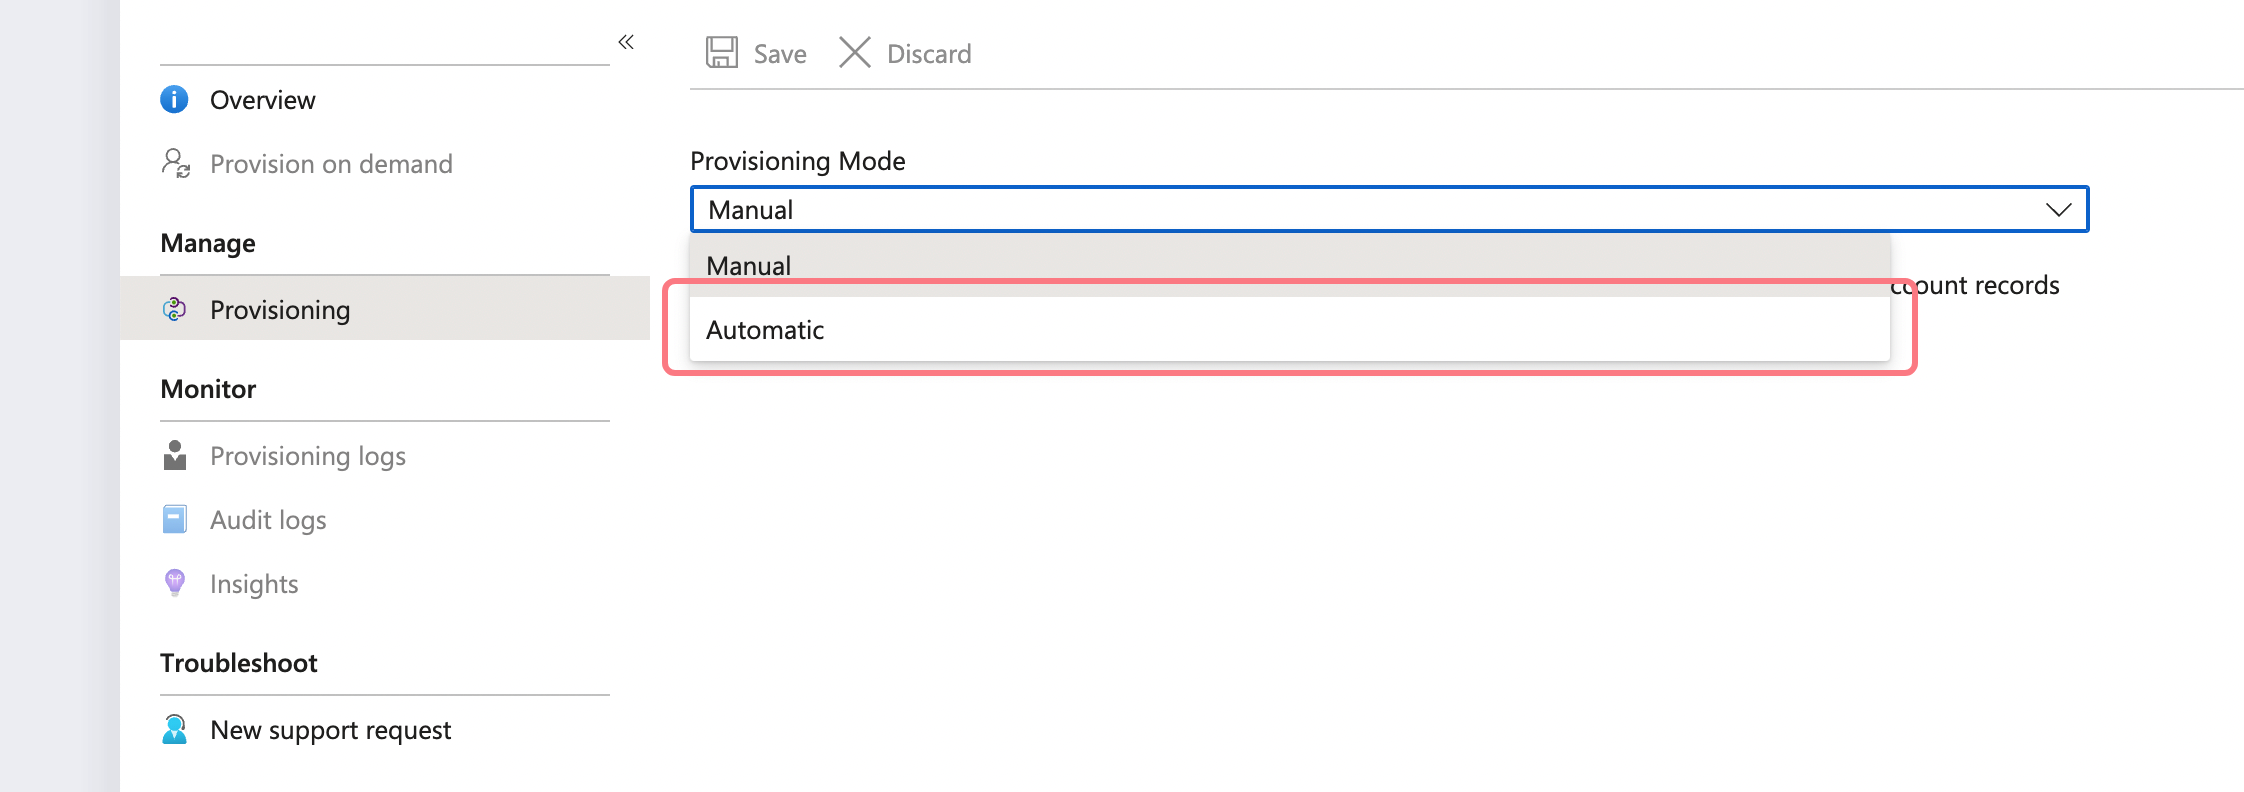
Set the Provisioning Mode to Automatic:
-
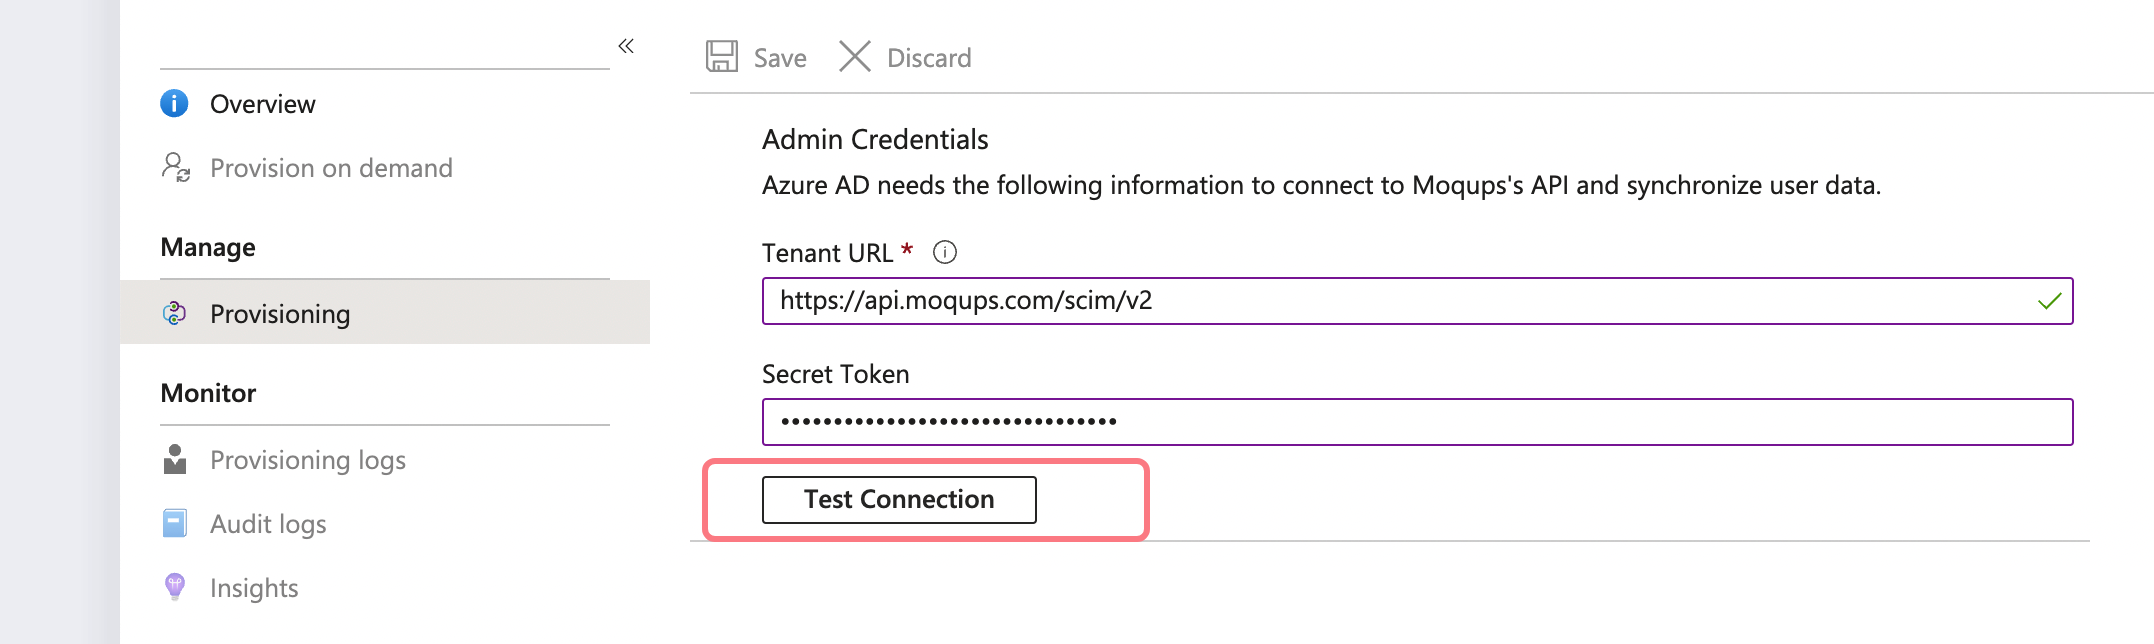
In the Admin Credentials section, input your Moqups Tenant URL and API Token.
-
Use
https://api.moqups.com/scim/v2as the Tenant URL. -
Use the API Token generated in Step 1.a as the Secret Token.
-
Click Test Connection so that Azure AD can confirm that the supplied credentials can be used for provisioning. If the connection fails, double-check the Tenant URL, as well make sure the API Token is correct.
-
-
Click Save to apply.
-
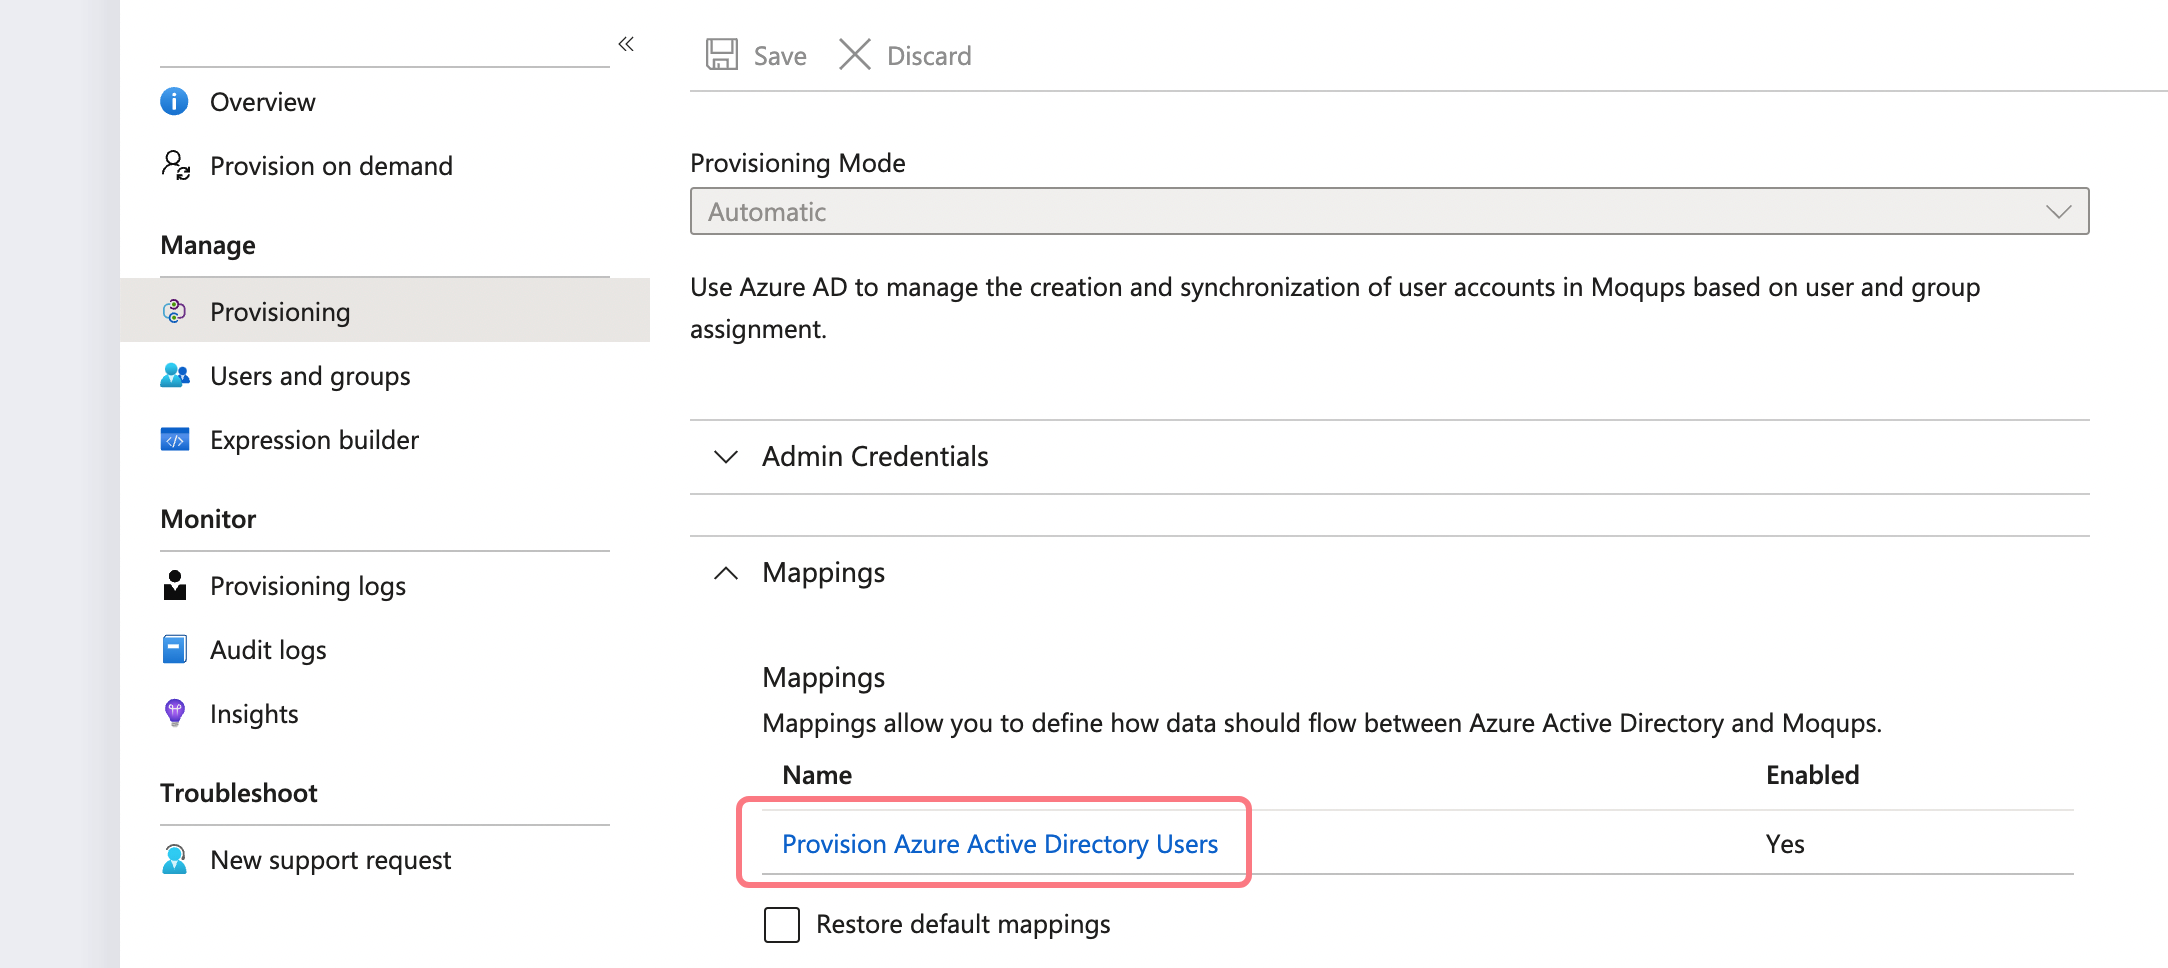
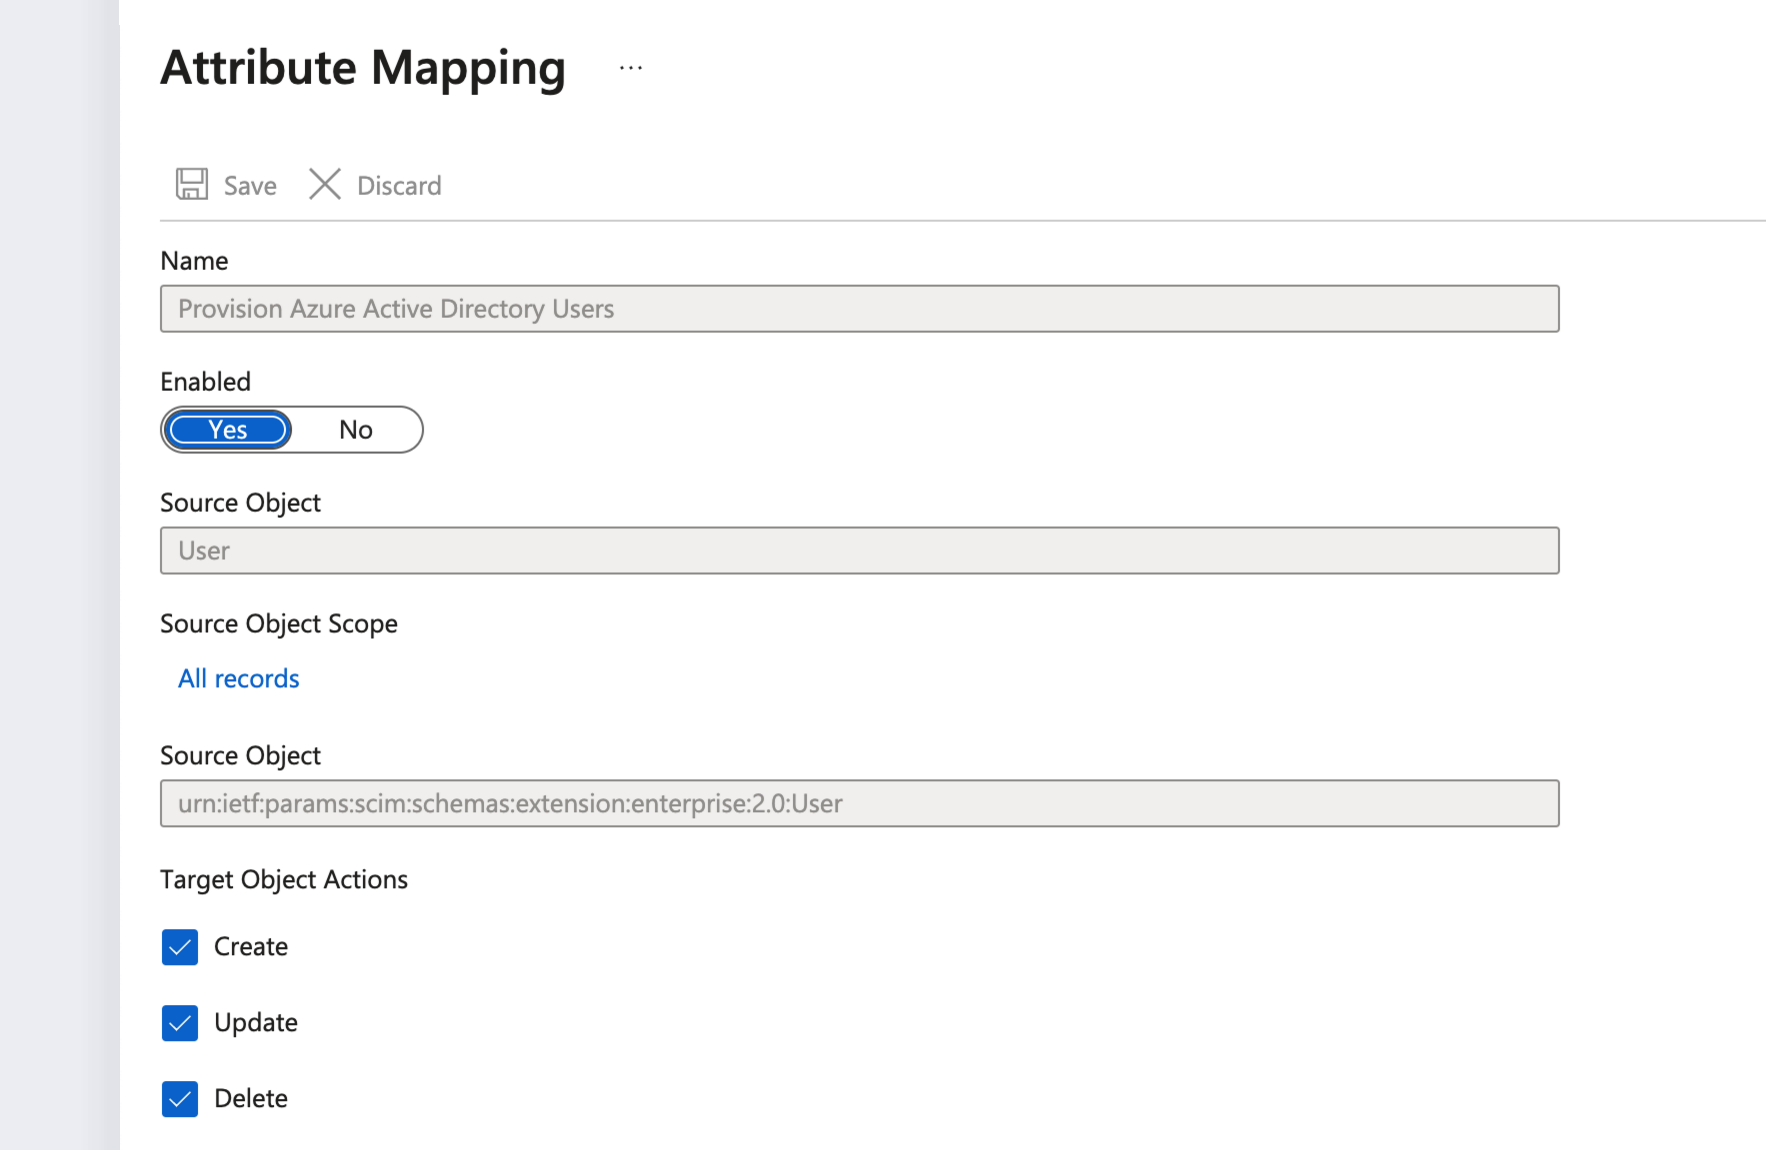
In the Mappings section, select Provision Azure Active Directory Users
-
Default mappings are expected to be sufficient. However, double-check that synchronization is enabled for users, and then click Provision Azure Active Directory Users to check that all required Actions (Create, Update, Delete) are turned ON:
-
Review the user attributes that are synchronized from Azure AD to Moqups in the Attribute-Mapping section.
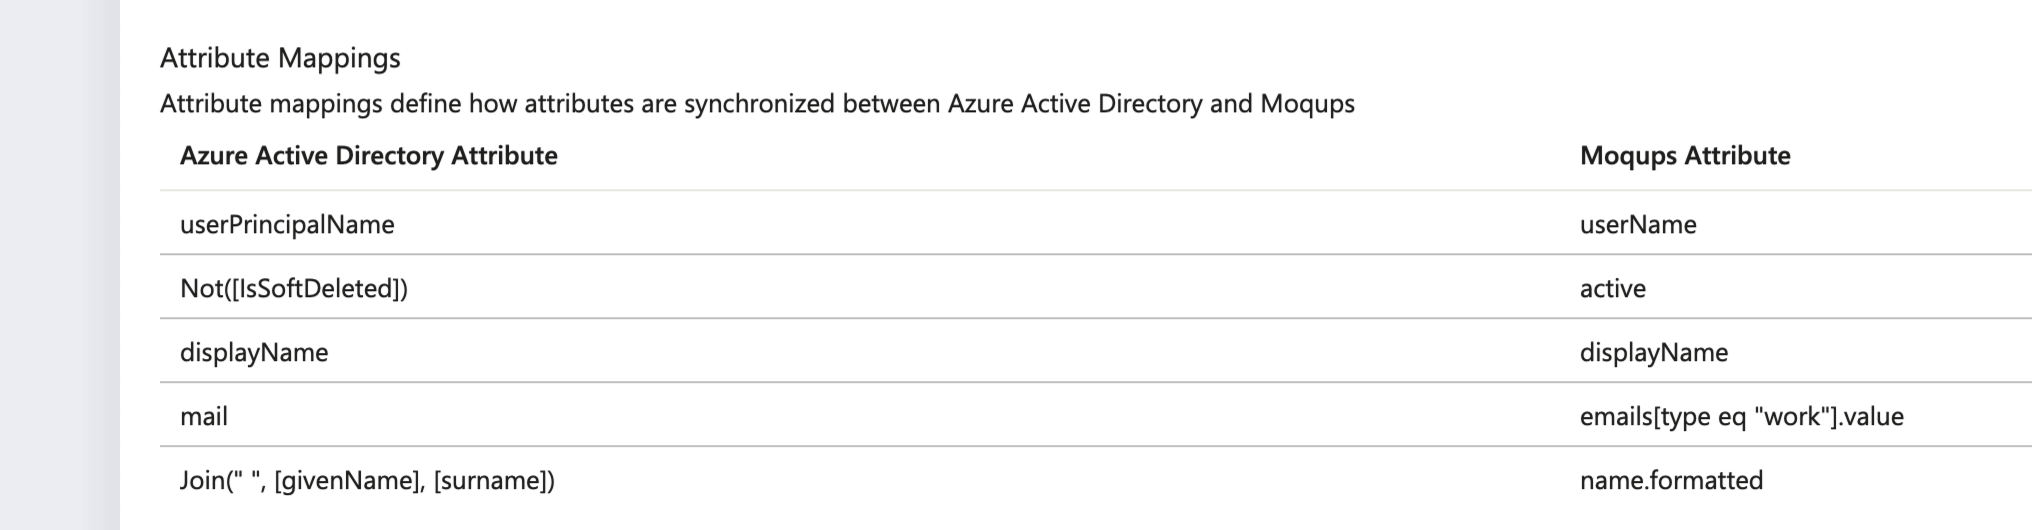
-
Now that the initial set-up is complete, you’ll need to enable the Azure AD provisioning service for Moqups by changing the Provisioning Status to On in the Settings section.
-
Choose the Provisioning tab on the left.
-
Turn the Provisioning Status toggle to the On position.
-
Click Save.

If you want to disable the provisioning, turn the Provisioning Status toggle to the Off position.
-
-
When you're ready to provision, click Save.
This operation starts the initial synchronization cycle. The initial cycle takes longer to perform than subsequent cycles, which occur approximately every 40 minutes as long as the Azure AD provisioning service is running.
Step 4: Monitor your deployment
Once you've configured provisioning, use the following resources to monitor your deployment:
-
Use the provisioning logs to determine which users have been provisioned successfully or unsuccessfully
-
Check the progress bar to see the status of the provisioning cycle and how close it's to completion
-
If the provisioning configuration seems to be in an unhealthy state, the application goes into quarantine. Learn more about quarantine states here.
Troubleshooting Tips
If you have any questions, or issues when configuring your Moqups/Azure SCIM integration, please reach out to us at support@moqups.com.