In this article:
SSO, or Single Sign-On, allows individuals to use a single set of identifying credentials to sign up and sign on to a variety of different websites and SaaS (Software as a Service) platforms.
Most people are familiar with SSO from signing up with a third party app, a feature that allows you to use your existing credentials to sign up and log in to many websites, including Moqups.
Single Sign-On with SAML goes a step further and allows the employees of an organization to use a single set of credentials to log on to a variety of websites and apps they may need for their work.
SAML (Security Assertion Markup Language) is the open standard that allows identity providers (IDP) like OneLogin, Okta, Microsoft Azure AD or Google to pass authorization credentials to service providers (SP) like Moqups. If you want, you can also configure a Custom SAML single sign-on for IDPs that aren’t on that list.
Once SAML is enabled for your Moqups account, users can use SSO by simply entering their email at the SAML login. Moqups then authenticates their credentials via the IDP – and they can begin using our app.
You can also set up automatic provisioning with SCIM (System for Cross-domain Identity Management). SCIM allows IT departments to automate their user identity management process within an IDP. To set up SCIM you will need to generate an API token in Moqups, and then add this to your IDP. You’ll find instructions for each of our supported IDPs below.
Who Can Use This Feature?
All Moqups Unlimited accounts can enable SSO by configuring SAML with their IDP.
To set up a SAML integration, you’ll need Admin privileges for both Moqups and your chosen IDP.
Moqups Admins also have the option of requiring their team members to use an SSO option, either via a third party app or one of the SAML providers listed below.
Still searching?
SCIM automatic provisioning can also be set up for Moqups using any of these IDPs.
OneLogin SAML
Please follow these steps to configure OneLogin SAML for your Moqups account:
-
Once signed into OneLogin, select the SSO tab for the Moqups app.
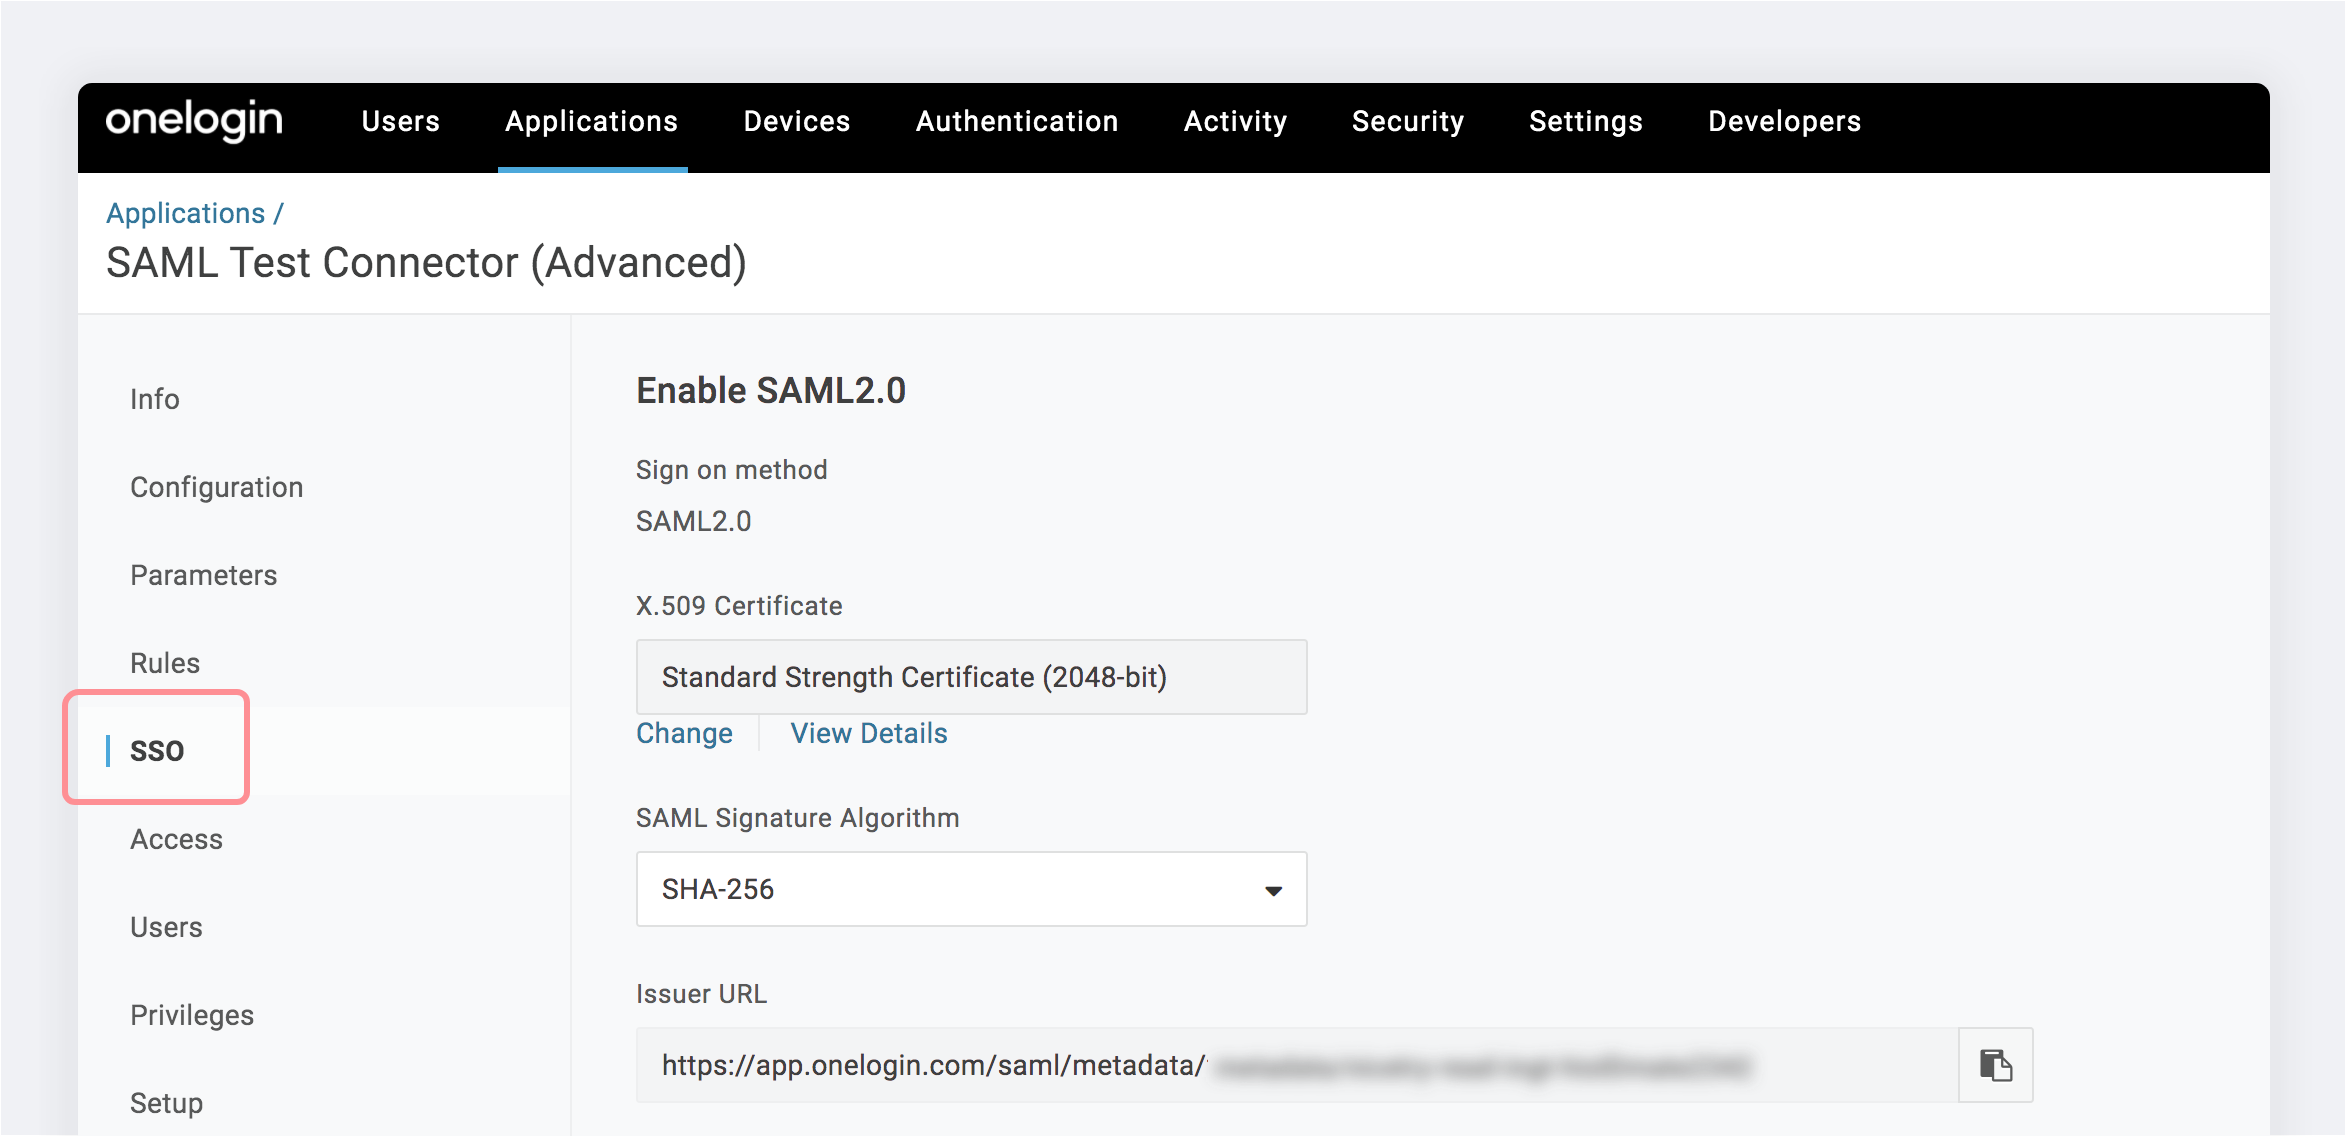
-
In the Issuer URL field, copy the identity provider metadata.

-
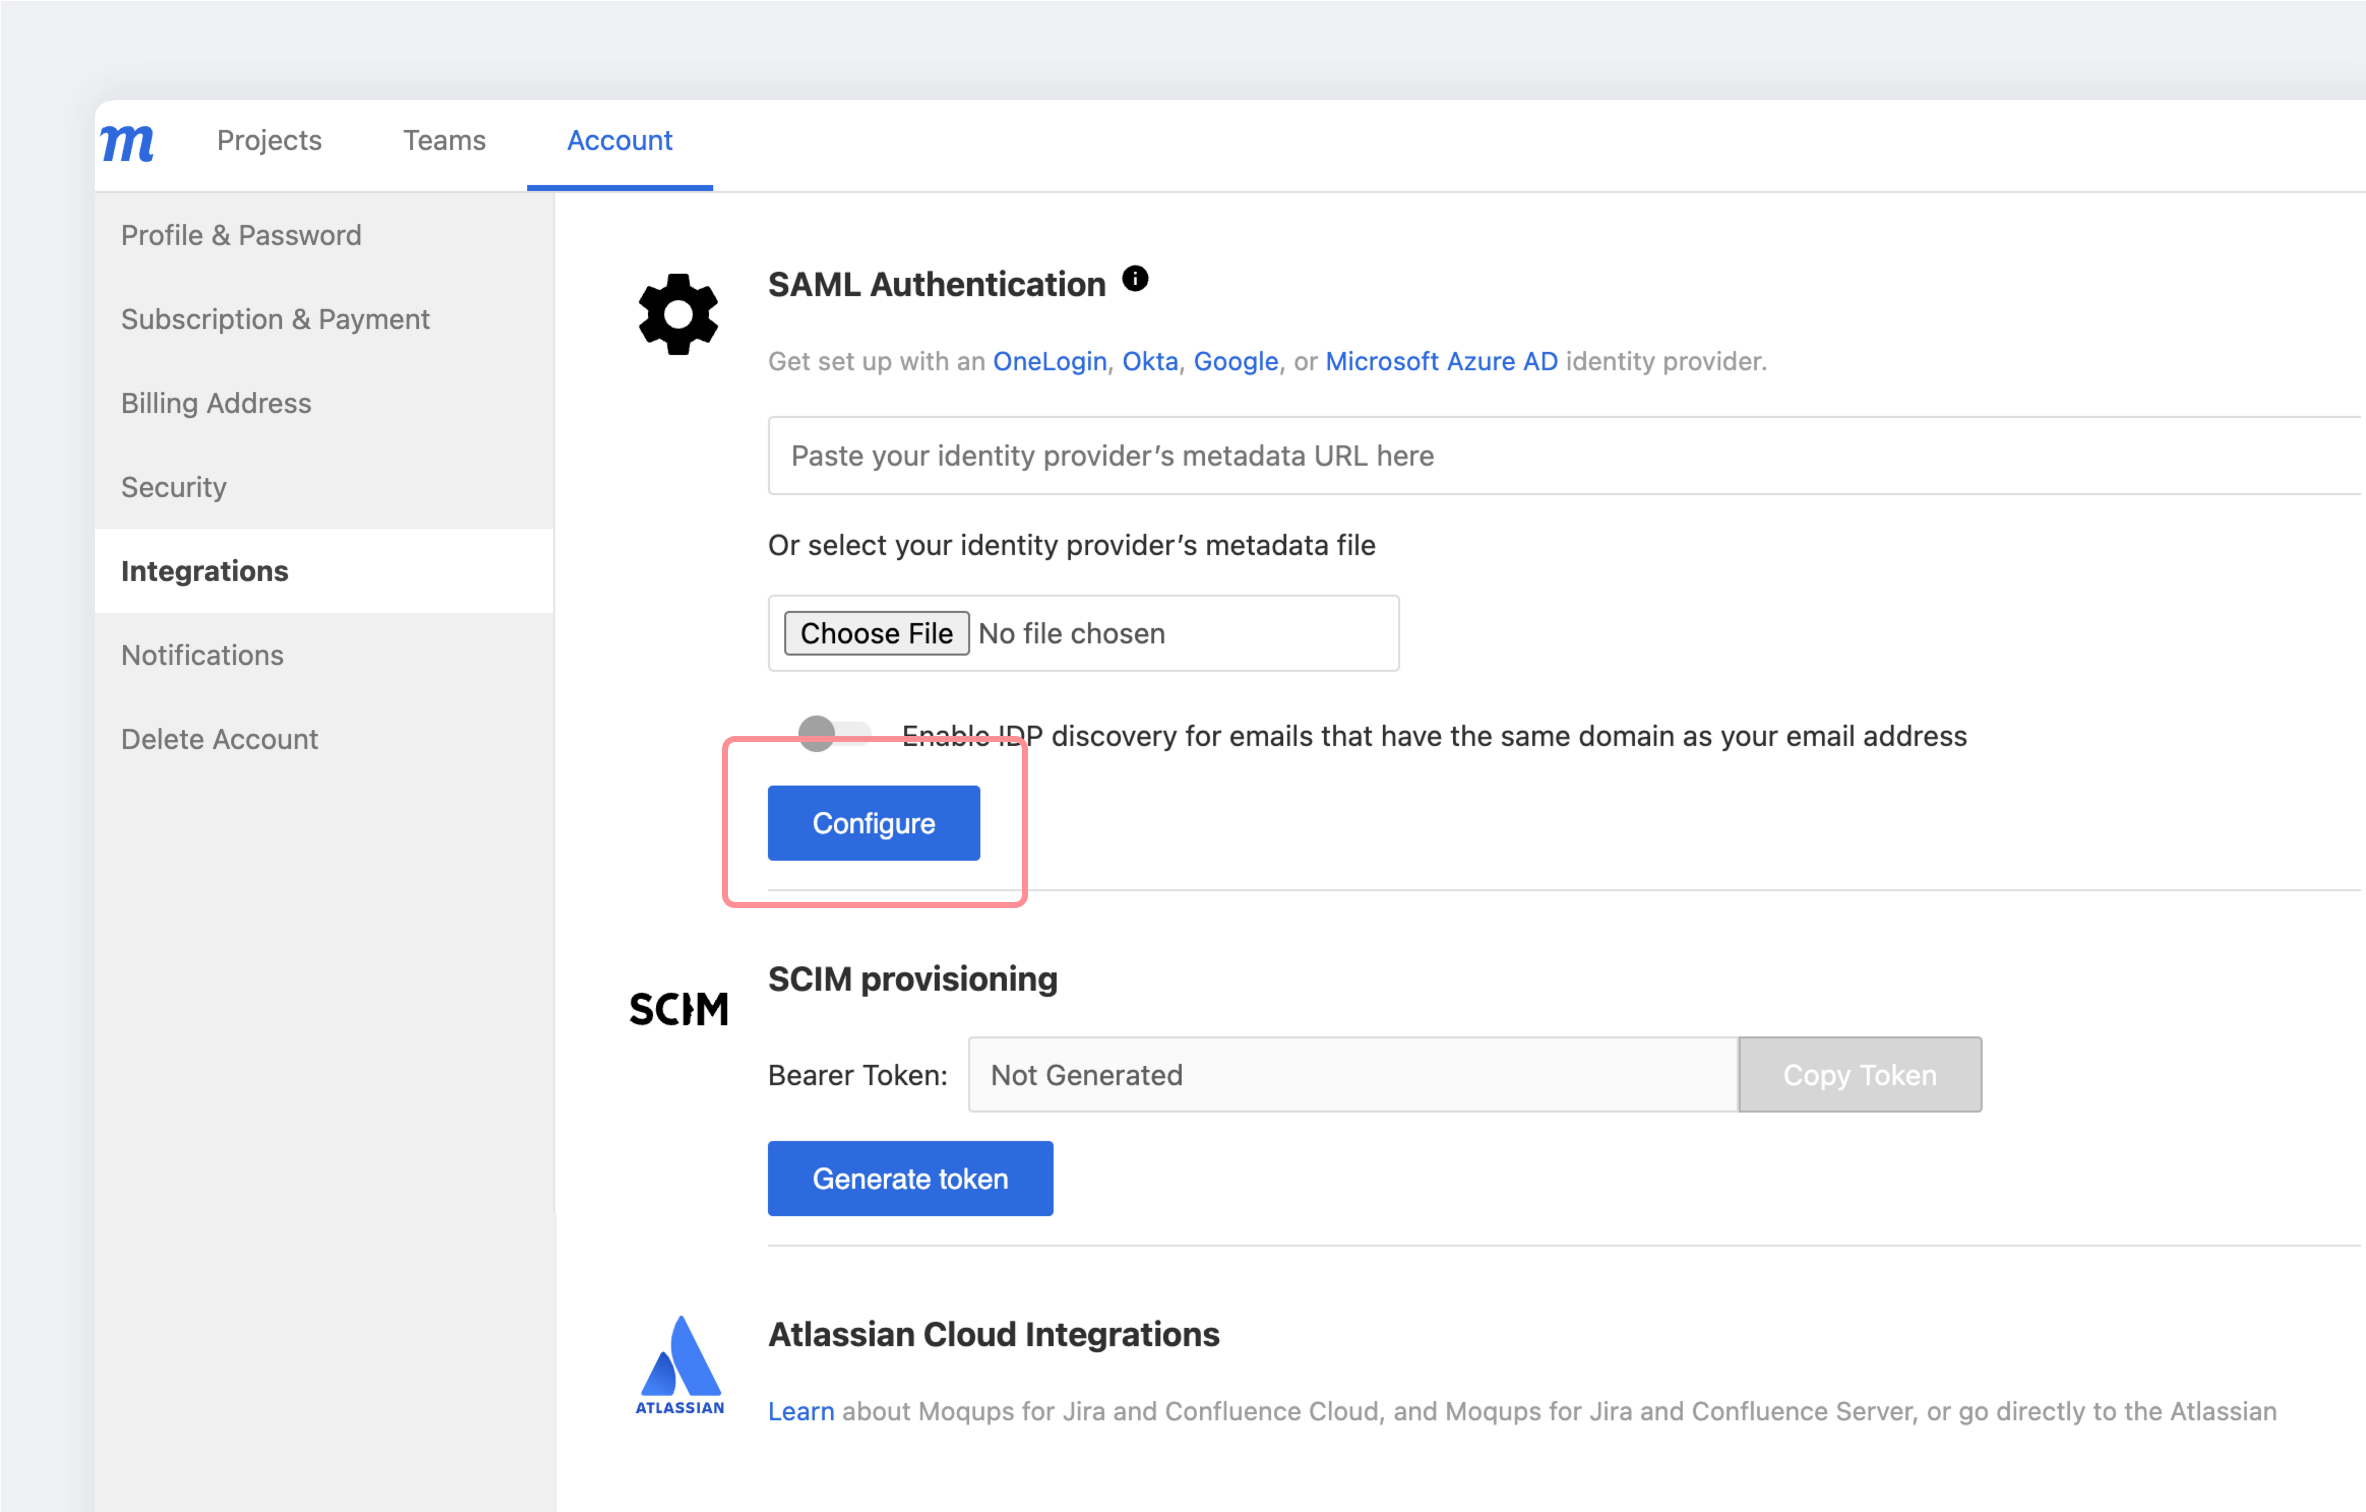
Click here to log into Moqups and go to the Integration tab on your Dashboard’s Account page.
-
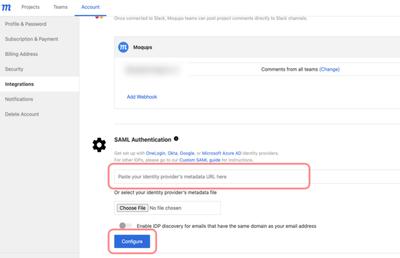
In the SAML Authentication section of your Integration tab, paste the identity provider metadata URL copied during Step 2 and click the Configure button.
-
Your configuration is now complete.
Okta SAML configuration
Please follow these steps to configure Okta SAML for your Moqups account:
-
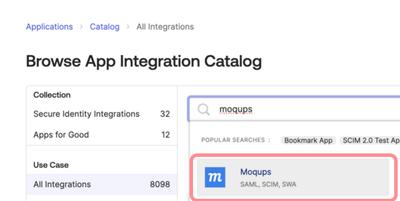
Once signed into Okta, select the Applications tab, and click the Browse App Catalog button.
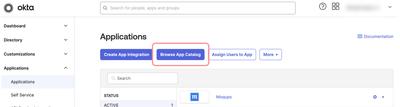
-
Search for Moqups in the Browse App Integration Catalog and click on Moqups
-
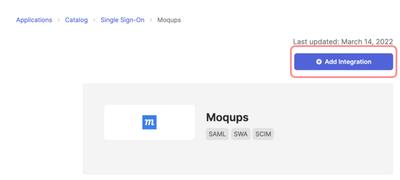
Click the Add Integration button.
-
When the Add Moqups page opens, go to the General Settings tab, and click the Next button.

-
Email support@moqups.com to get the Moqups Encryption Certificate. Save the moqups.pem file to your desktop.
-
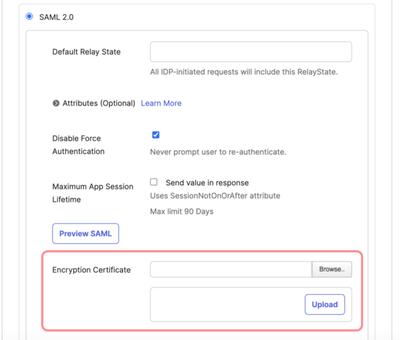
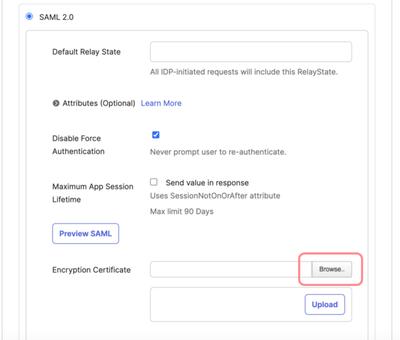
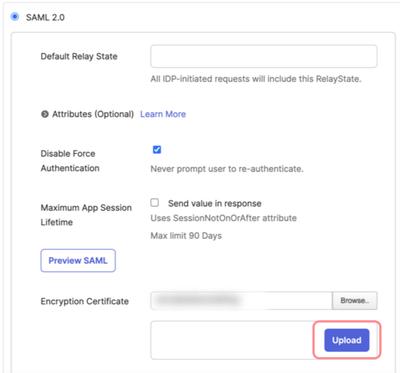
While still on the Add Moqups page, switch to the Sign-On Options tab and scroll down to the Encryption Certificate input. Click the Browse button to find the moqups.pem certificate you saved in the previous step (Step 5).
-
Select the Moqups SAML Encryption Certificate (moqups.pem) and click the Upload button.
-
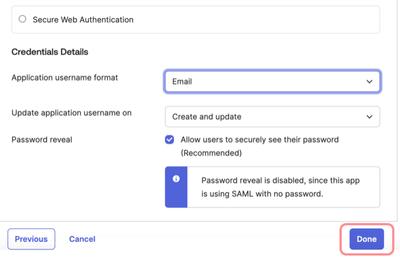
Now, scroll further down the Add Moqups page to Credential Details. For Application username format choose Email and click the Done button.
-
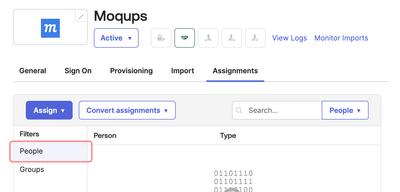
Once you click Done on the Sign-On Options page, Okta’s Moqups integration page will open, and the Assignments tab will be preselected. Click the Assign button and select People from the Filters list. Now, from the Person list, you can select the users that will be granted access to the Moqups app.
-
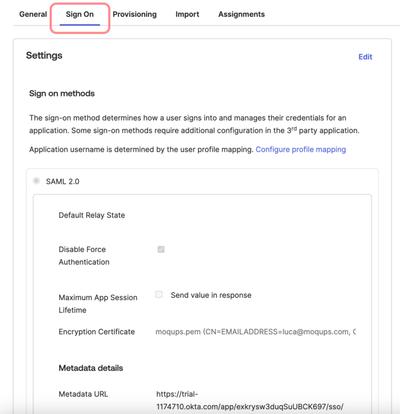
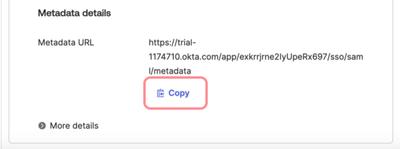
Now, select the Sign On tab from the same page and scroll down to the Metadata details section.
-
In the Metadata details section, copy the Metadata URL. Once you’ve copied the URL, you’ll need to sign in to Moqups and go to the Moqups app Dashboard.
-
In the Moqups Dashboard, go to the Account page and select the Integrations tab. Scroll to the SAML Authentication section and paste the identity provider Metadata URL copied in the last step (Step 11) into the available input. Then, click the Configure button.
-
Your configuration is now complete.
Microsoft Azure AD SAML
This section provides an overview and the steps required to configure SAML authentication for Moqups and Microsoft Azure AD.
Contents
- Supported Features
- Requirements
- Step-by-Step Configuration Instructions
- Renew an Expired SAML Signing Certificate
Supported Features
The Microsoft Azure/Moqups SAML integration currently supports the following features:
- SP-initiated SSO
- IDP-initiated SSO
- JIT (Just In Time) Provisioning
Requirements
SAML authentication is available to Moqups customers on our Unlimited Plan.
Step-by-Step Configuration Instructions
Within Azure AD, you’ll need to add Moqups from the gallery to your list of managed SaaS apps. Then, within the Moqups app, you’ll need to add Azure’s metadata URL to your Dashboard.
Please follow these steps:
-
Sign in to the Azure portal.
-
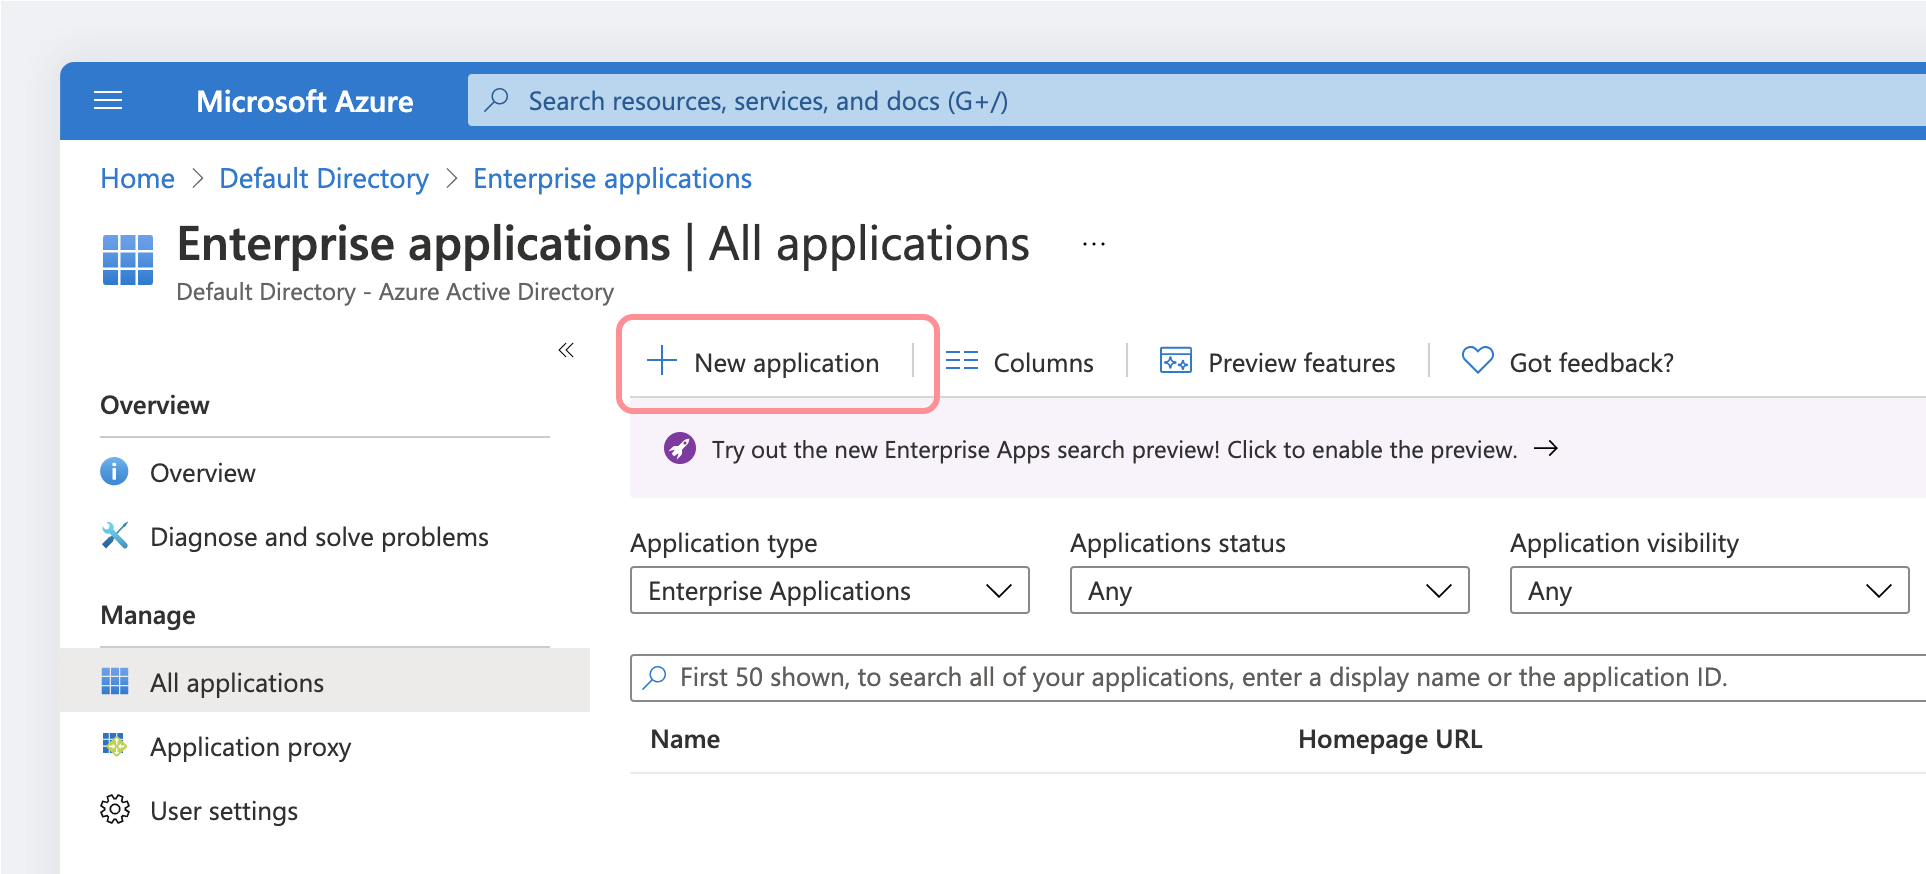
Select Azure Active Directory → Enterprise applications → +New application
-
To add a new application, select New application:
-
In the Add from the gallery section, type Moqups in the search box.
-
Select the Moqups app from the results panel.

-
You should be redirected to the Moqups app within Azure (if not go to Azure Active Directory → Enterprise applications → All applications → Moqups)
-
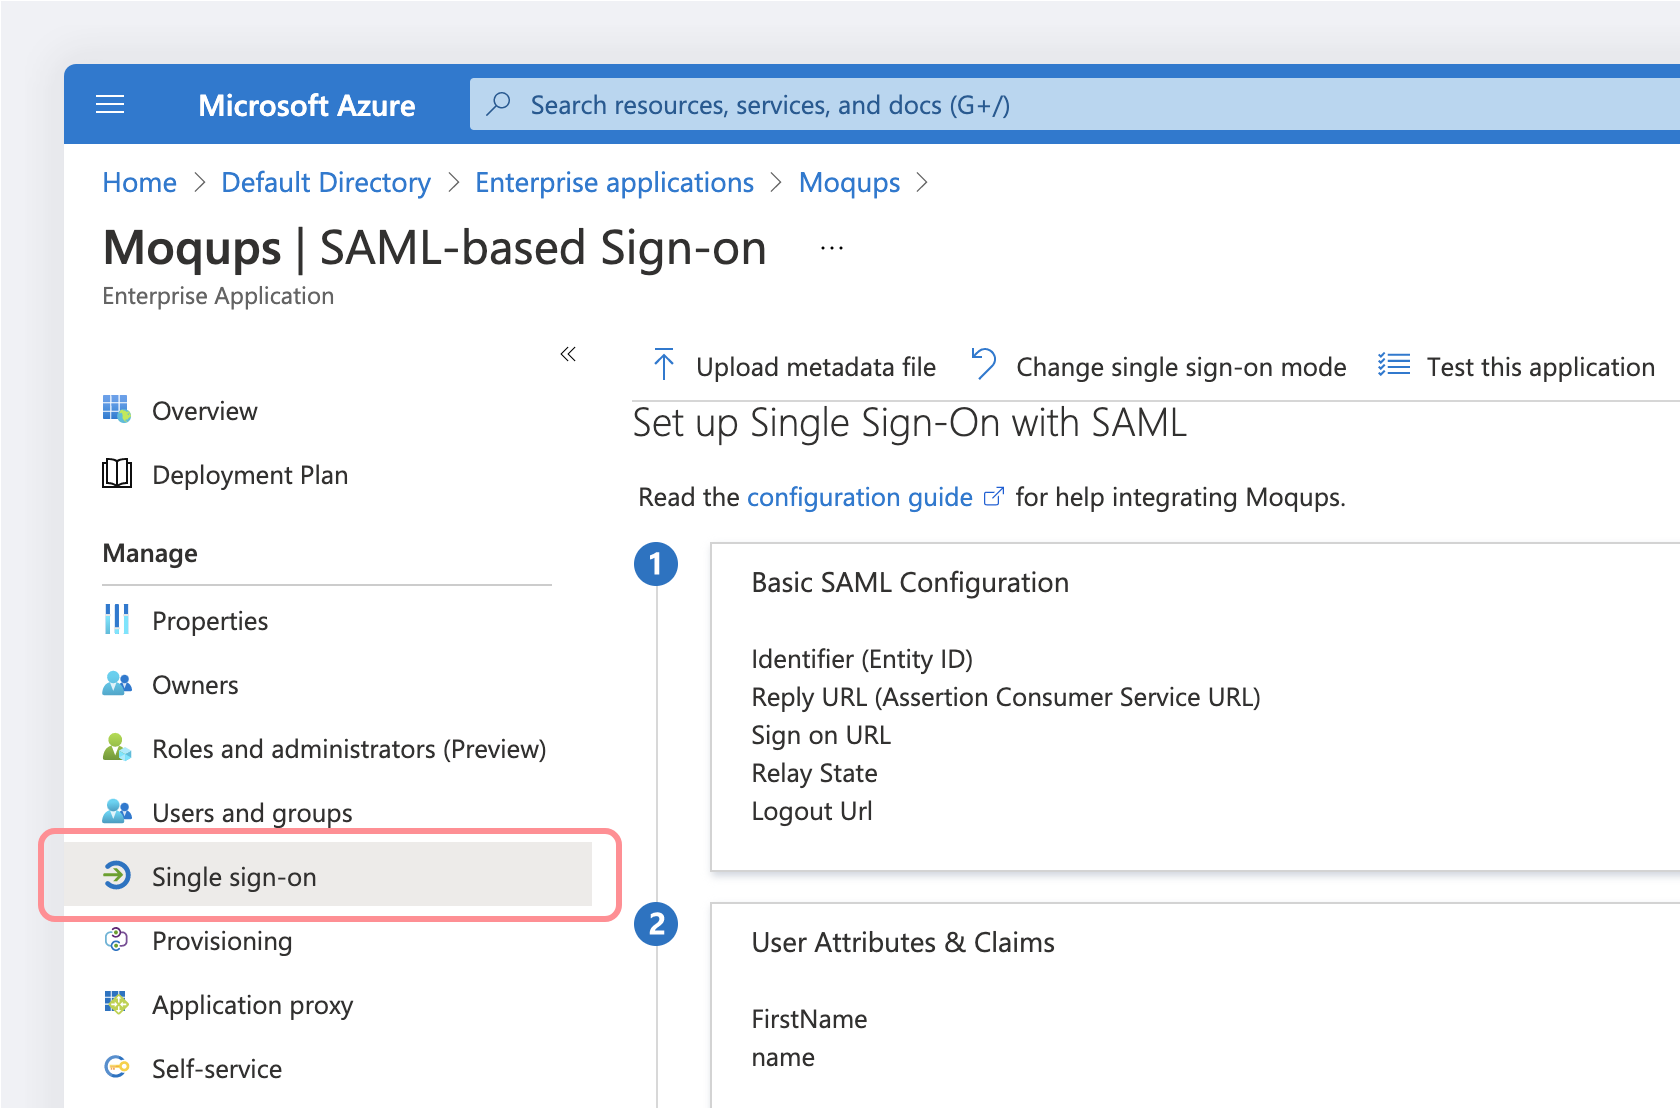
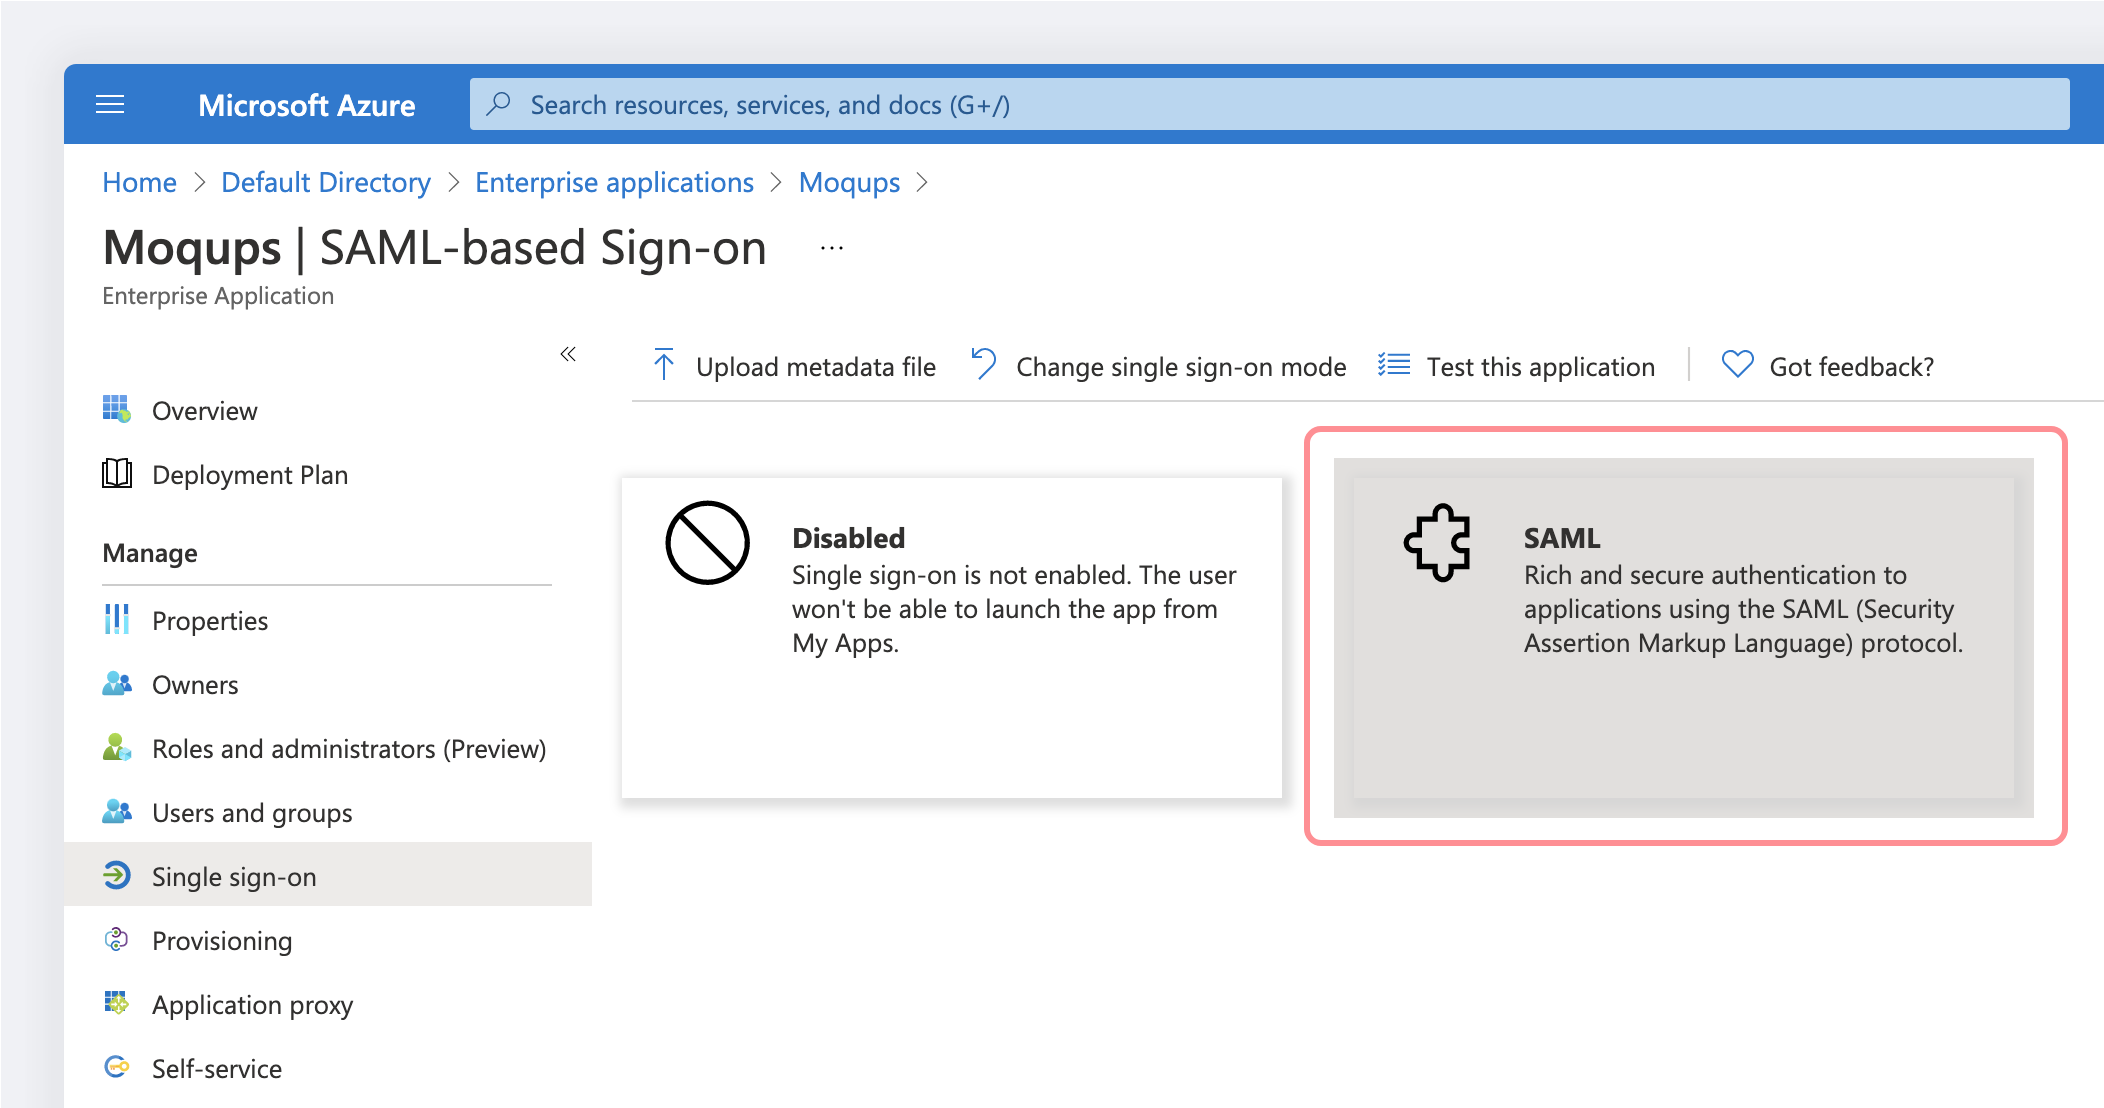
Go to Single sign-on:
-
On the Select a single sign-on method page, select SAML:
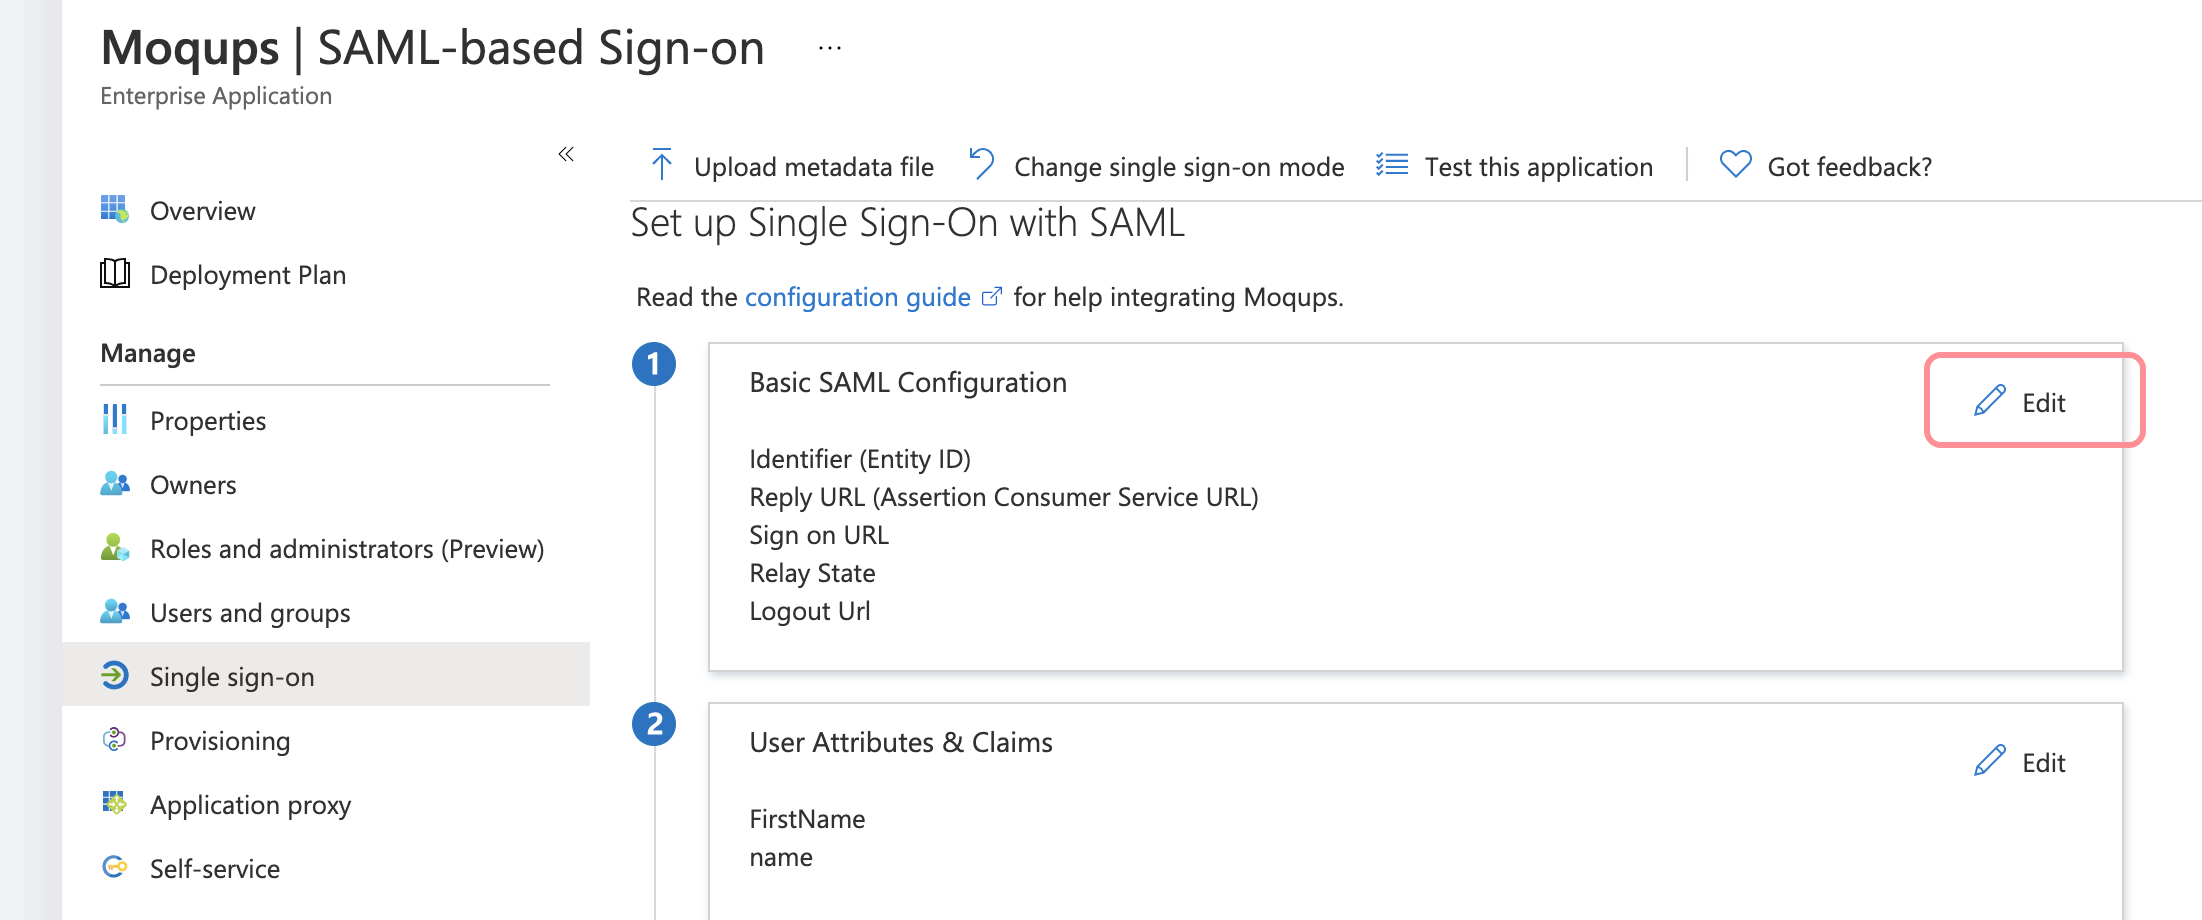
-
On the Set up single sign-on with SAML page, click the edit/pen icon for Basic SAML Configuration to edit the settings:
-
Copy the App Federation Metadata URL:
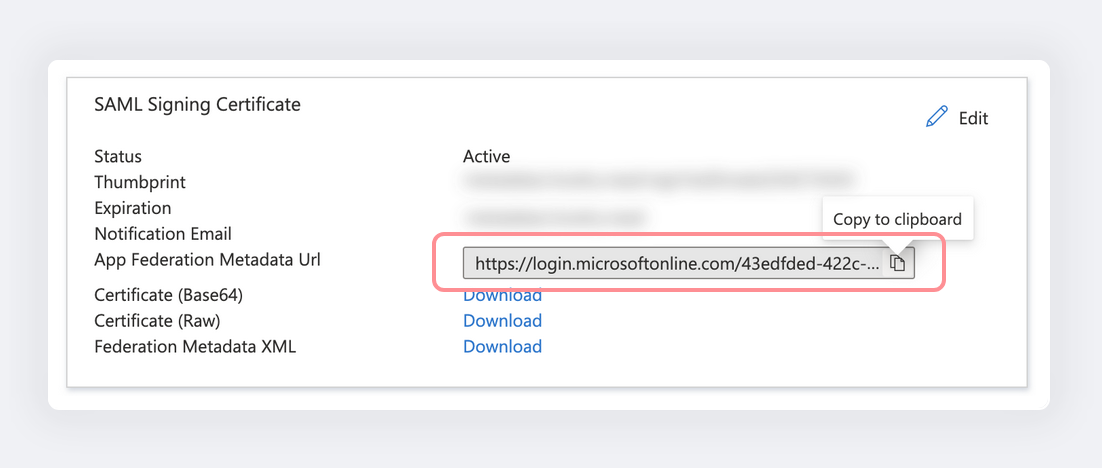
-
Log in to Moqups.
-
Now paste the App Federation Metadata URL copied at Step 10.
-
Click the Configure button
-
Your configuration is now complete.
Renew an Expired SAML Signing Certificate
With Azure AD, you’ll need to renew your SAML Signing Certificate when it expires. Azure will notify you before the expiration date. Here are the steps to renew your signing certificate and add it to Moqups:
-
In your Azure Dashboard, open the Moqups application page.
-
Click on the Single sign on tab.
-
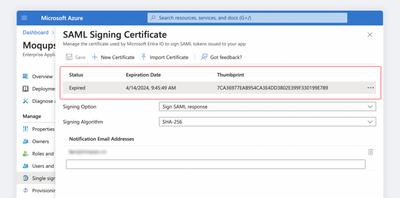
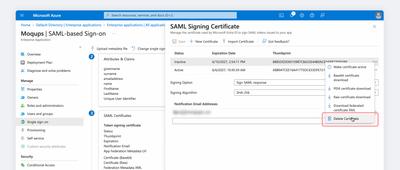
Locate the SAML Certificates section of your IDP and click on the Edit button.
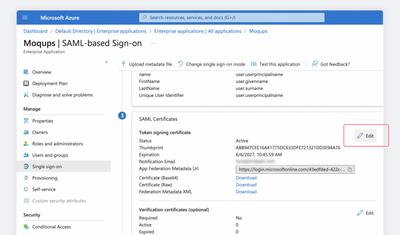
-
In the SAML Signing Certificate modal, you will see your Expiring/Expired certificate.
-
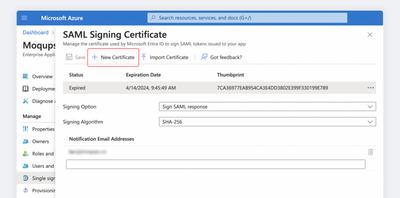
Click on the New Certificate button to generate a new certificate; leave the Signing Option and Signing Algorithm as they are.
-
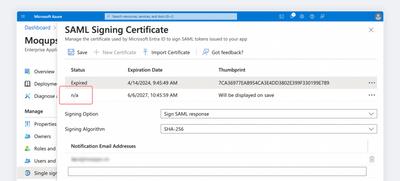
You’ll see the draft version of the new certificate, and its status will be marked n/a.
-
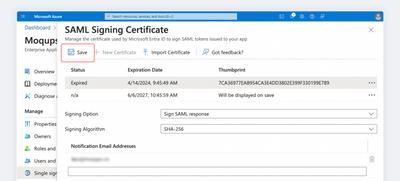
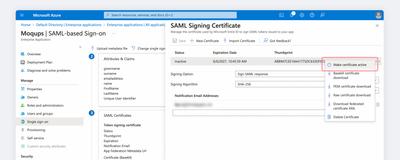
Now, hit the Save button to display the new certificate with its Inactive status.
-
Open the Context menu to the right of the Expiring/Expired certificate and click the Delete button to remove the old certificate.
-
Now, open the Context menu to the right of the Inactive certificate and click Make Certificate Active.
-
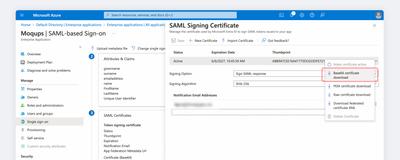
Once again, use the Context menu and download the active Base64 certificate.
-
Go to the Accounts page of your Moqups Dashboard.
-
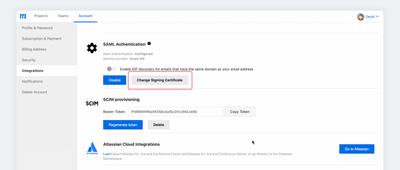
Select the Integrations tab.
-
In the SAML Authentication section and click the Change Signing Certificate button.
-
Paste or upload the new certificate and click Update Signing Certificate.
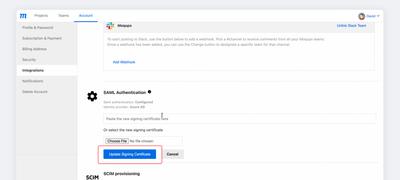
-
Your updated certificate is now active.
Custom SAML
If your preferred identity provider doesn’t offer the ability to connect with Moqups, you can use the following information to set up a custom SAML connection.
Requirements
SAML authentication is available to Moqups customers on our Unlimited Plan.
Parameters to Configure
Follow these parameters to configure your custom SAML connection.:
Assertion Consumer Service URL (ACS URL)
- The ACS URL to use is:
https://api.moqups.com/saml/v2/acs
EntityID
moqups.saml2.sp.eid.gkoAgEAAoICA
SAML Logout Endpoint
- Moqups does not support Single Logout or session duration configured in your IDP
Considerations to Keep in Mind
- Moqups supports HTTP REDIRECT binding and HTTP POST binding. You need to configure HTTP POST bindings in the IDP metadata.
- Your IDP needs to ensure a user is both authenticated and authorized before sending an assertion. If a user isn't authorized, assertions should not be sent. We recommend your identity provider redirects people to an HTTP 403 page or something similar.
Settings to Include
NameID (Required)
-
SAML nameID format needs to be of the following email type:
<saml:NameID
  Format="urn:oasis:names:tc:SAML:1.1:nameid-format:emailAddress">
    YOURDOMAIN@email.com
</saml:NameID>
First Name Attribute (Optional)
<saml:Attribute
  NameFormat="urn:oasis:names:tc:SAML:2.0:attrname-format:basic"
  Name="FirstName">
    <saml:AttributeValue
        xmlns:xsi="http://www.w3.org/2001/XMLSchema-instance"
        xsi:type="xs:string">
           FIRST NAME
    </saml:AttributeValue>
</saml:Attribute>
Last Name Attribute (Optional)
<saml:Attribute
  NameFormat="urn:oasis:names:tc:SAML:2.0:attrname-format:basic"
  Name="LastName">
    <saml:AttributeValue
      xmlns:xsi="http://www.w3.org/2001/XMLSchema-instance"
      xsi:type="xs:string">
        LAST NAME
    </saml:AttributeValue>
</saml:Attribute>
Certificates
-
Public Certificate
- Moqups requires the SAML response to be signed.
- Your IDP’s metadata needs to include a valid x.509 pem Certificate for Moqups to verify your identity. This is different from your SSL certificate.
Moqups requires that the SAML response is signed.
Log in to Moqups with SAML/SSO
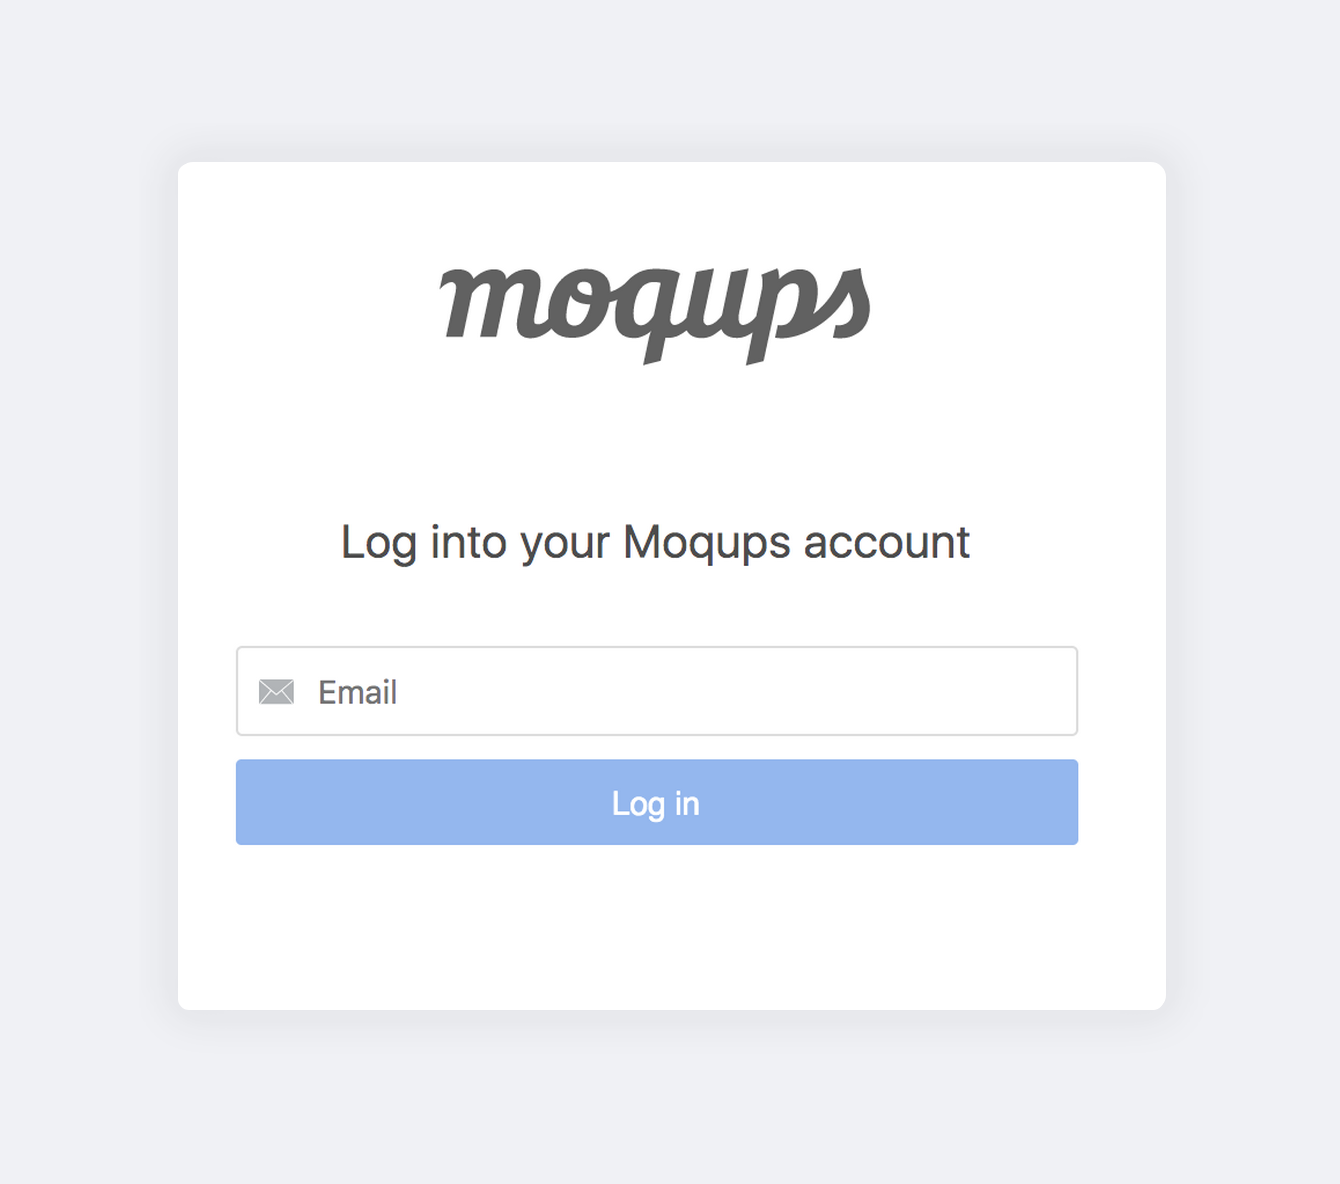
Once the SAML integration has been configured, your users can use SSO to log in to Moqups:
- Go to https://my.moqups.com/saml-login
- Enter your email address
- Click Log in
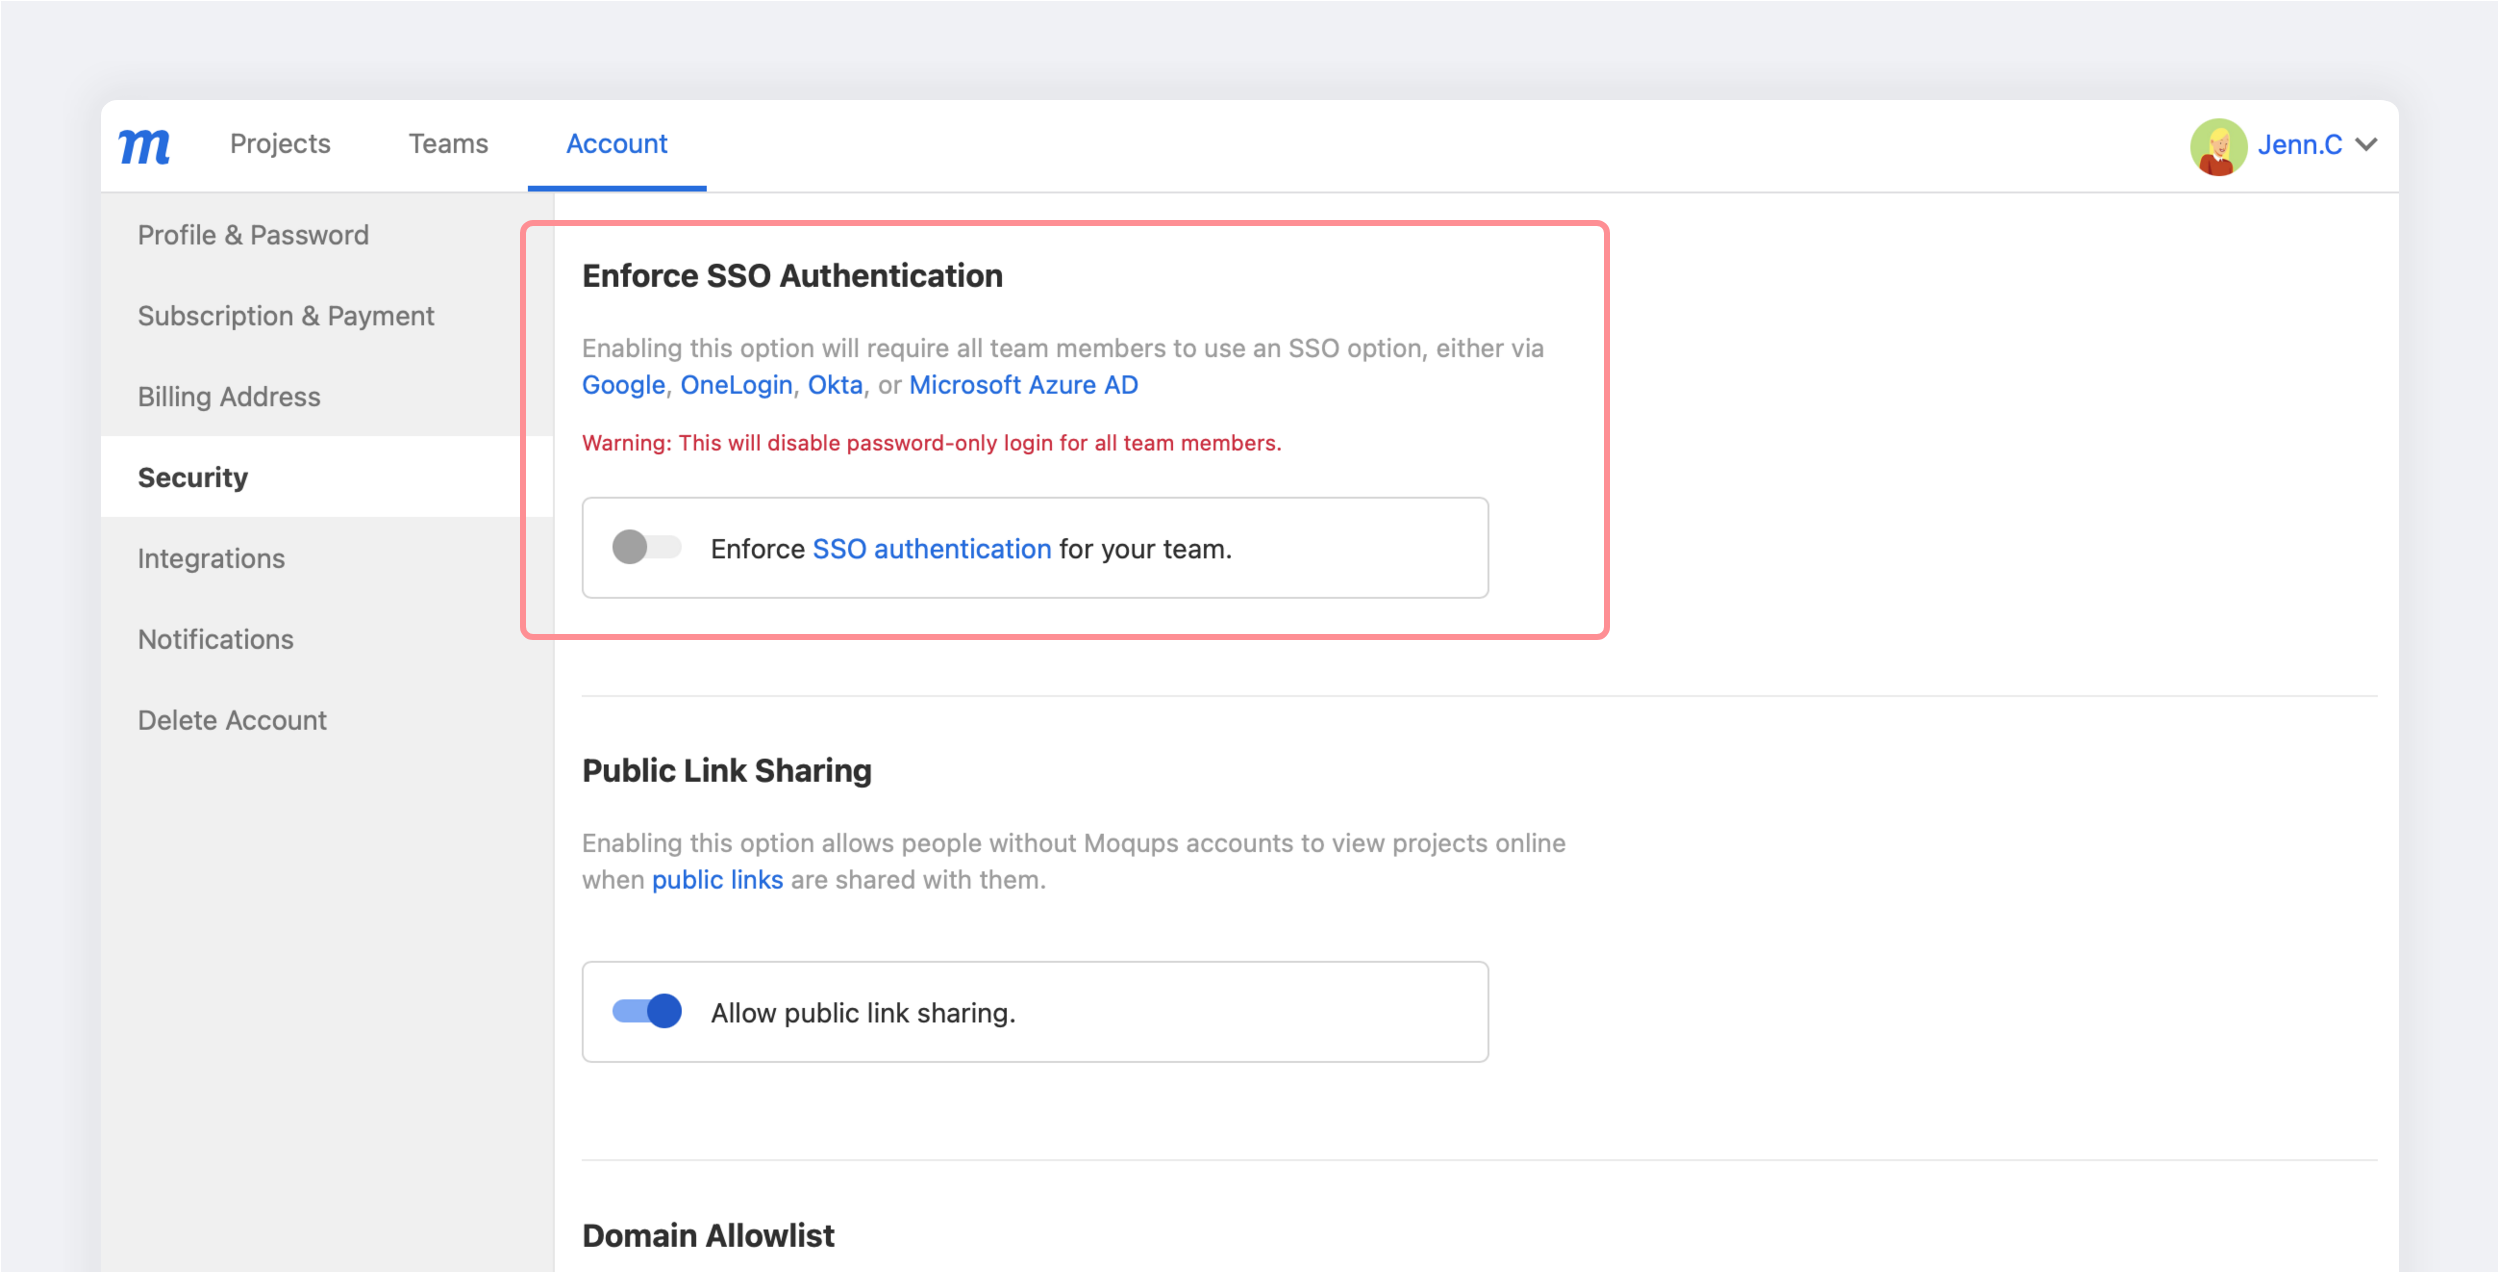
Enforce SSO authentication
In order to provide an additional layer of security, Moqups admins (team owners) can require all their team members to use an SSO option, either via a third party app or one of the SAML providers above.
Enabling the Enforce SSO Authentication option means that password-only login will be disabled for all team members.
To disable password-only login for your team, your own Admin account must first use an SSO provider: OneLogin SAML, Otka SAML, Azure SAML, Google SAML, or a third party app.
To enforce SSO authentication for your team:
- Go to the Accounts window of your Dashboard
- Click on the Security tab
- In the Enforce SSO Authentication section, set the Enforce SSO Authentication for your team toggle to the ON position.
- Confirm your choice by pressing the Continue button in the pop-up.