In this article:
With Moqups' integration for Jira Cloud, Atlassian customers can use the full spectrum of Moqups functionality – including Team and Project management – within the Atlassian ecosystem.
Moqups for Jira Cloud works seamlessly with your current Moqups account. That means you can embed existing Moqups projects – or create new projects – within your Jira issues. You can edit designs in-place, share projects between Jira and Confluence, and update content in realtime.
And, no matter where your team members create, embed, or edit their Moqups projects, the data automatically syncs between your Atlassian and Moqups accounts – eliminating back-and-forth, and providing an up-to-date, reliable source of truth.
Who can use this feature?
You need a Business or Unlimited plan to connect to an Atlassian instance. No additional purchase is required.
You can find out more about the Moqups for Jira Cloud app on our Atlassian Marketplace listing.
The following article explains how to install and configure Moqups for Jira Cloud (for Atlassian Administrators), and how to work with Moqups from within Jira issues (for all Jira users).
Install (Admin)
If you are the Administrator of a Jira instance, follow the instructions below to install:
- Go to Moqups for Jira Cloud listing in the Atlassian Marketplace
- Click the Get it now button in the upper right to open the Jira Add-ons page
- Click on the Install button
- In the Confirm add-on installation window, click the Accept & install button
- When the installation is complete, the Installed and ready to go! pop-up will appear
- Click the Get started button to go to our Moqups App Information / Configuration page
Configure (Admin)
Once you have installed Moqups for Jira Cloud, you’ll need to configure the app by connecting your Jira instance to a Moqups account. You do this from the Moqups App Information / Configuration page. You will automatically be taken to this page after the installation is complete, but you can also find the page as follows:
- Navigate to the left sidebar of your Jira instance and click on Settings
- Next, click on Add-ons to open the Add-ons page
- In the list of add-ons, in the Moqups section, click on Settings to open the Moqups App Information/Configuration page
Once you are on the Moqups App Information/Configuration page, you’ll need to activate the Moqups App by connecting your Jira instance to a Moqups account.
-
If you don’t have a Moqups account, you will find a link at the bottom of the page that will take you to our website, and you can sign up from there.
or
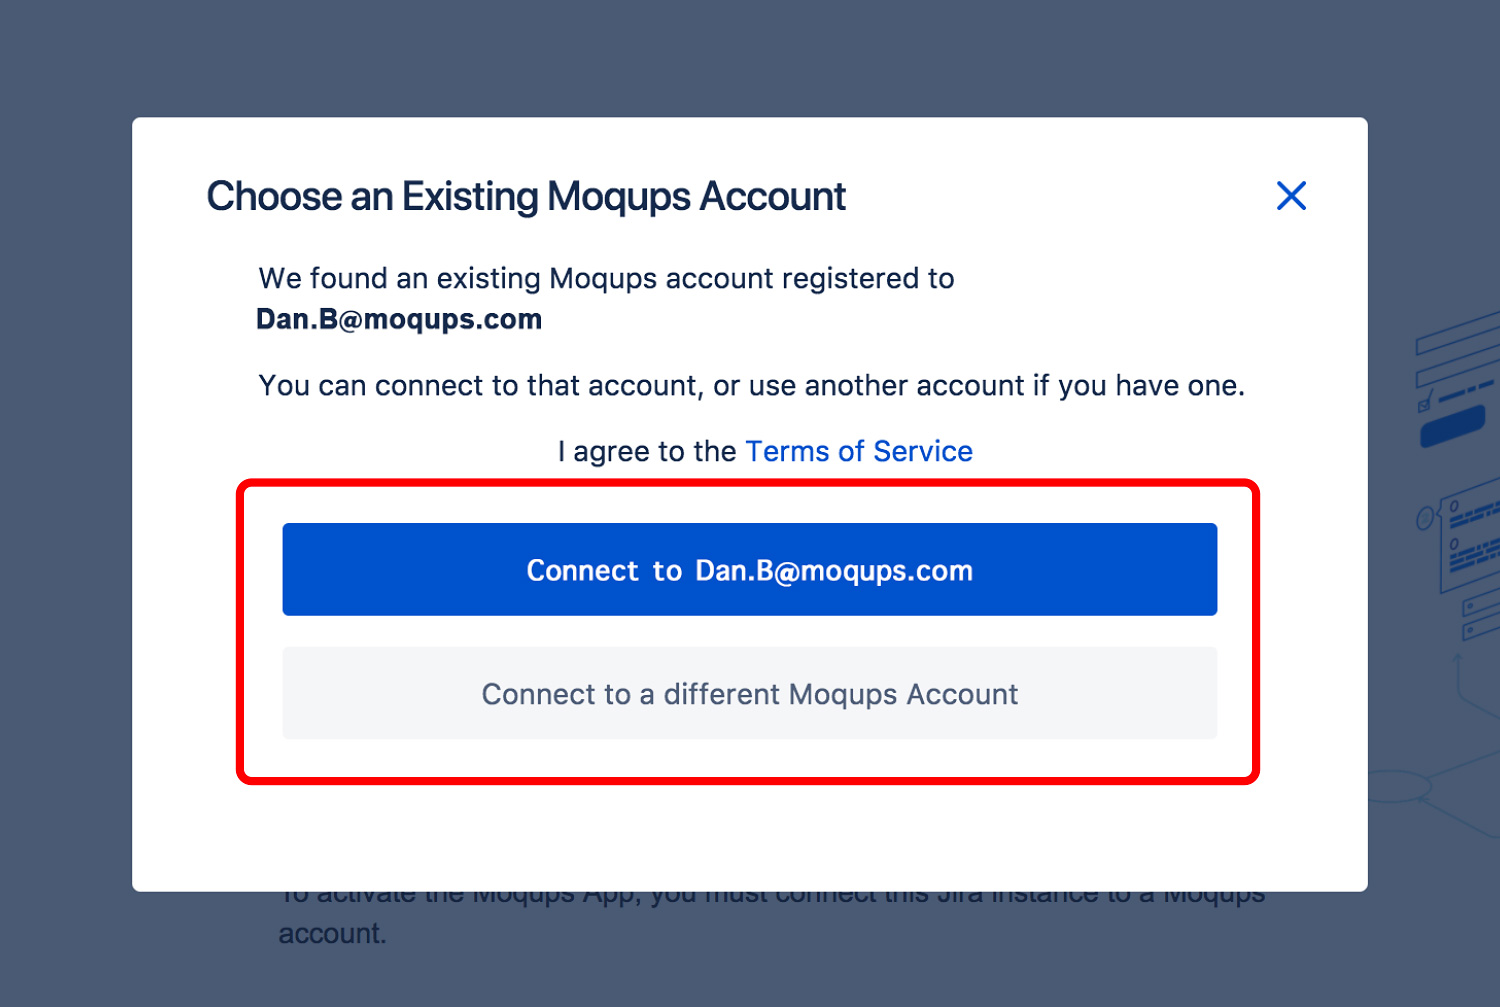
If you already have a Moqups account, click on the Connect to an existing Moqups account button. You will be taken through the Connect process, and be given two choices:
a. If there’s already a Moqups account associated with your Jira admin email, Moqups will automatically identify that account and will offer to connect.
b. You can also choose to connect to a different, existing Moqups account.
-
Continue with the login process
-
Click Done to finish the configuration process
You can also sign up or log in with either Google or Slack.
Create Jira issue
To create a Jira issue:
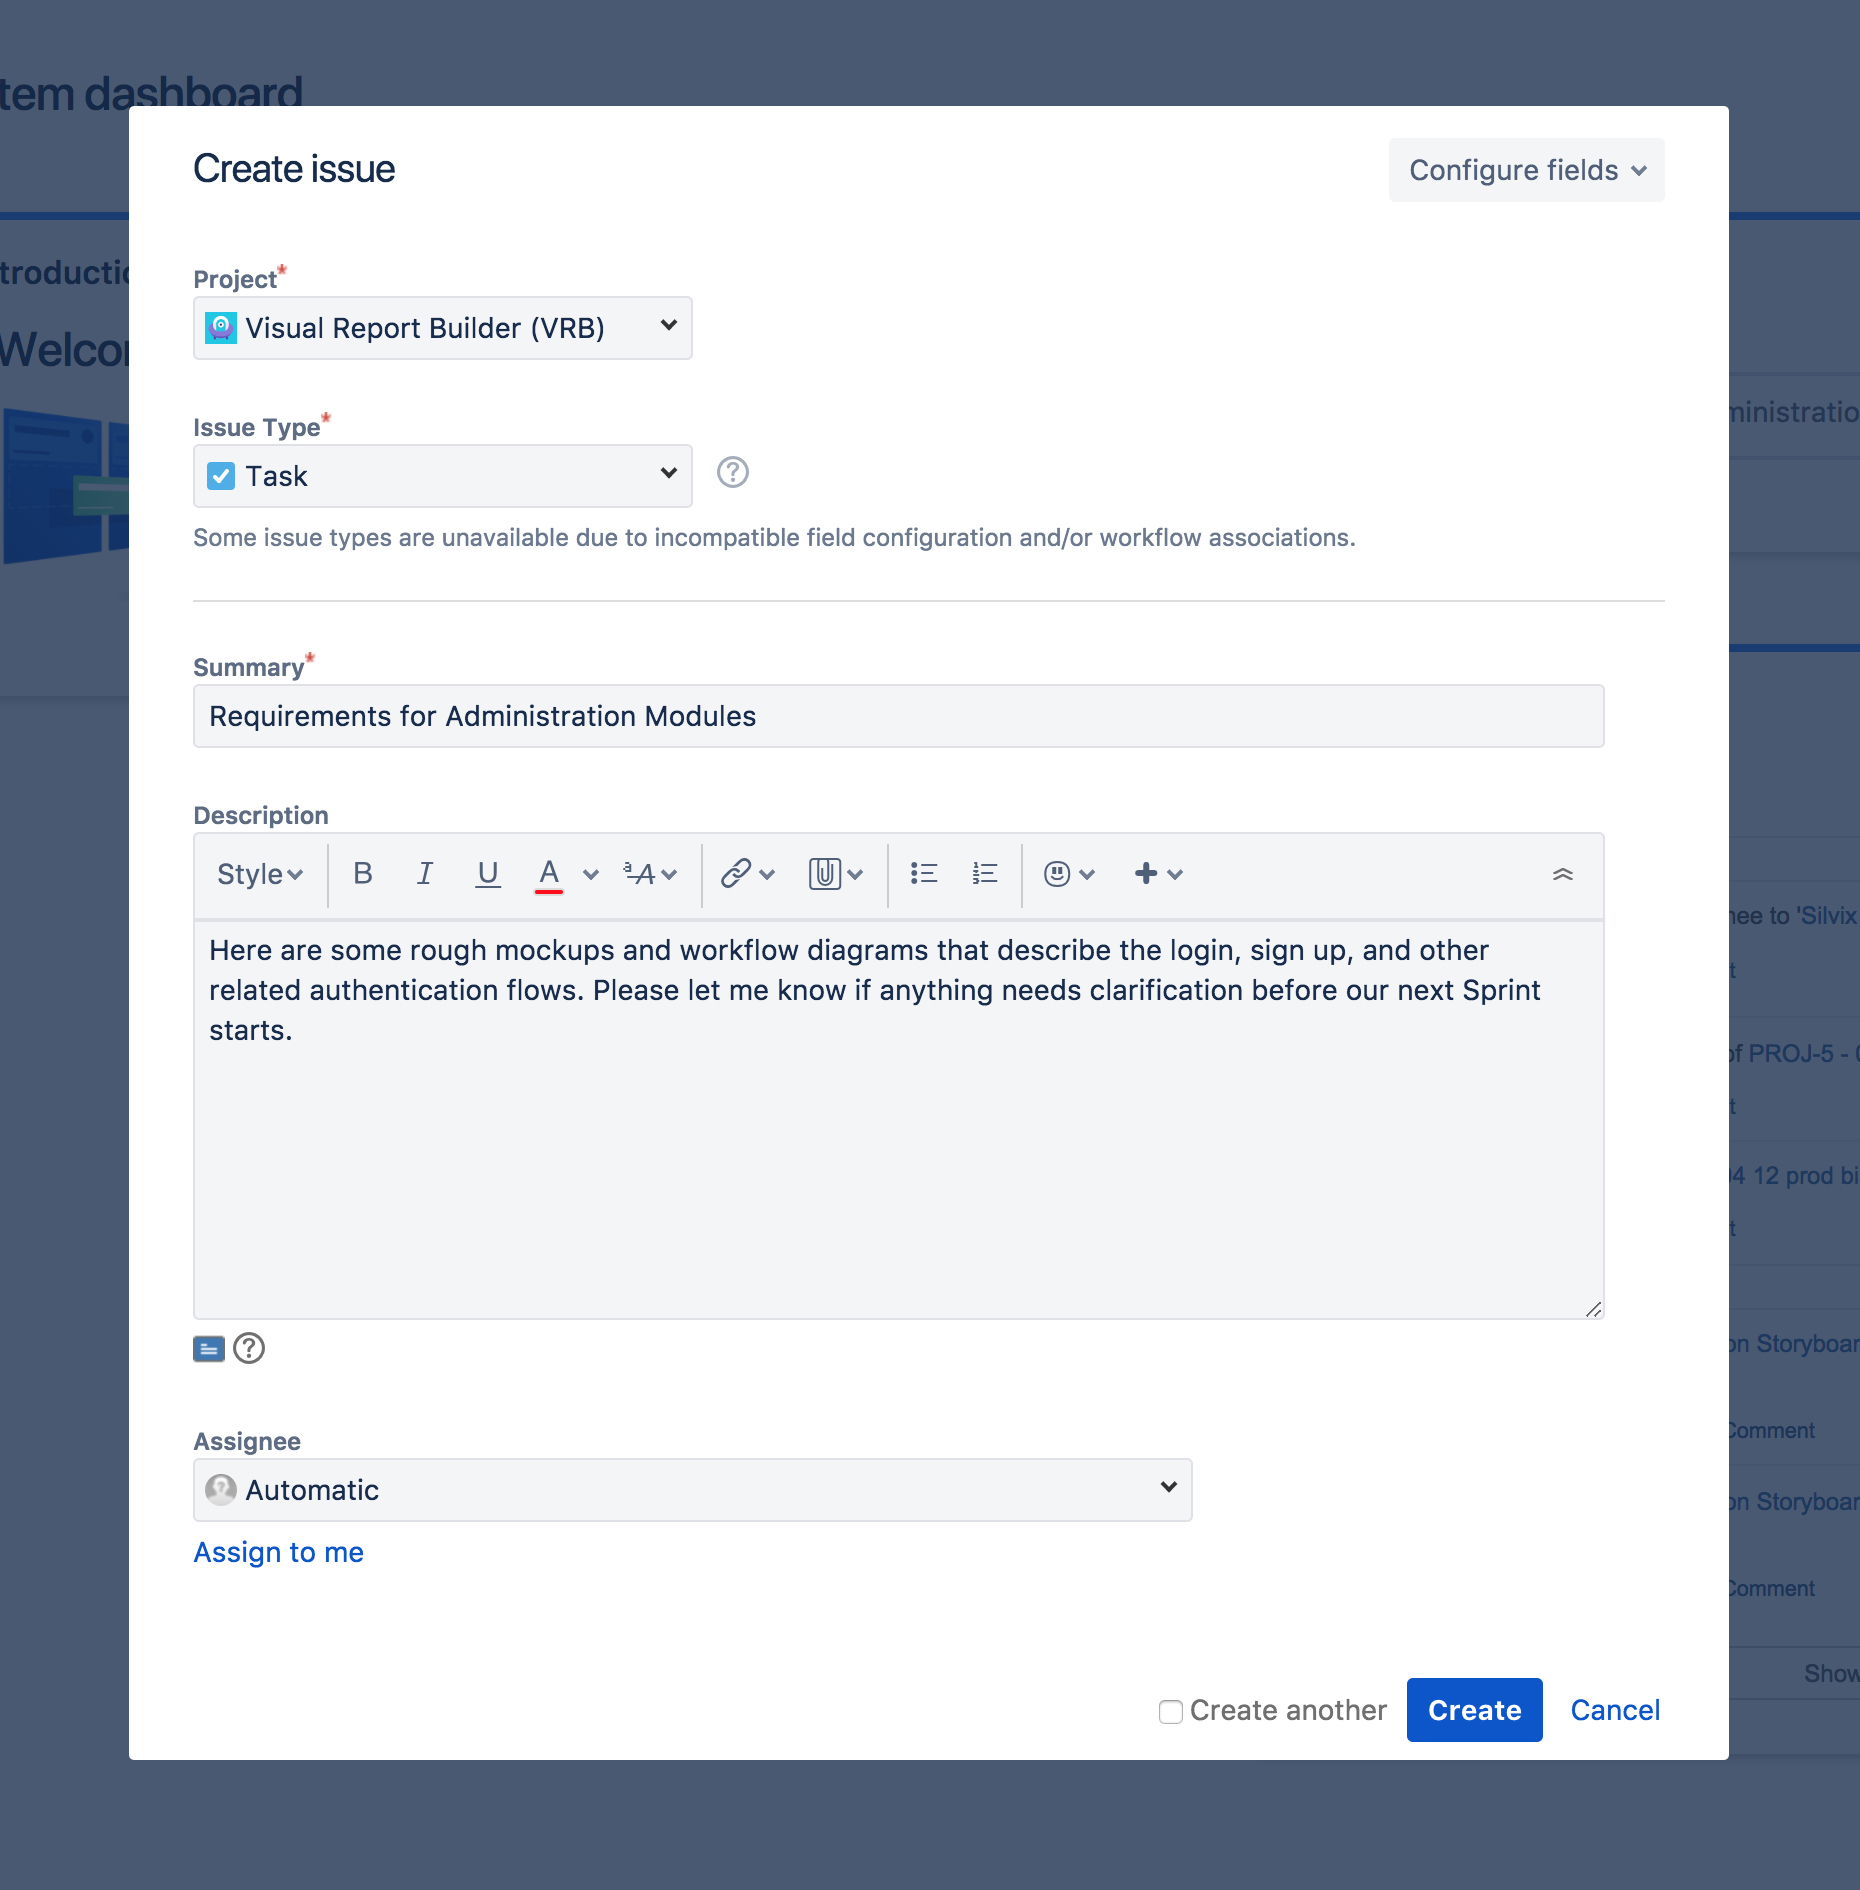
- Click the Create button at the top of the screen to open the Create Issue dialog box
- Select the relevant Project and Issue Type on the Create Issue dialog box
- Type a Summary for the issue and complete any appropriate fields – at least required ones which are marked by an asterisk
- When you are satisfied with the content of your issue, click the Create button
Add Moqups project to Jira
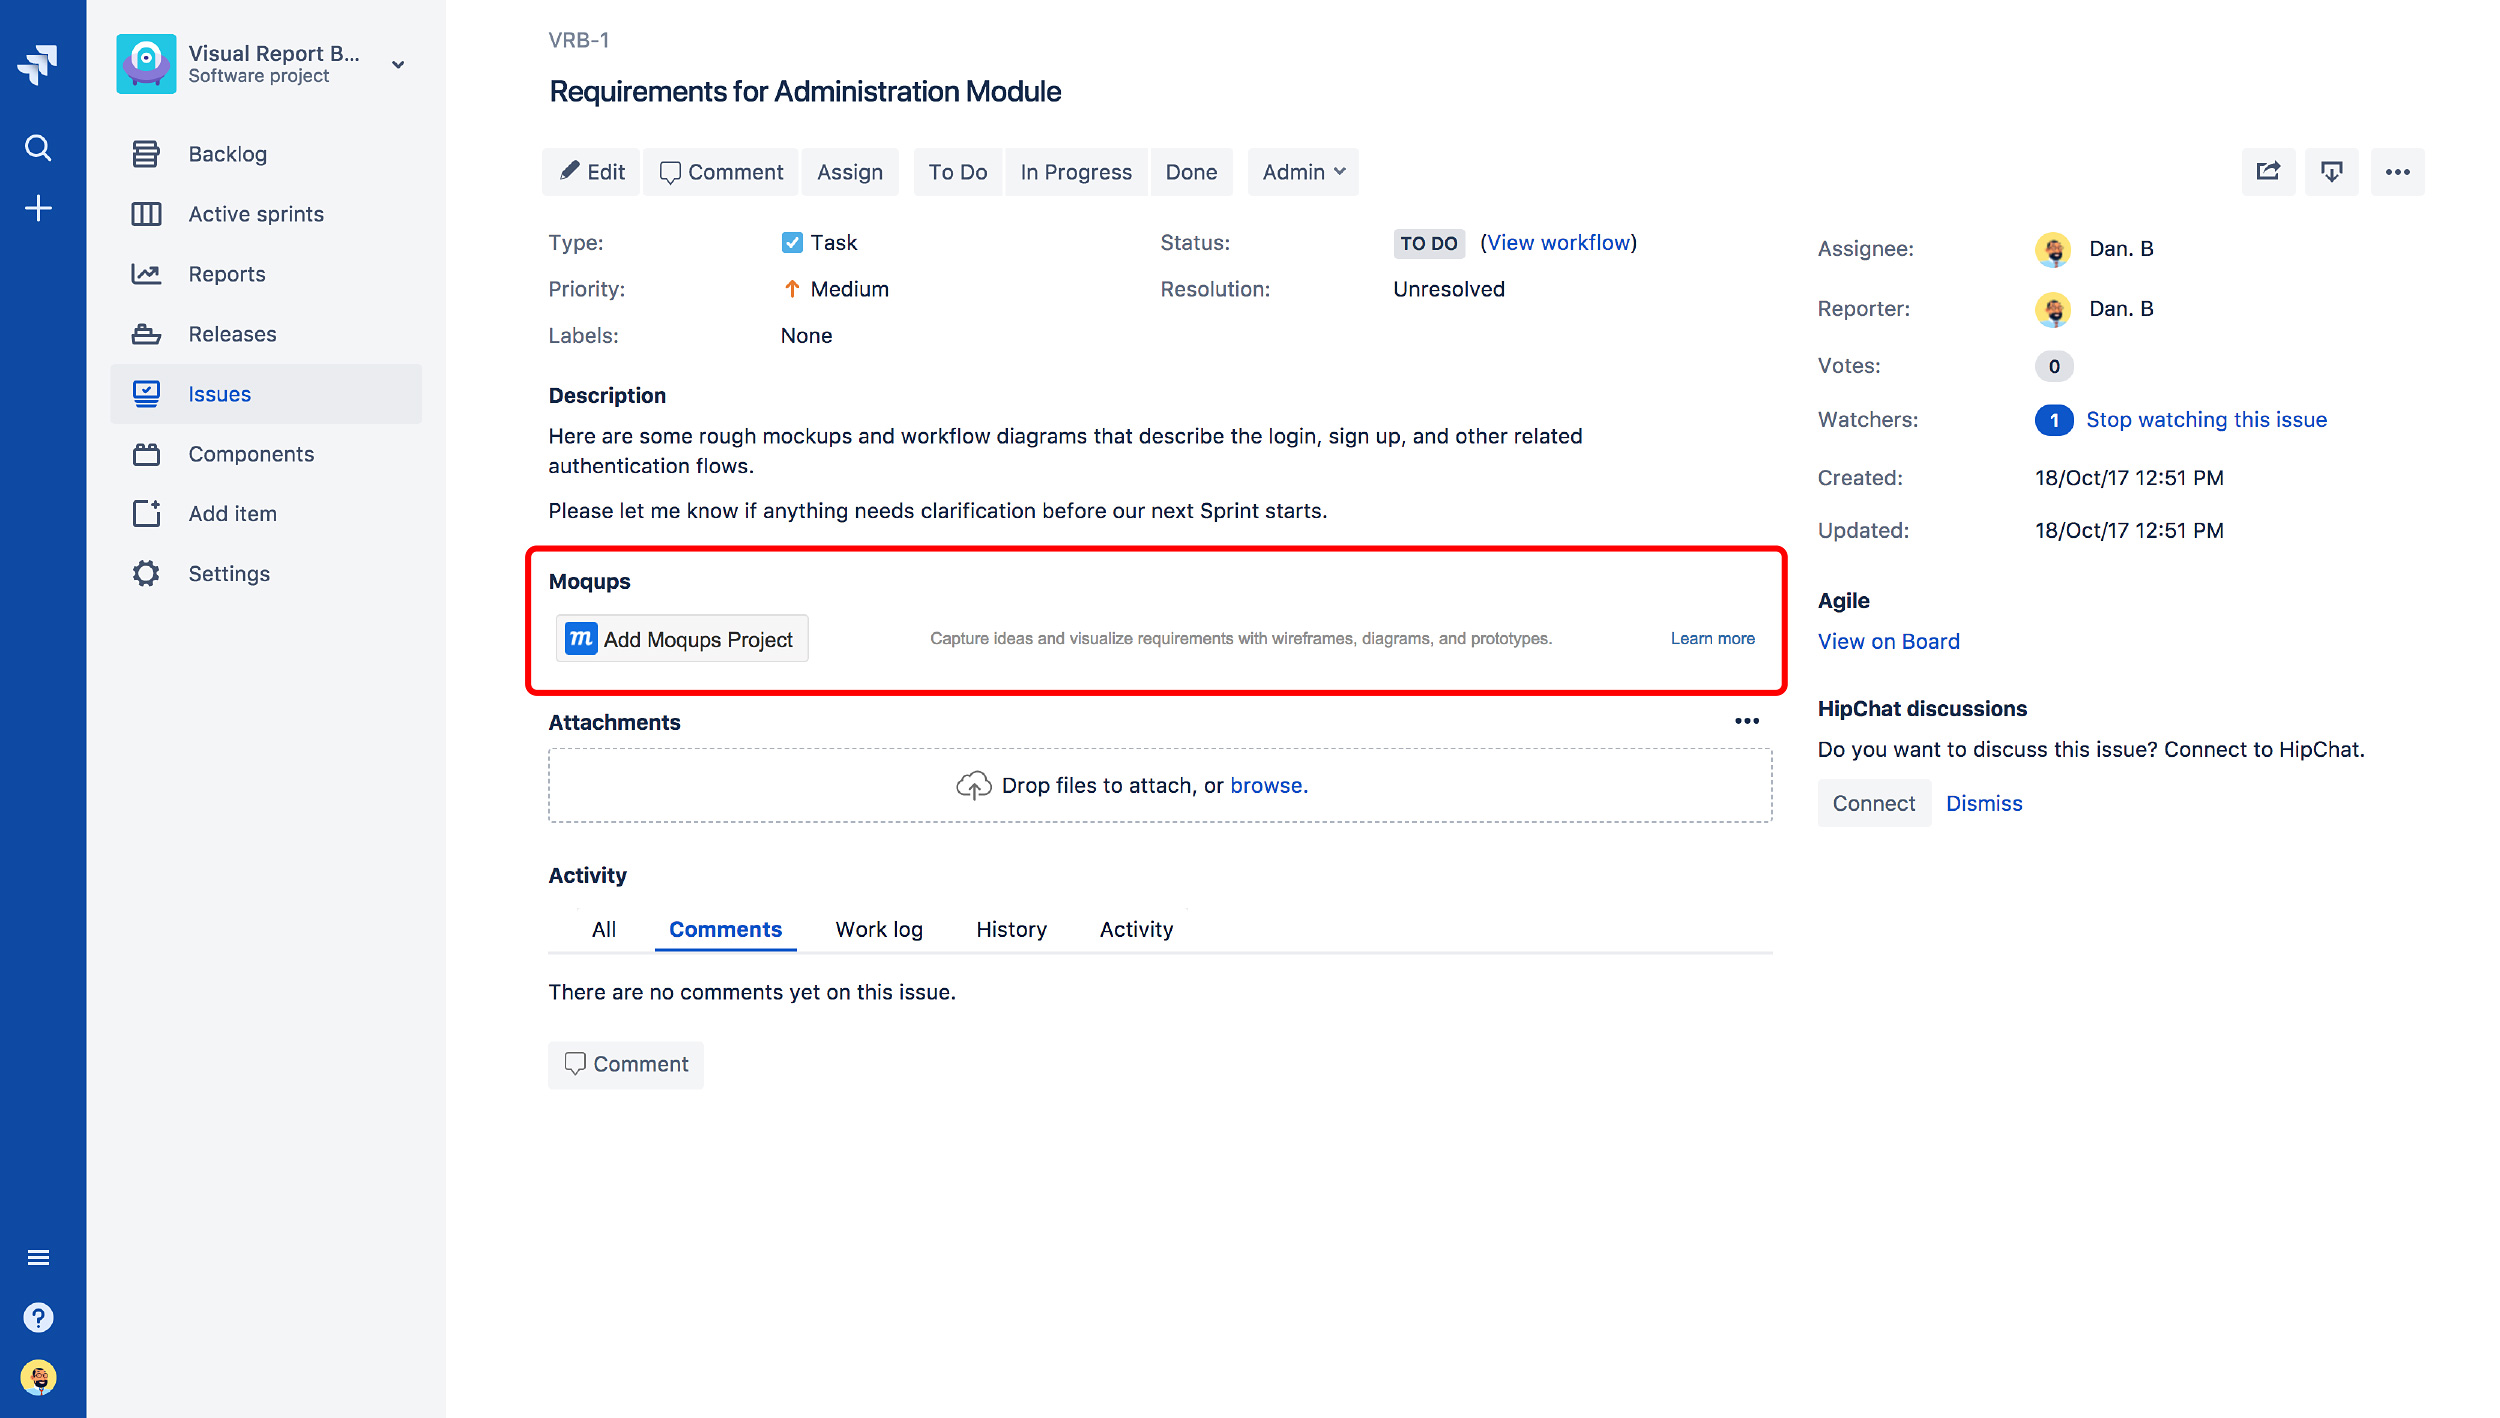
Add a Moqups Project from within a Jira issue
Once you’ve located and opened your Jira issue, there are two ways of adding a Moqups Project from within that issue:
-
Click the Add Moqups Project button
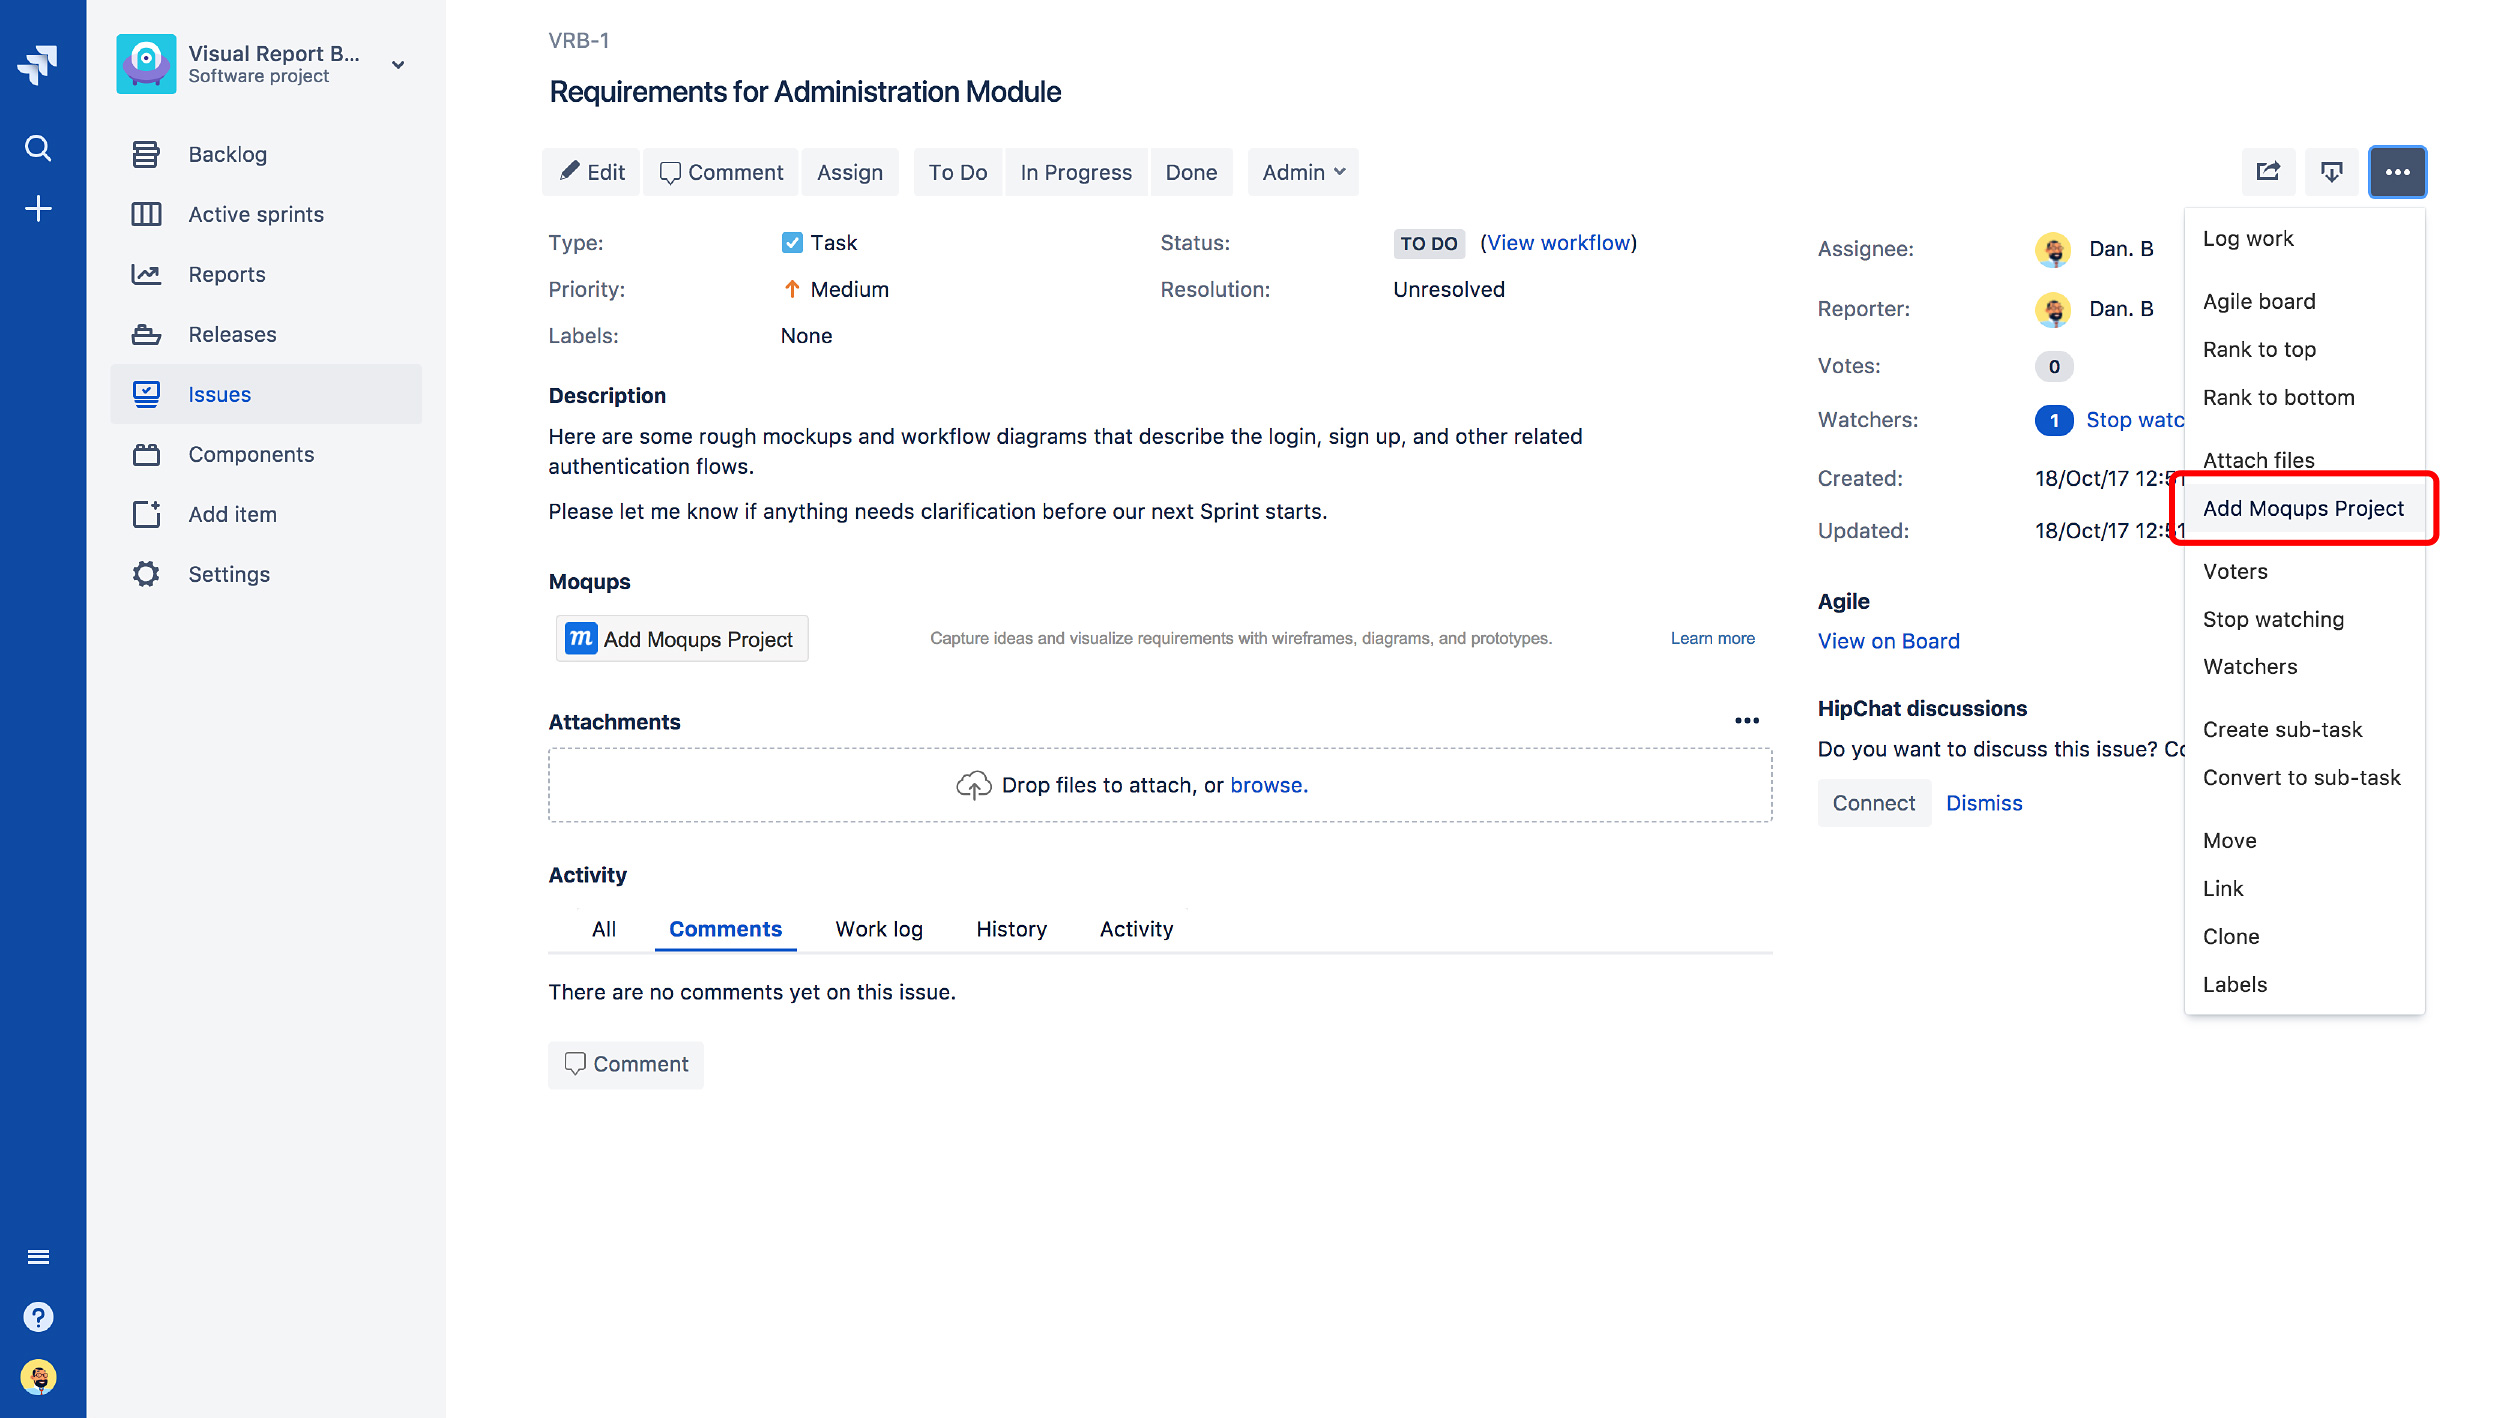
-
Click the More button and select Add Moqups Project from the dropdown menu
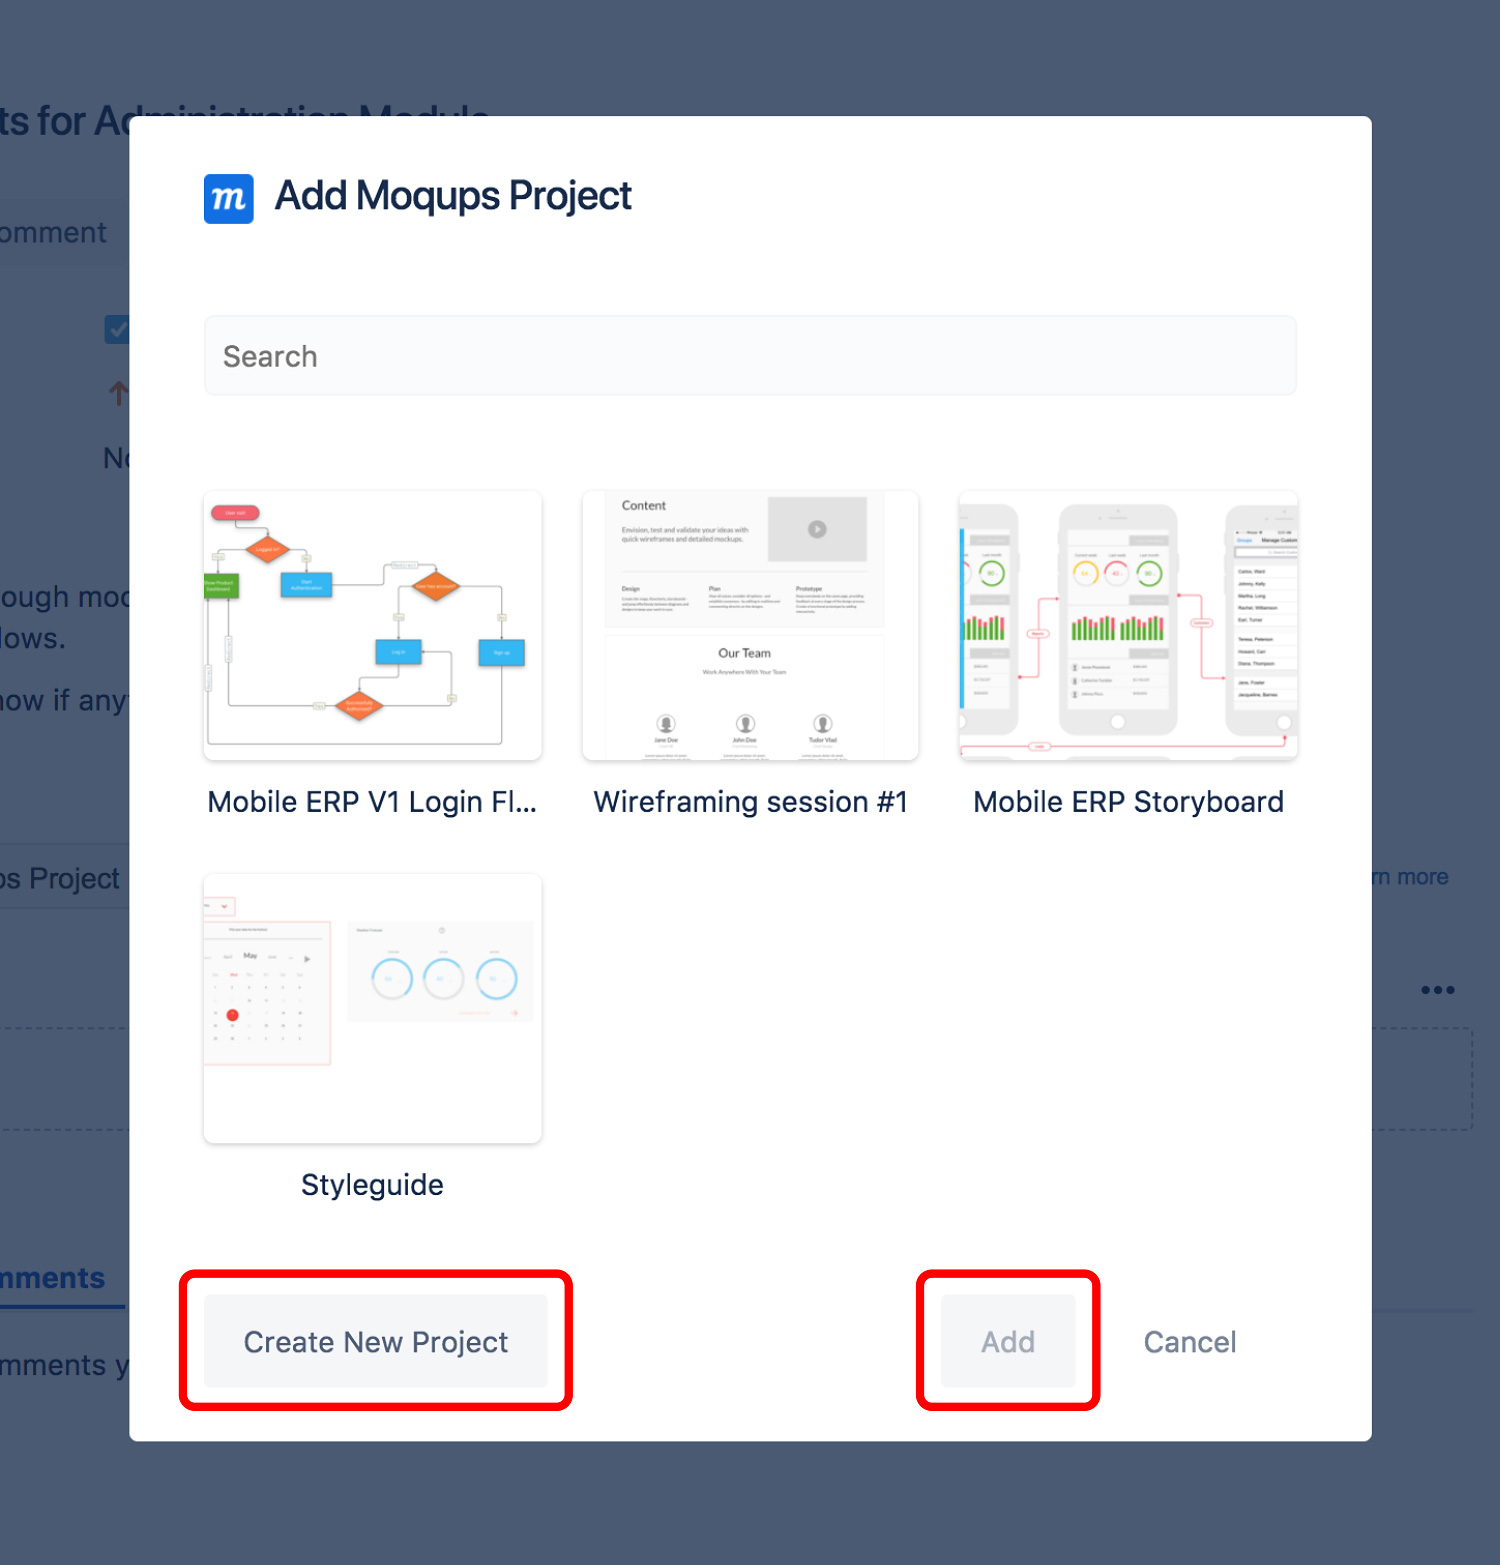
No matter whether you use the button or the dropdown, you will then have the choice to either:
-
Create a new Project
or
-
Add an existing Project
We explain both of these choices below:
Create New Project from within Jira issue
To create a new Moqups project from within a Jira issue:
- Click the Create New Project button to open the Moqups Project Created window
- You can choose to replace the default Project Name with one of your own
- Click the Edit Project button
- You will automatically be redirected to the Moqups app where you will have full access to the Moqups features – and can start working on your project
- The newly created project will be saved within your Jira issue – and in your Moqups account as well. Now, you can access the project from either your Jira or your Moqups account, and all changes to the data will automatically sync between the two accounts.
- When you are done working on your project, simply close the Moqups tab
Add an Existing Moqups Project to Jira
Once the Add Moqups Project Window opens, you’ll be able to browse through all the existing Moqups projects in your Moqups account; this includes projects created from within Jira, as well as projects created – independent of Jira – by your Moqups team. No matter what kind of project is listed in your Moqups account, it can quickly be attached from within Jira!
To add an existing Moqups Project to Jira:
- Click on the thumbnail of the project that you wish to attach
- Click the Add button
- The project thumbnail will now appear within your Jira issue
- If you want to view or edit the project, follow the instructions directly below
Set thumbnail
Once you’ve added a Moqups project to Jira, you can set a specific page thumbnail for that project. Clicking on that thumbnail will take the viewer to the page you’ve chosen to display.
To set the thumbnail and page destination:
- Click the gear Configure icon in the thumbnail’s option menu
- Select the destination page from the Page Displayed dropdown
- Click Save to see the new thumbnail in place
- Clicking on the thumbnail will now take you to the selected page of the project.
View or edit project in Jira
To view or edit a Moqups project from within a Jira issue:
Navigate to the thumbnail of the Moqups Project you want to open and then:
-
Click the Eye icon to open and view your project in Preview mode
or
-
Click the Pencil icon to open and edit your project

Disconnect Jira Cloud from Moqups
You can manage your Jira Cloud integration from the Accounts Page of your Dashboard.
To disconnect a Jira Cloud instance from your Moqups account:
- Open the Account Settings Menu in the lower-left corner of the Left Sidebar
- Select Apps & Notifications from the Account Settings Menu
- Scroll to the Atlassian Cloud Integrations section.
- Click the Disconnect link to the right of the Jira Cloud instance.
- Confirm your choice by clicking the Disconnect Now button in the pop-up.