In this article:
In this article, we’ll cover the Security tab in the Account Settings Window, and explain how admins can apply these security features account-wide.
We’ll show you how to enforce single sign-on so that all team members use one of our single sign-on options.
We’ll also look at two features that are available exclusively with our Unlimited Plans – the ability of Admins to disable Public Link Sharing account-wide, and their ability to restrict team members to approved email domains through the creation of a domain allowlist.
Still searching?
With our Unlimited Plan, you also have the option, within the Team Settings, of opening up access for all team projects, thus preventing the creation of private, invitation-only projects. You can read more about that security feature here.
Enforce single sign-on
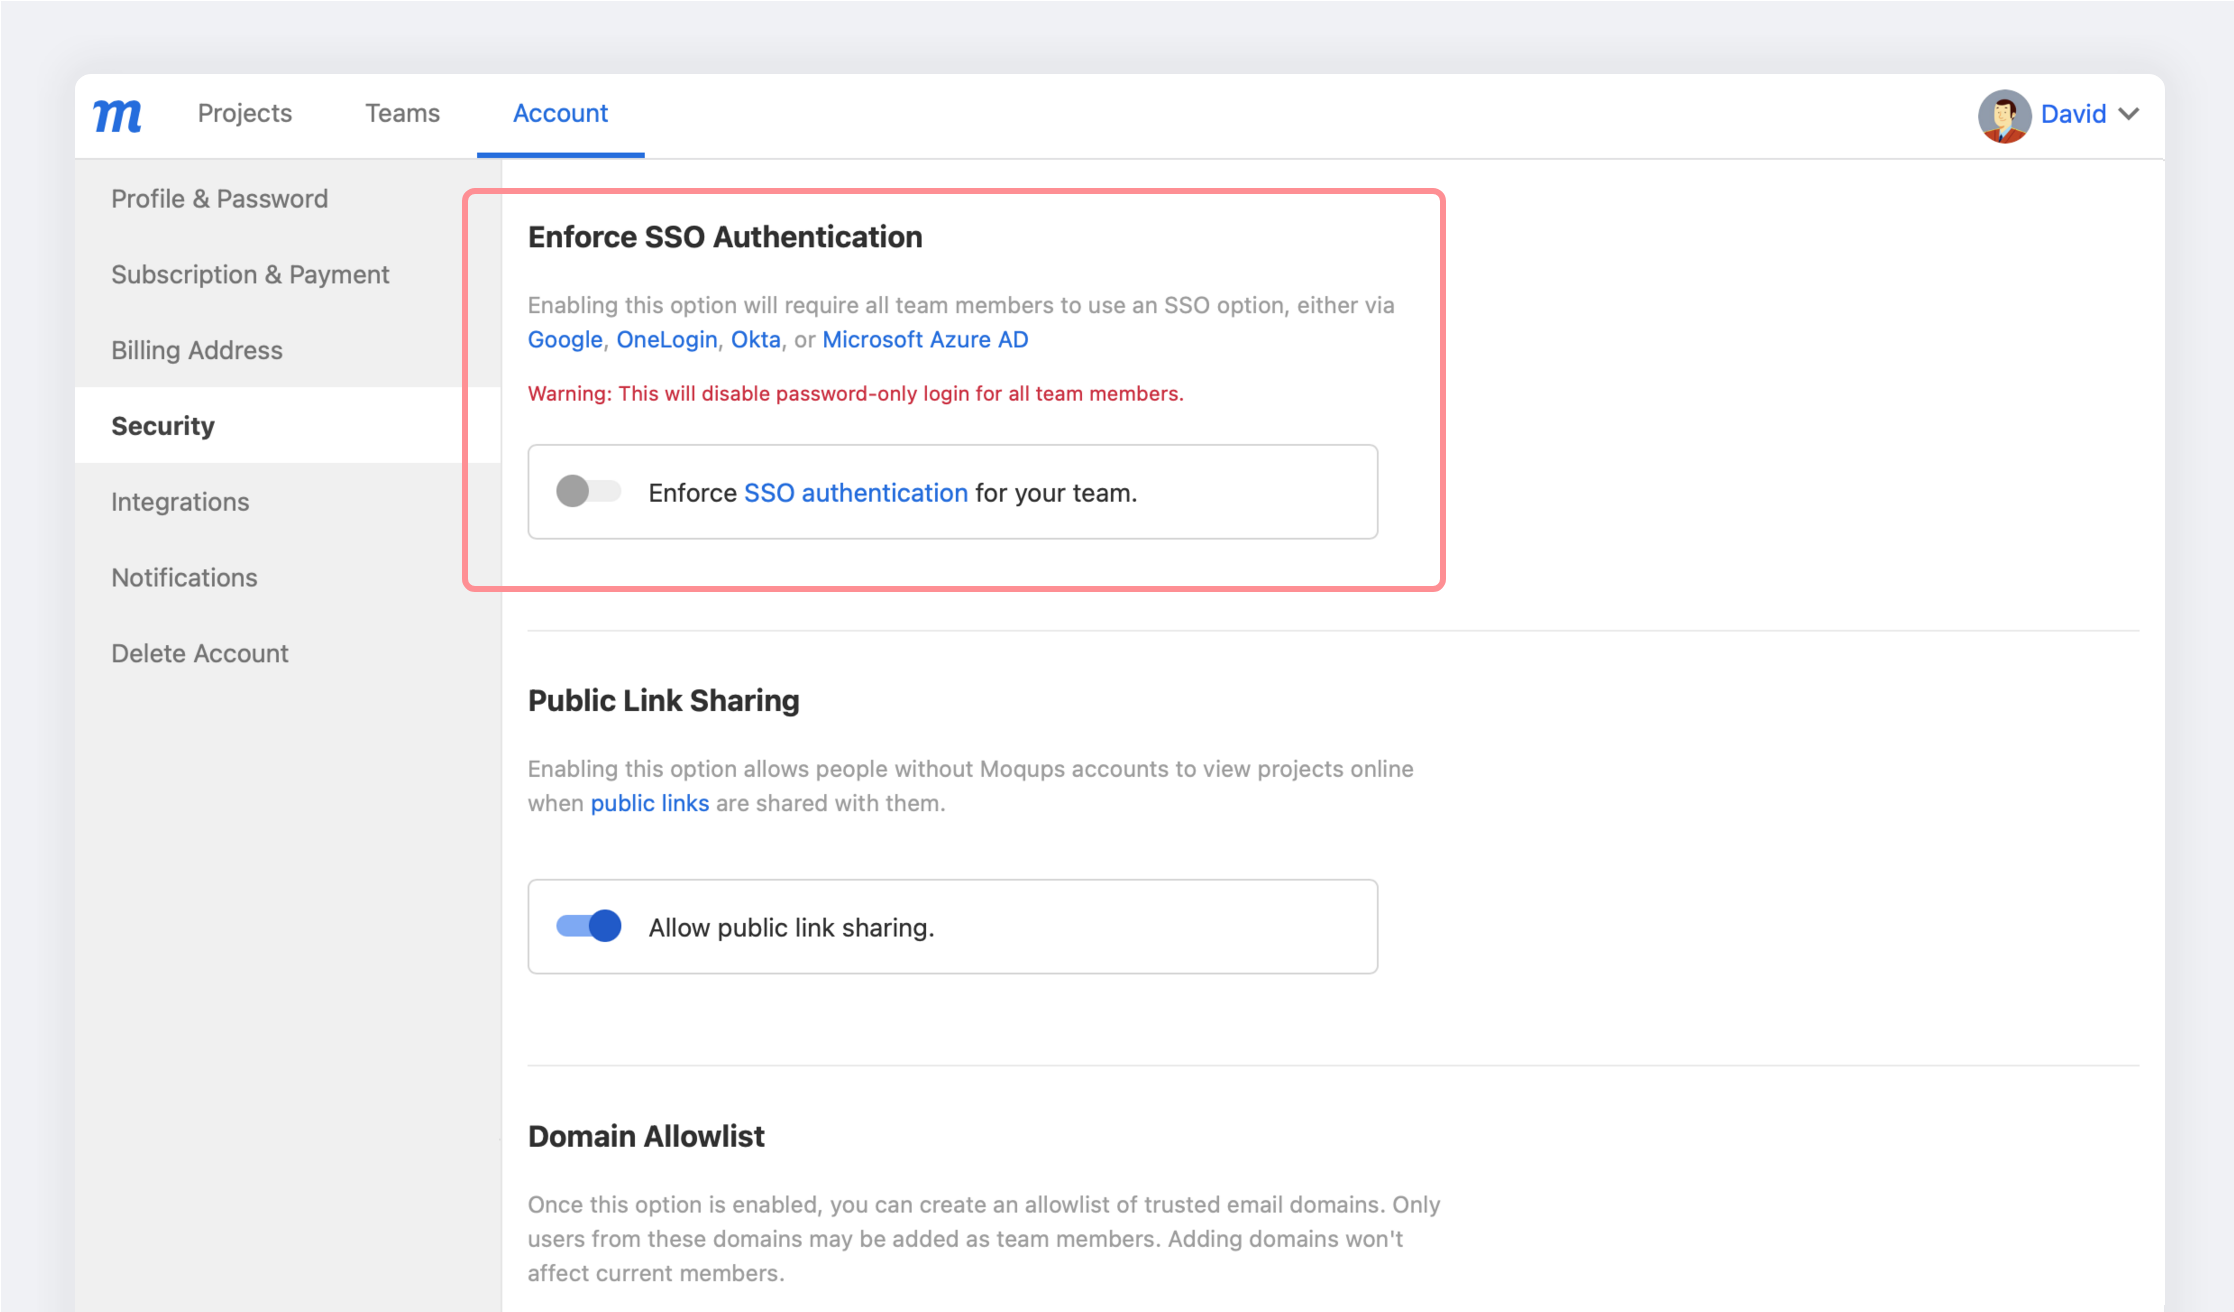
In order to provide an additional layer of account security, Admins can require all team members to use an SSO option, either via a a third party app, OneLogin, Okta, or Microsoft Azure AD;they can also set up a Custom SAML.
Enabling the Enforce SSO Authentication option means that password-only login will be disabled for all team members. To learn more, check out the Single Sign On article in our Integrations section.
To enforce single sign-on:
- Open the Account Settings Menu in the lower-left corner of the Left Sidebar
- Select the Account Settings from the menu
- On the Account Page of your Dashboard, go to the Security tab
- In the Enforce SSO Authentication section, toggle Enforce SSO authentication for your team to the on position
- You’ll get a pop-up warning that “This will disable password-only login for all team members.”
- Click the Continue button
- An instructional email will be sent to all team members notifying them of the change
Allow public link sharing
This feature allows account admins to disable all public link sharing so that Anyone with the link can view option is unavailable when sharing a project.
Who can use this feature?
This security feature is available as part of our Unlimited plan.
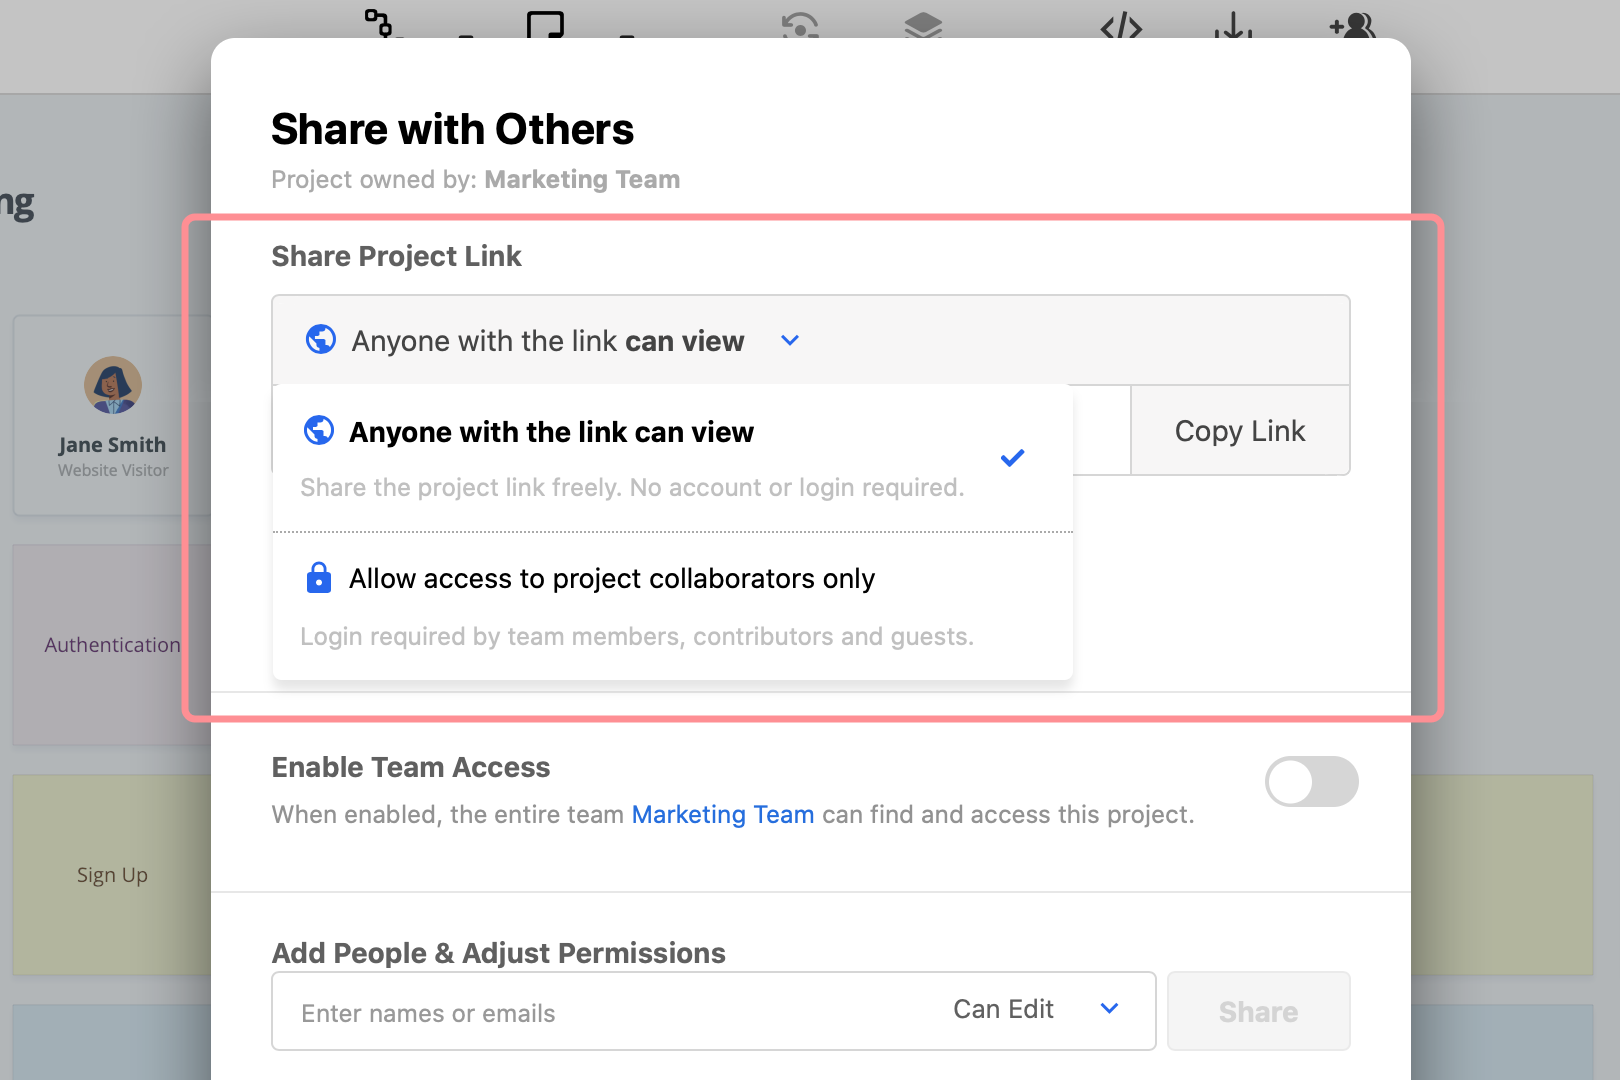
In Moqups, the top toolbar’s Sharing button opens the Sharing window. From there, team members can choose two ways to share project links:
- Allow access to project collaborators only: With this option, the shared link only works for collaborators that already have permission to access the project (Team members, Contributors and Guests). This option is designed for sharing confidential work.
- Anyone with the link can view: With this option, anyone with whom the link has been shared can view the project online – even stakeholders that don't yet have a Moqups account. This is useful when you are reviewing and testing with a wider – or public – audience.
By default, public link sharing is allowed. However, to provide additional security for their proprietary designs and intellectual property, organizations may sometimes want to disable the Anyone with the link can view option – to prevent public link sharing altogether. Disabling public link sharing is retroactive, meaning that previously shared public links will no longer work.
To disable public link sharing:
- Open the Account Settings Menu in the lower-left corner of the Left Sidebar
- Select Account Settings from the menu
- On the Account Page of your Dashboard, go to the Security tab
- In the Public Link Sharing tab, toggle Allow public link sharing to the ‘off’ position

Domain allowlist
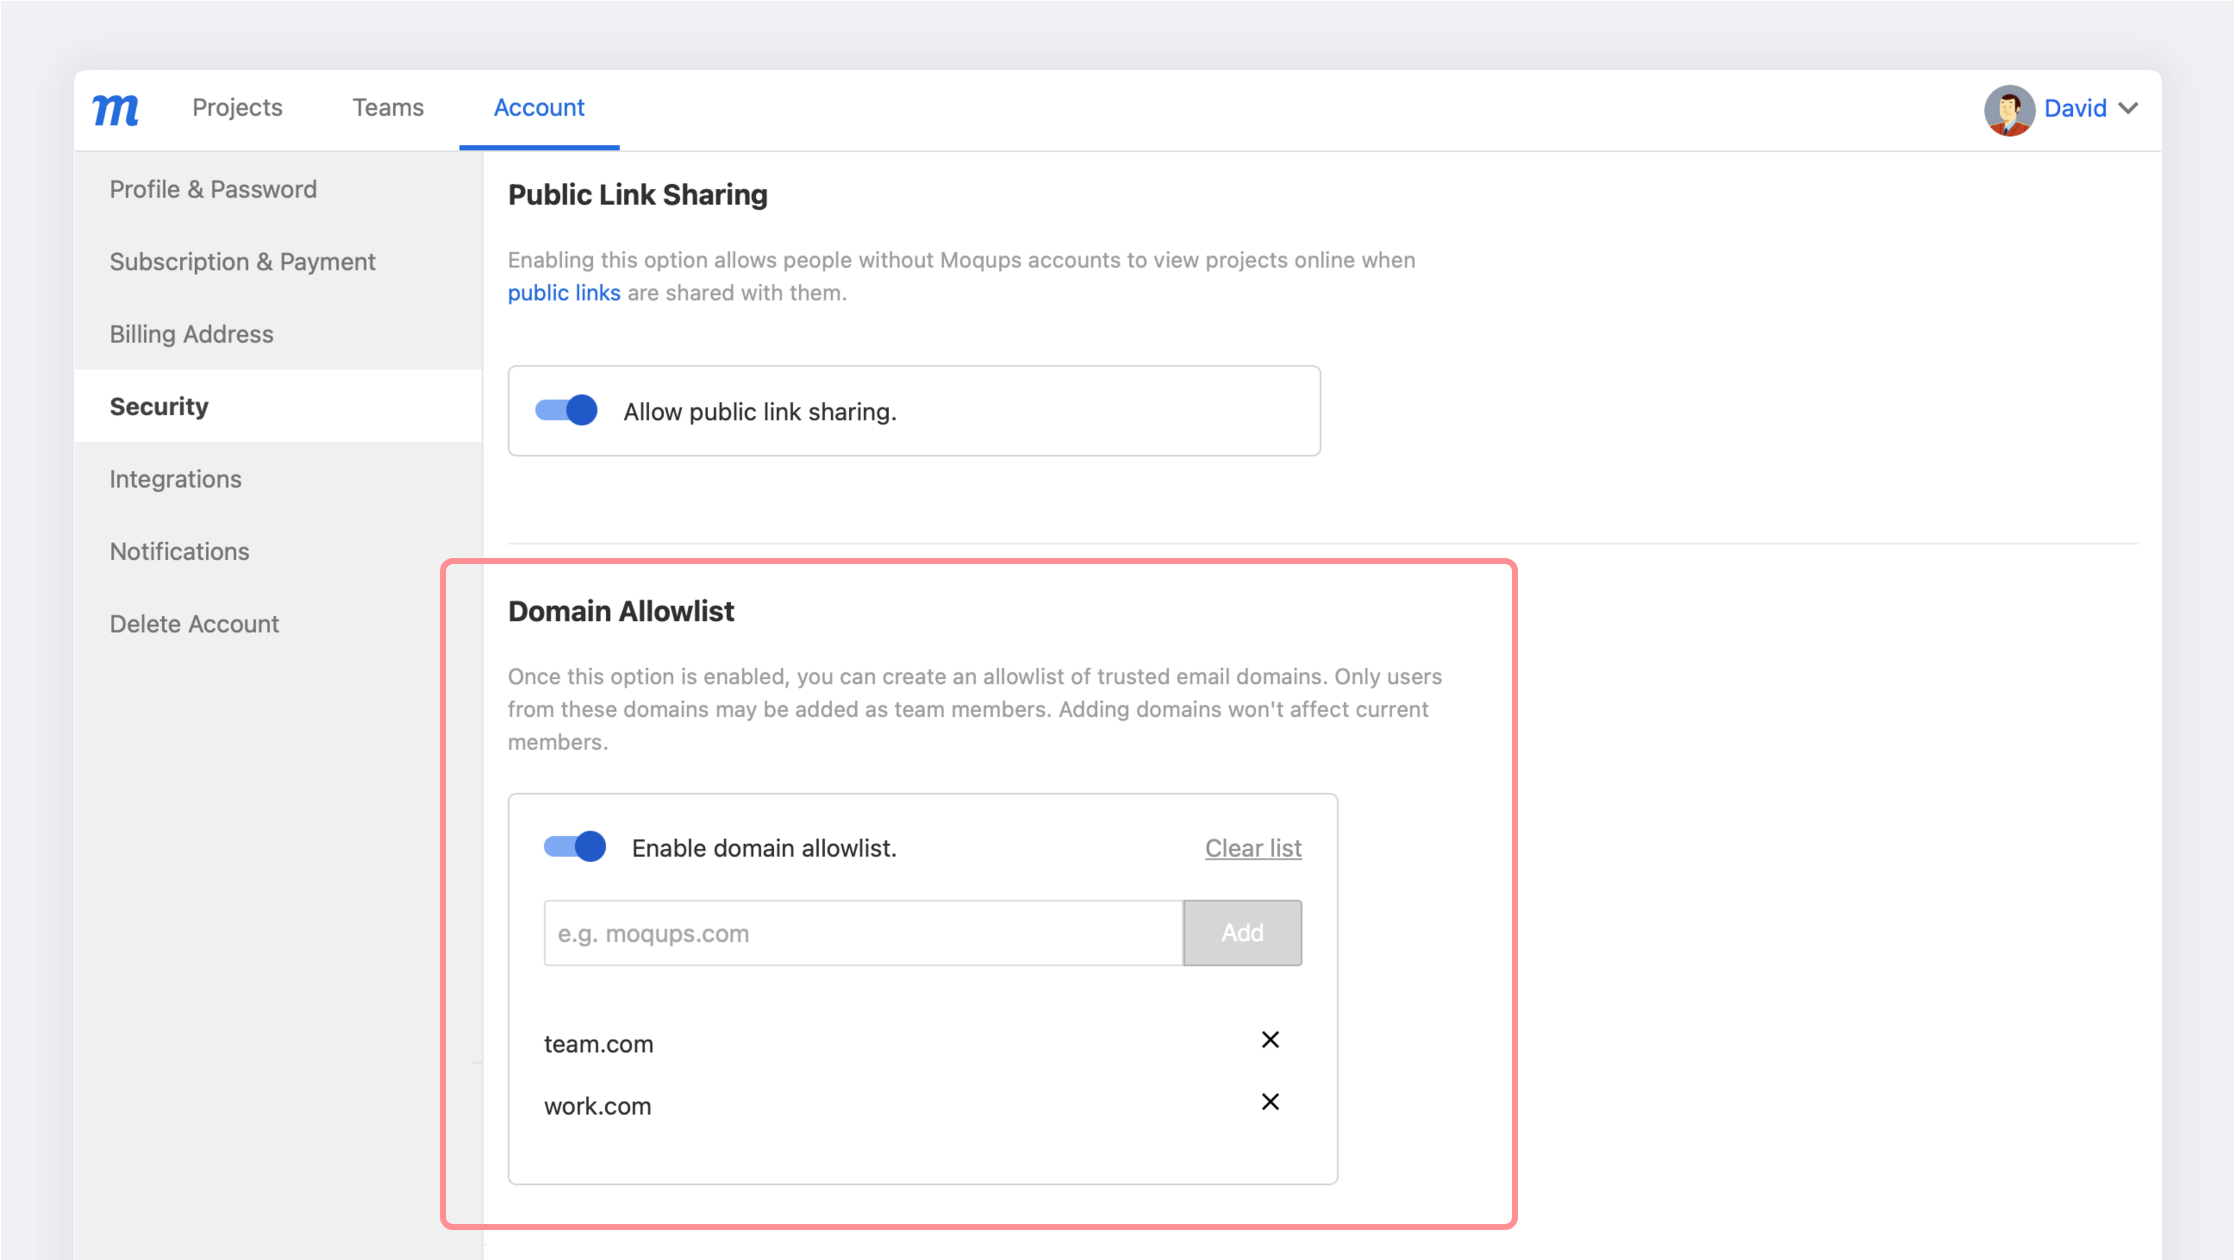
The domain allowlist lets you create a list of trusted email domains. Once enabled, only users with emails from that list can be added as team members within your account. However, outside collaborators - Contributors and Guests – can still be added to individual projects. The list is not retroactive, so adding domains won't affect current team members.
Who can use this feature?
This security feature is available as part of our Unlimited plan.
To enable a domain allowlist:
- Open the Account Settings Menu in the lower-left corner of the Left Sidebar
- Select Account Settings from the menu
- On the Account Page of your Dashboard, go to the Security tab
- In the Domain Allowlist section, toggle Enable domain allowlist to the ‘on’ position
Change account admin
You can change Admins by transferring ownership of your account to a new email address.
You may want to do this because of a change in personnel within your organization, or because you want to move the administration of your Moqups account to a supervisory level (i.e. your company’s Accounting department).
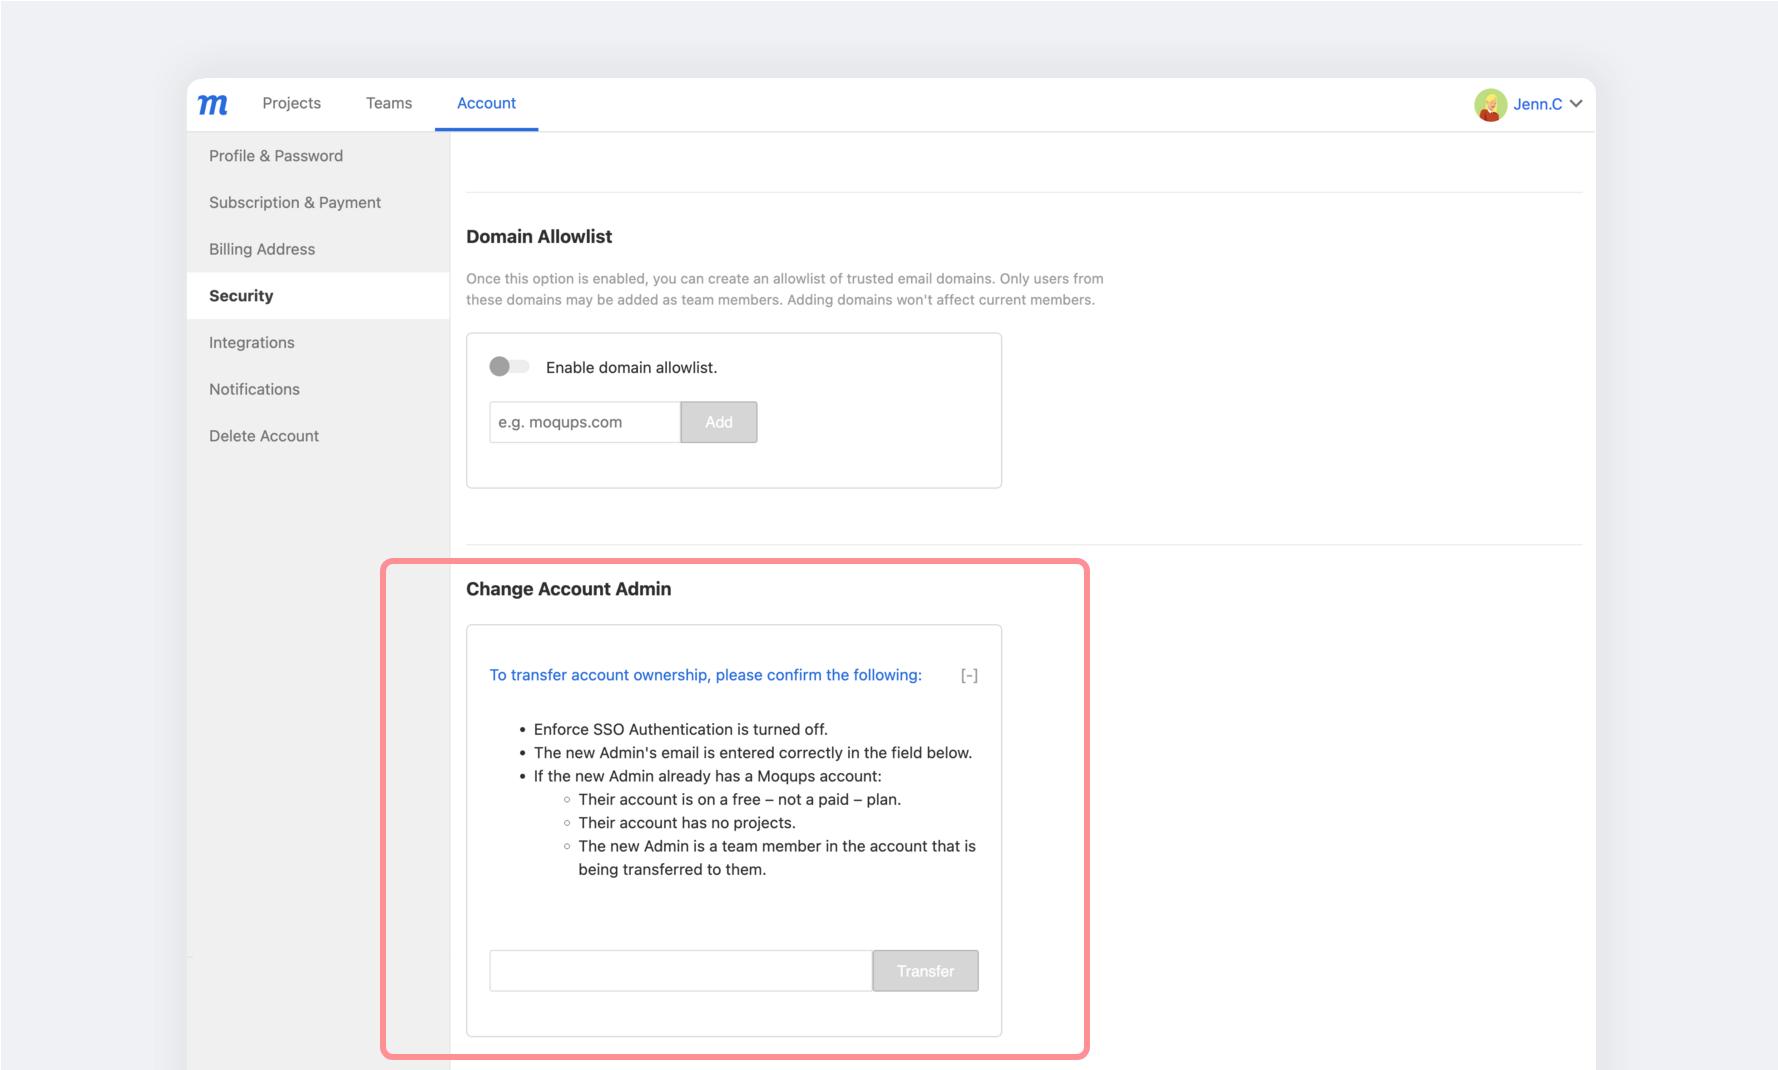
Before changing admins, please make sure that Enforce SSO Authentication is turned off for your account.
To change an account Admin :
-
Open the Account Settings Menu in the lower-left corner of the Left Sidebar.
-
Select Account Settings from the menu.
-
On the Account Page of your Dashboard, go to the Security tab.
-
In the Change Account Admin section, read and confirm the transfer criteria:
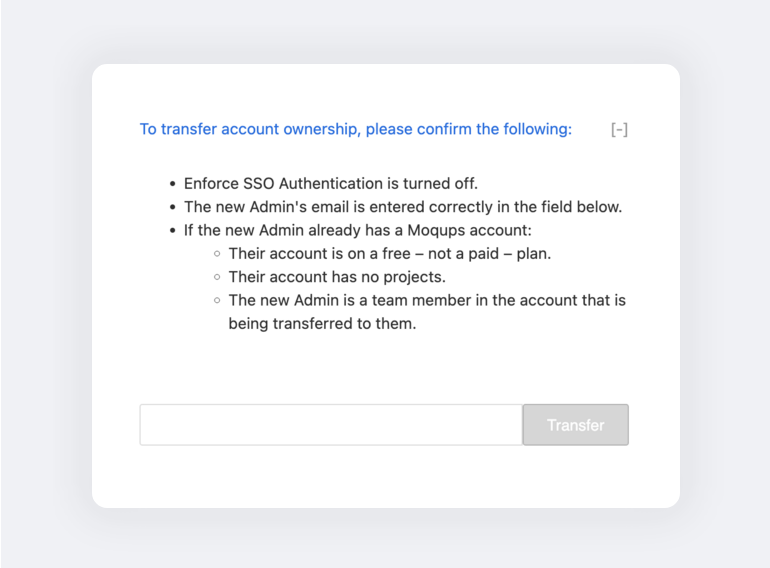
-
Enter the email address of the new admin and click Transfer.
-
Both the old and new admins will receive an email notification of the change.
If the person who’s becoming the new admin already has an existing Moqups account – either free or paid – and they have existing projects in their old account, they need to remove them from that account before initiating the transfer of ownership. There are several options:
- If they no longer want the projects in the old account, they can simply delete them.
- If they want the projects to be part of the team they’re about to administer, they can transfer the projects to that account before changing the admin.
- If they want to keep the projects as part of another Moqups account, they can create a new account, with a new email address and transfer the projects there.
If the new admin has a paid plan, they should deal with their projects before canceling their subscription. This avoids the problem of their excess projects being archived as they downgrade to Free.