In this article:
This article focuses on the creation and management of teams, and is relevant to team Admins and the Managers they designate.
Who can use this feature?
Anyone with a paid plan. Our Business Plan lets you create one team and designate roles within it. Our Unlimited Plan lets your create and manage multiple teams within your account.
Teams window overview
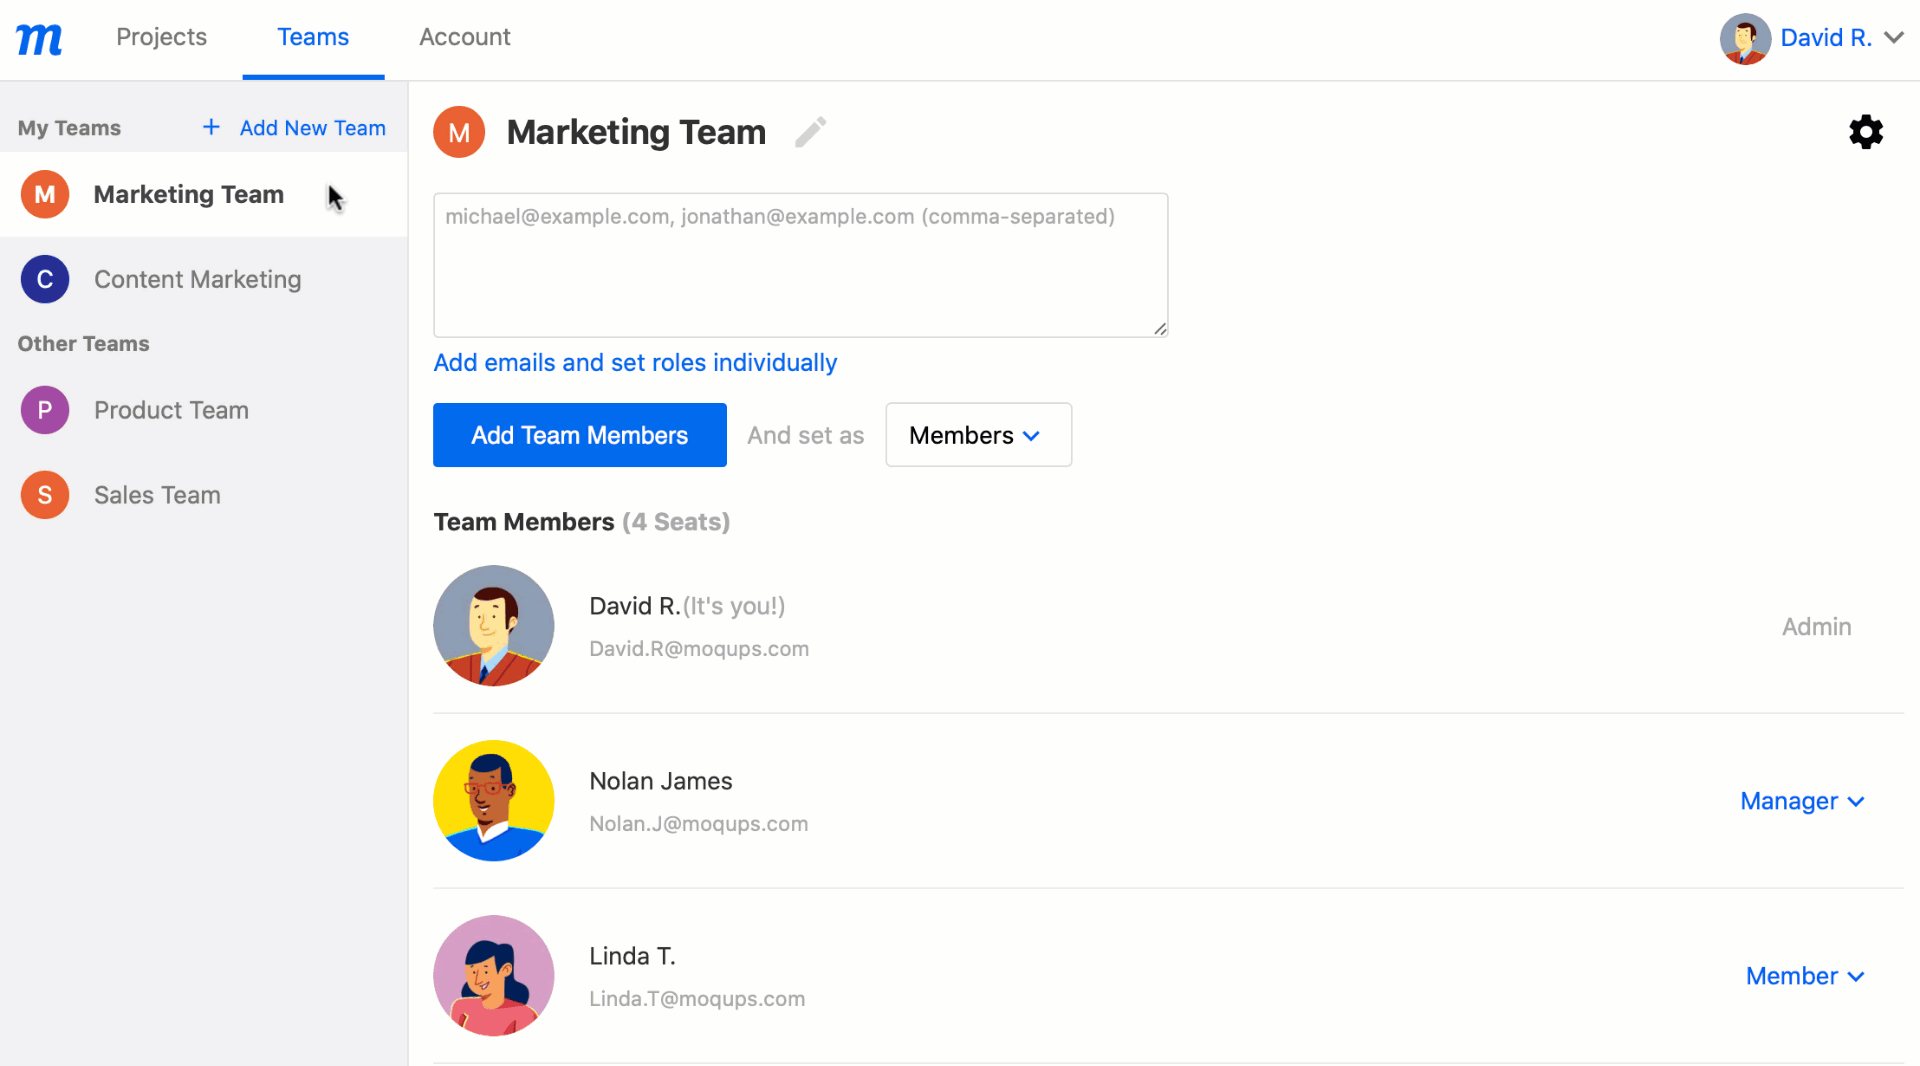
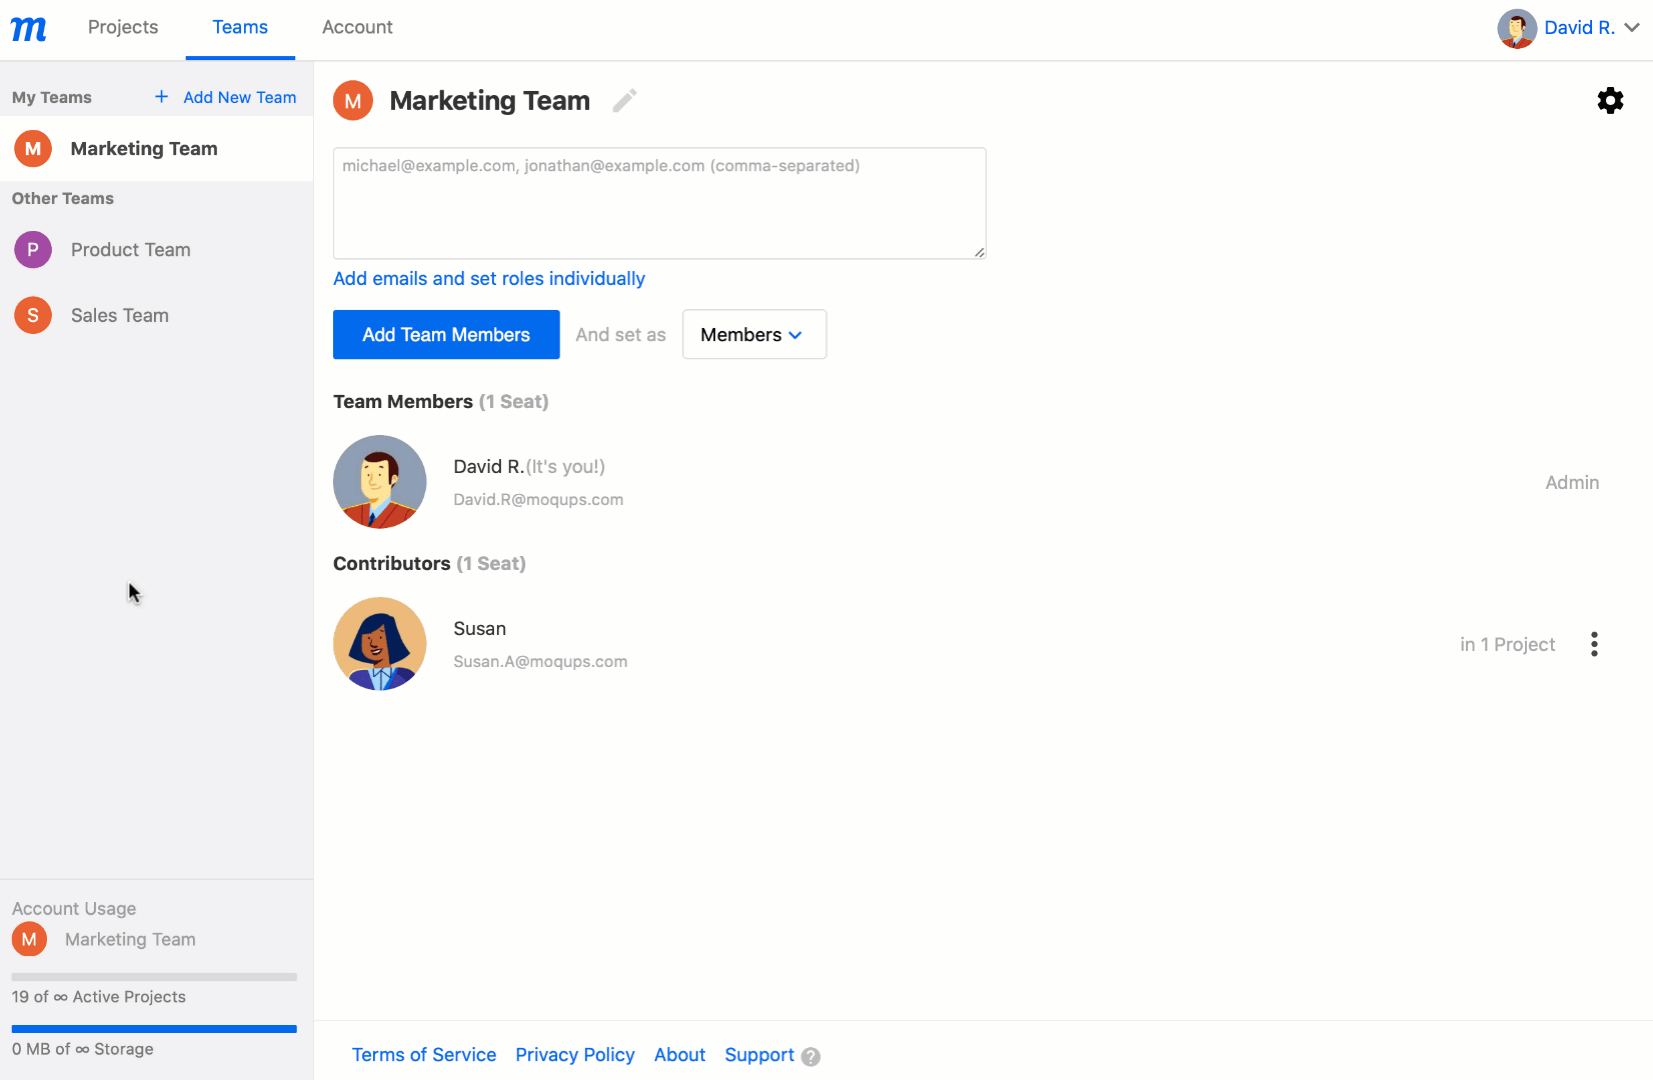
In the Dashboard, the Teams Window displays the user’s personal account and any teams that they’ve joined.
The window displays the basic information for each team, including that team’s name and a list of its members, Contributors, and Guests.
Admins and Managers see an enhanced version of the window that includes all Team Management functions.
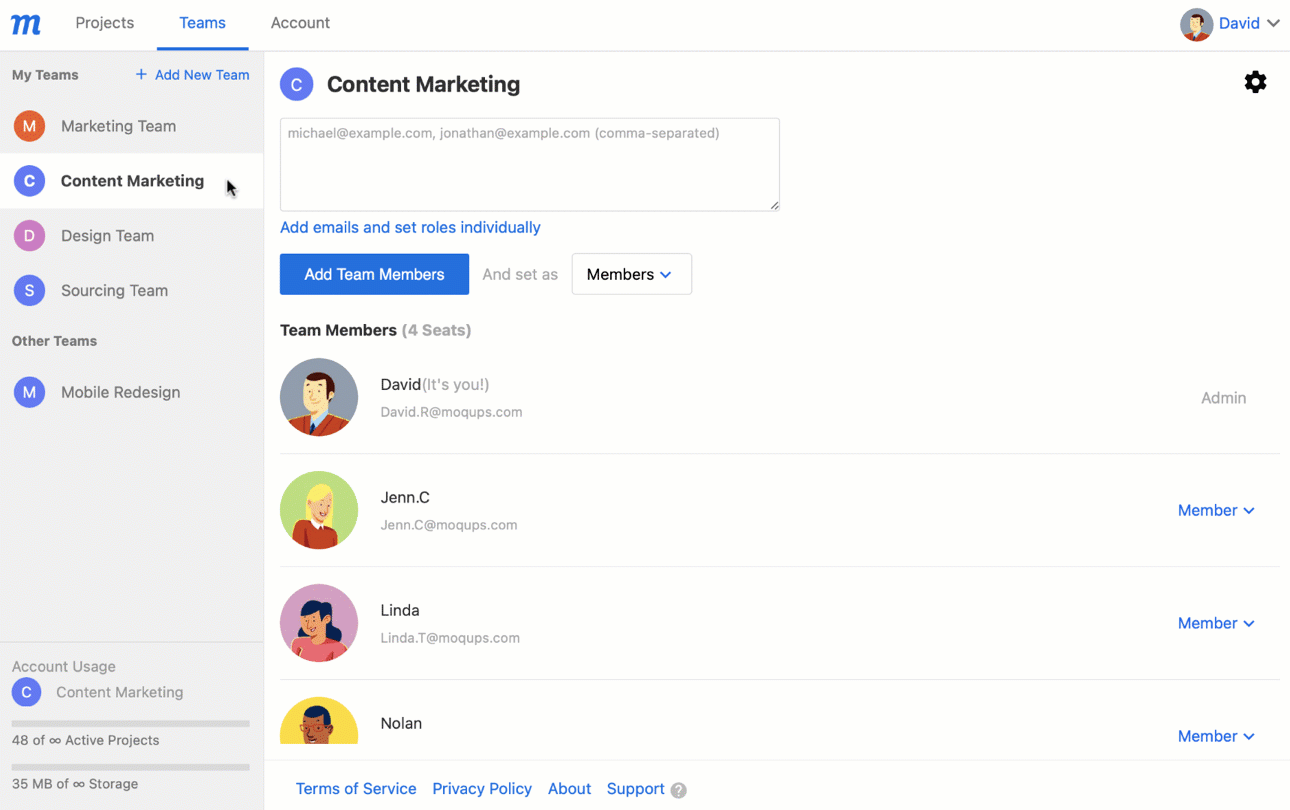
To get to the Team Window of your Dashboard, just click on your username in the lower-left corner of the editor and select Team Management from the dropdown menu. Or, from the Moqups Main Menu in the upper-left corner of the app, choose Dashboard, and then select the Teams tab.

Create a team
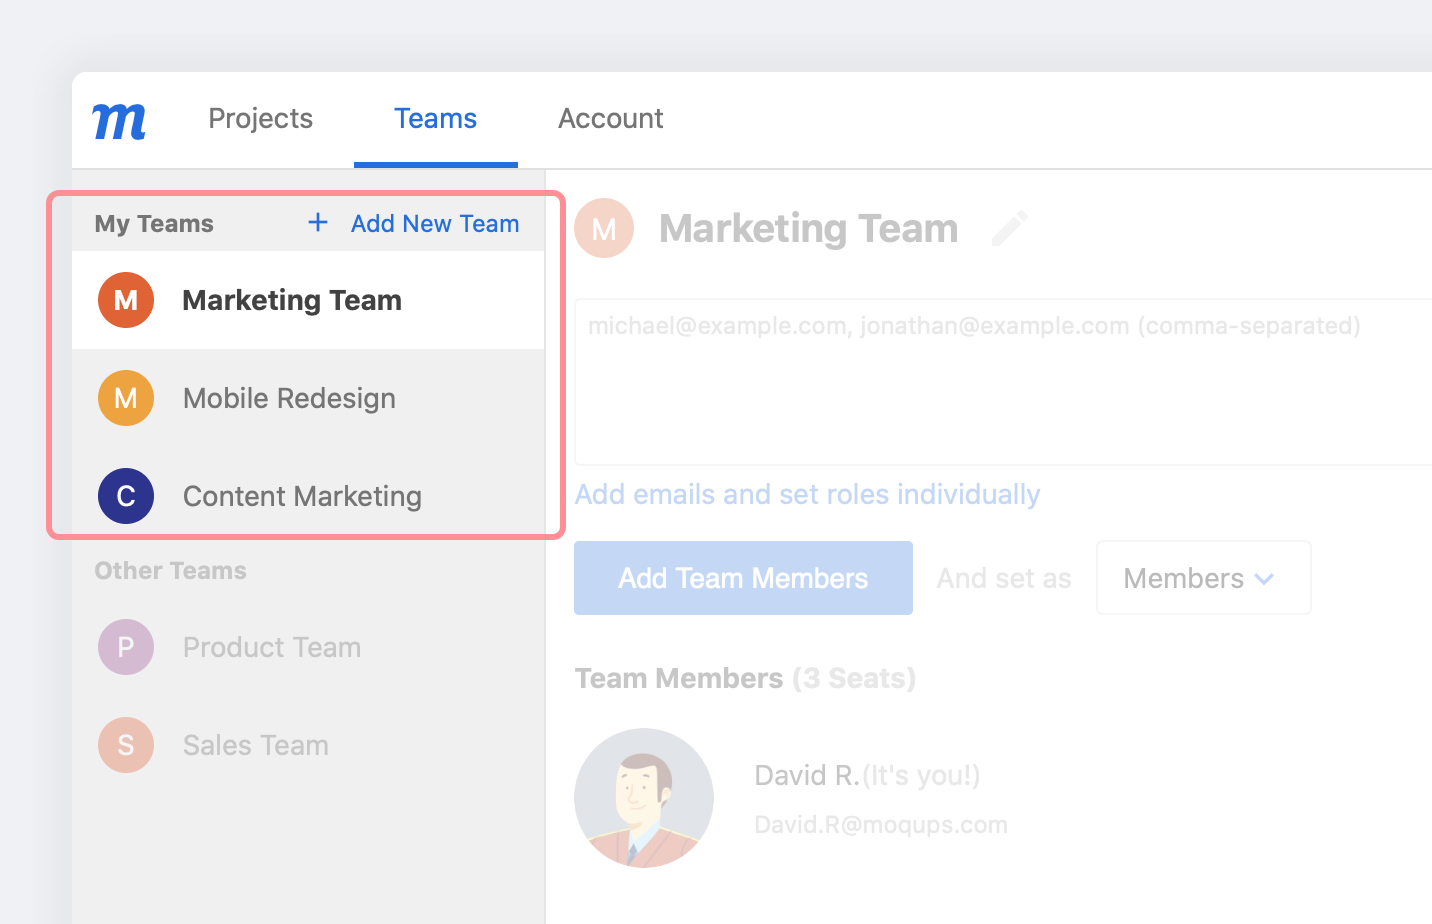
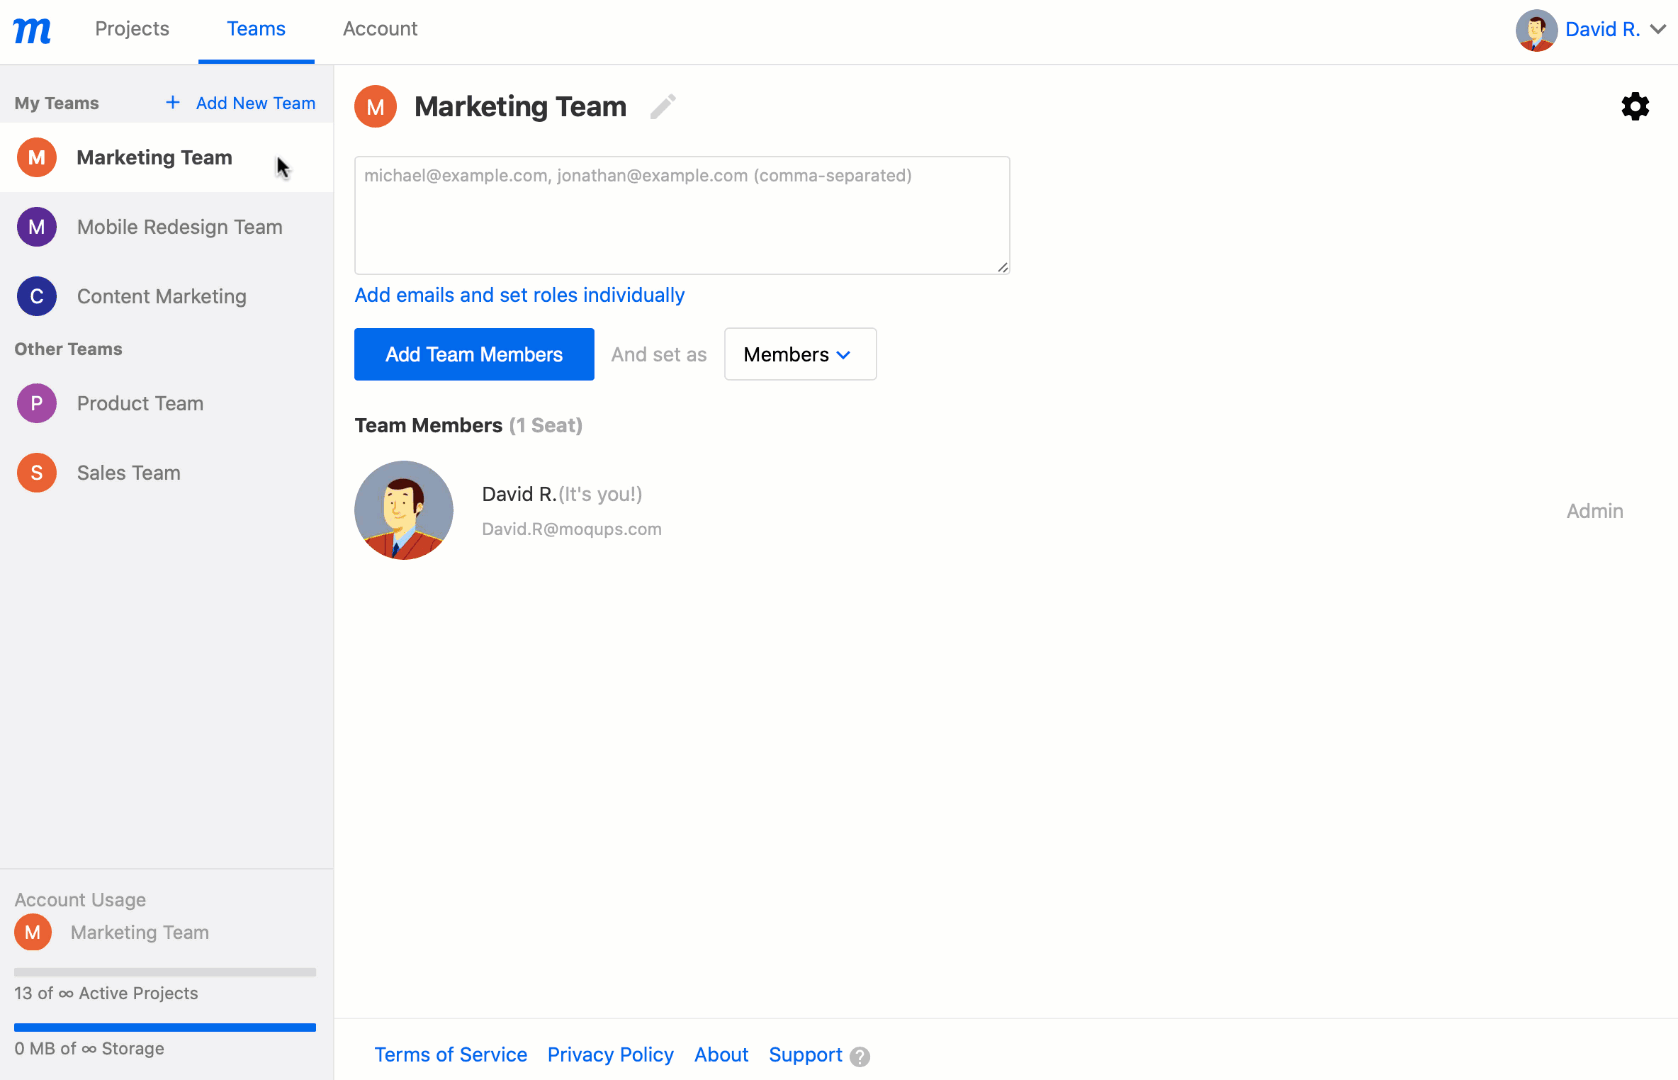
An account owner can create their initial team by simply adding members. In doing so, their personal account becomes the de facto team account and they become the Admin for that team, and any subsequent teams they add. These teams will appear in the My Teams section of the Teams List:
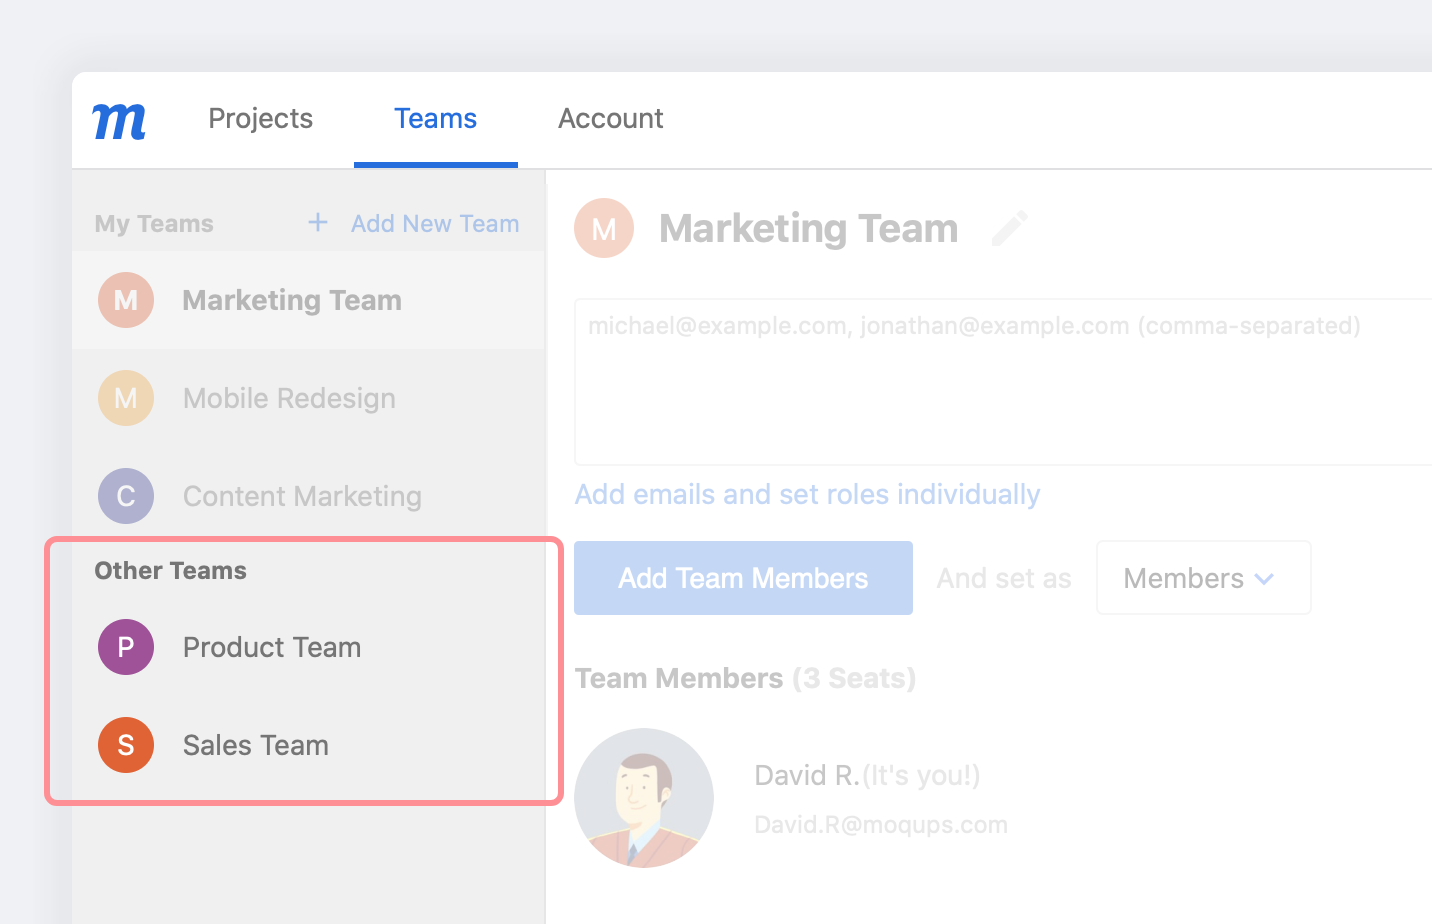
When a user is invited to join a team for which they are not the Admin, either within their organization or without, that team will appear in the Other Teams section of the Teams List:
Clicking on any Team Name from the Team List will display that team’s Member and Outside Collaborator list as well as its Team Settings:
Multiple teams
If you’re subscribed to our Unlimited Plan, you can create multiple teams within your account.
To add a team:
- Click the Add New Team button in the Teams List.
- In the pop-up, name your team and click the Create Team button.
- Your new teams will appear in the My Teams section of the Teams List.

Team settings
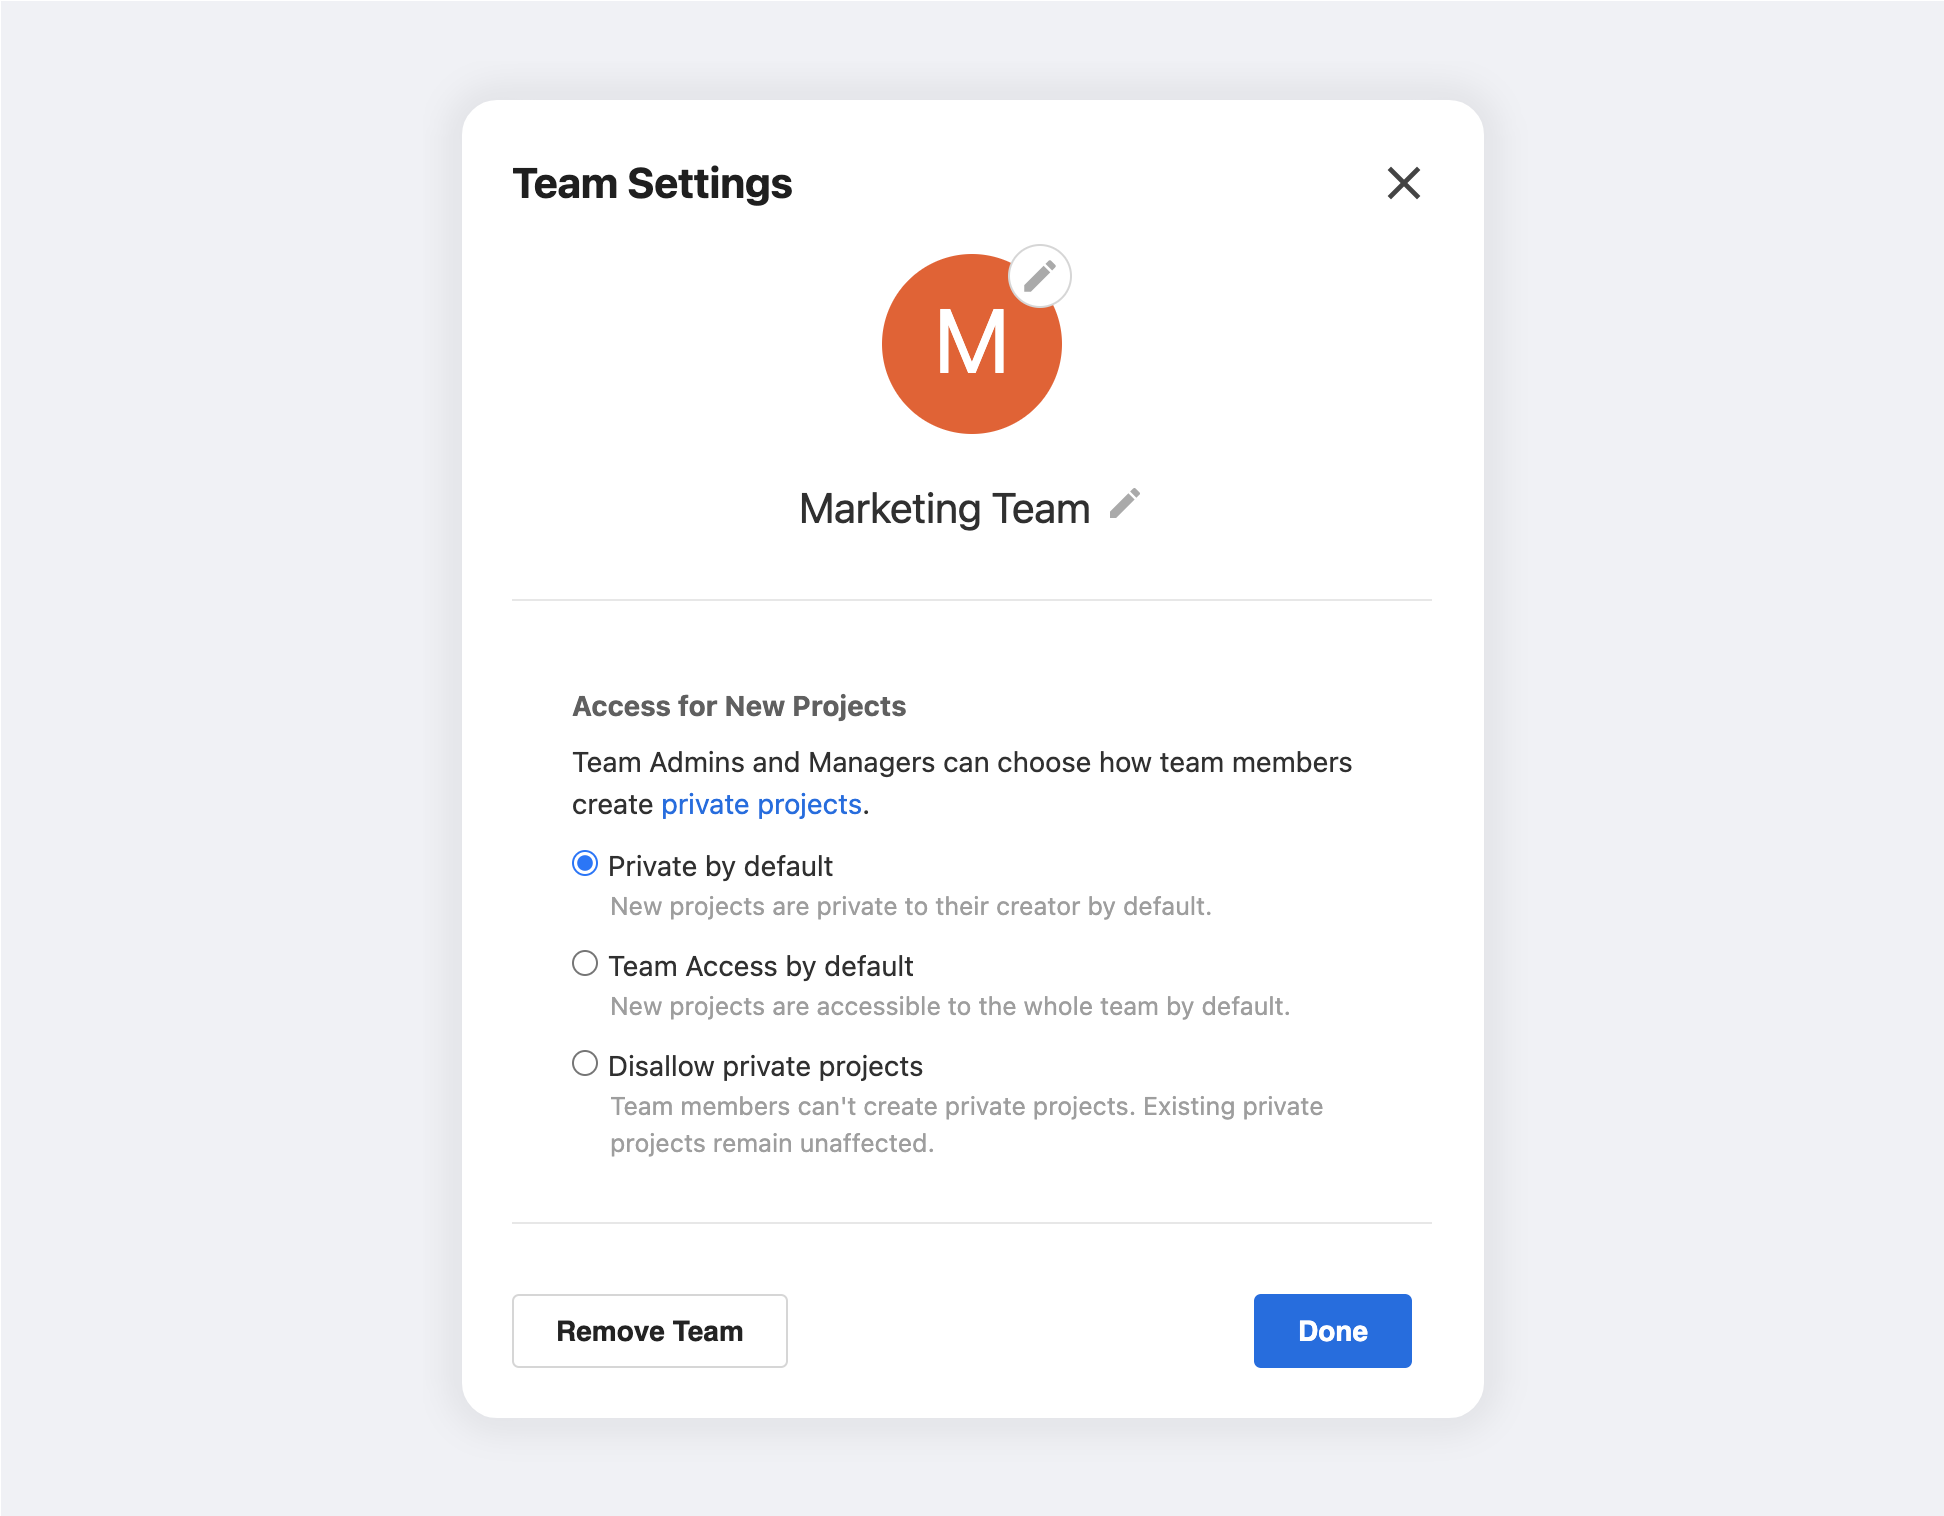
Clicking the little gear button at the top right of the Teams Window will open the Team Settings for whichever team you’ve selected from the Teams List.
Here, you can choose a team avatar and name, and also control how team members create private projects.
-
Choosing an avatar
Moqups automatically assigns an avatar that displays the initial letter of your team. You can change it by uploading your own file, or choosing from our selection.
-
Naming your team
When you create your initial team, it adopts the name of your personal account. You can rename that, or any subsequent teams you create, in the Team Settings pop-up. Or, you can click on the name in the upper-left corner of your dashboard’s Team Window, and type into the field.
-
Access for New Projects
A team’s Admin and Managers can choose how team members create private projects. New projects are private by default, but here you can change the default to Team Access. Subscribers to our Unlimited plan also have the option of disallowing private projects altogether.
-
Removing a team
Check out the section below to learn how to remove a team.
Add team members and set roles
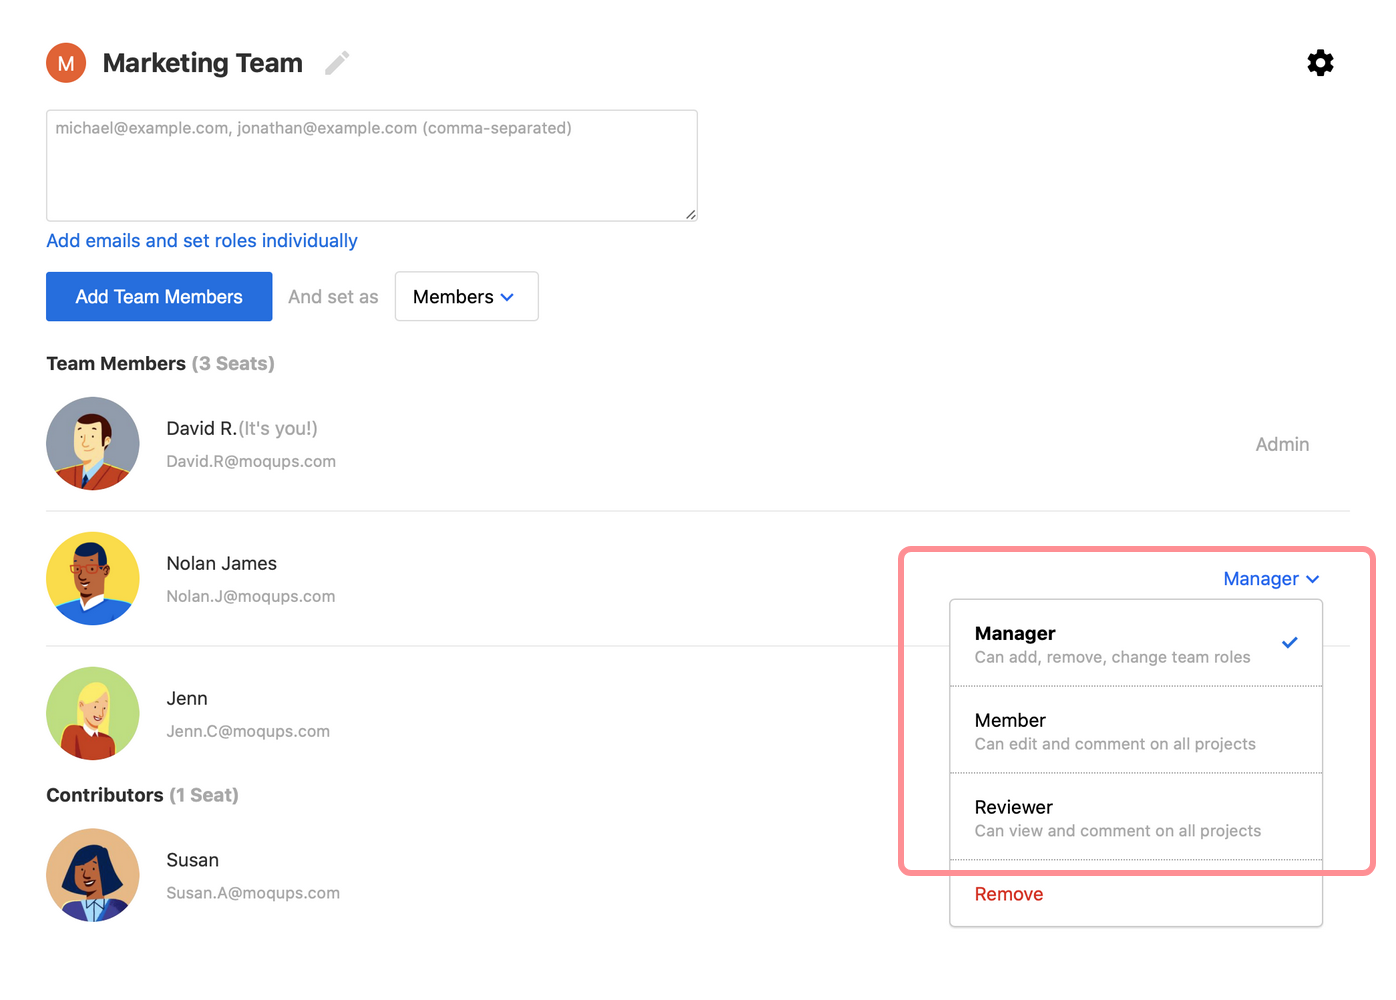
When you add members to the team, you can also assign their roles. You can designate them as Managers, Members, or Reviewers.
The Admin role is not assignable since the account owner is automatically the team’s administrator – and the only one who has access to its account and billing information.
There are two ways to add members to your team:
To add members and assign them the same role:
- In the field at the top of the Teams Window, enter the emails of your prospective team members, separated by commas.
- Use the dropdown to set their role.
- Click the Add Team Members button.
- Newly added team members will receive an invitation email.
To add members and assign them different roles:
- Click the Add emails individually link.
- Enter member emails one by one, add their name, and use the dropdown to set their roles.
- Click the Add Team Members button.
- Newly added team members will receive an invitation email.
Change team roles
You can set your members’ roles when you first invite them to the team. You can also retroactively change their roles in the Teams Window.
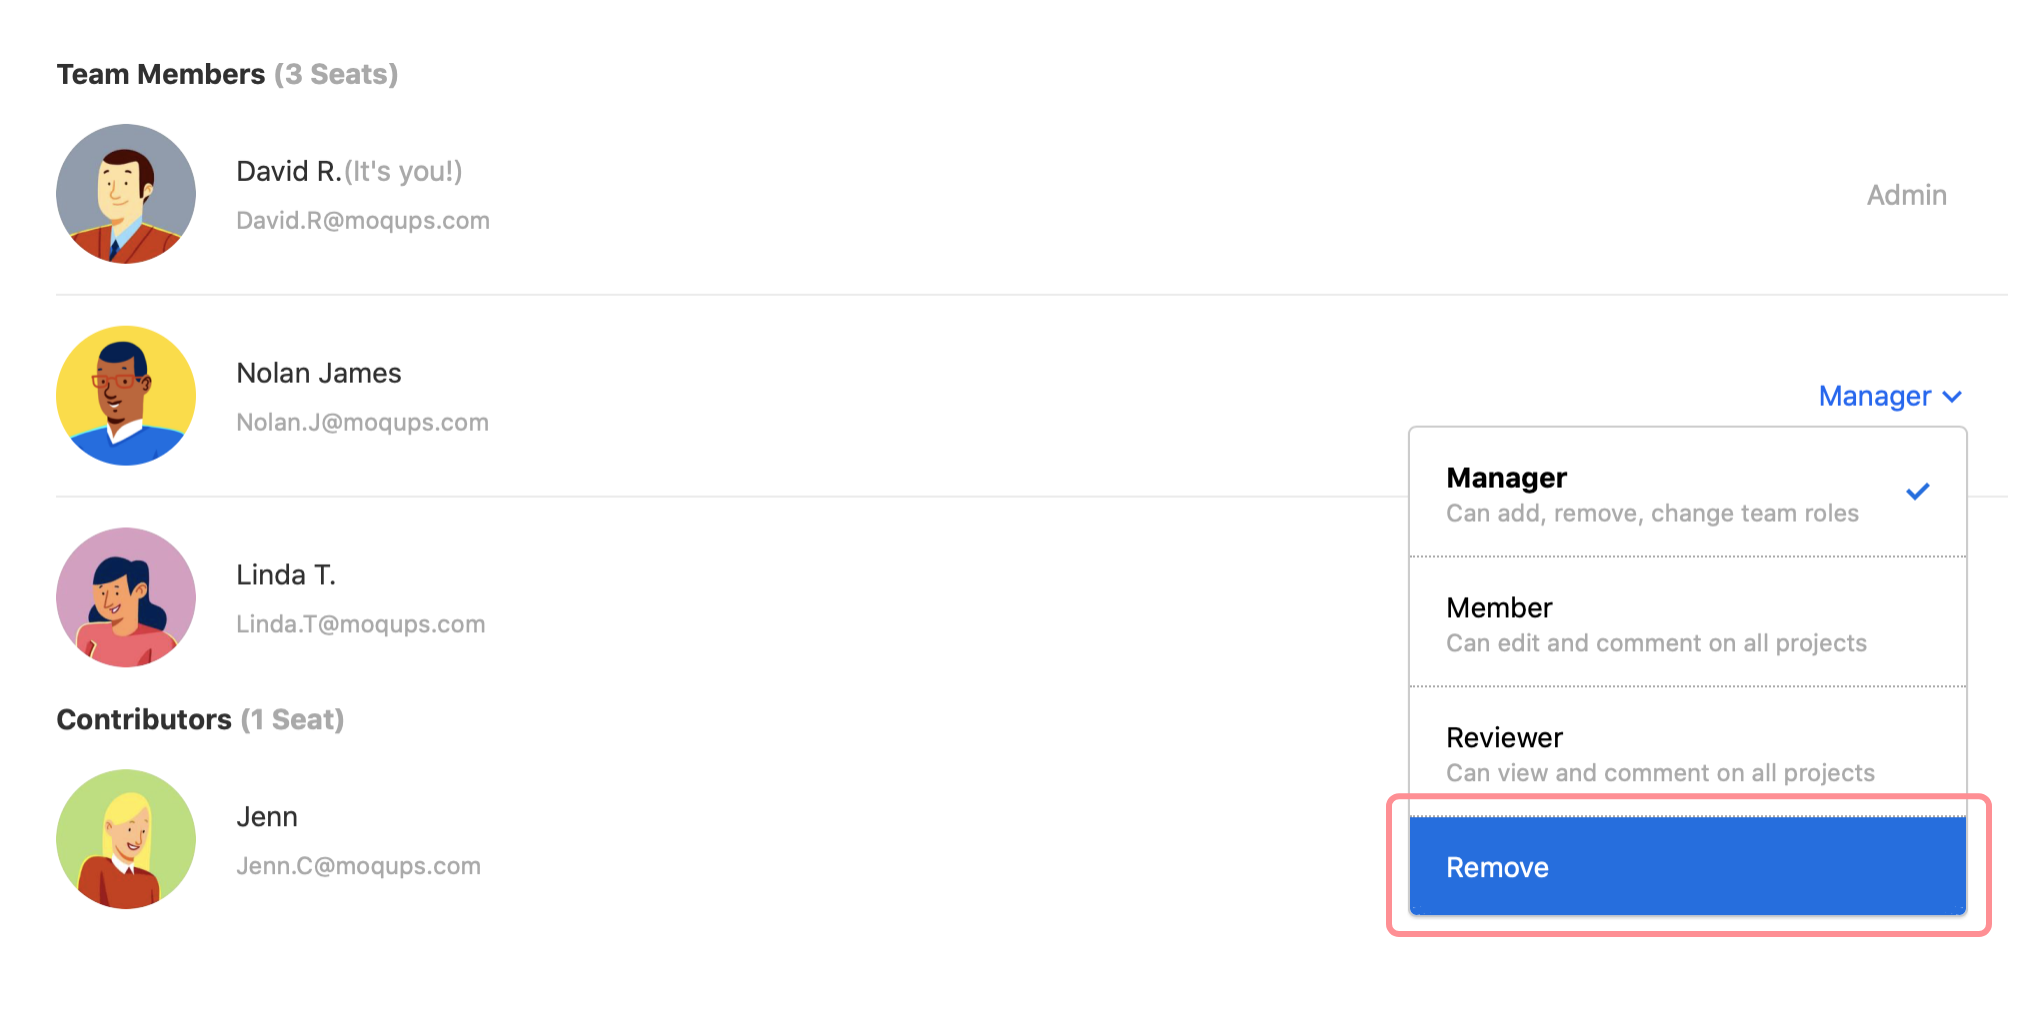
To change a team’s member role, click the Team Role Switcher and select their new role.
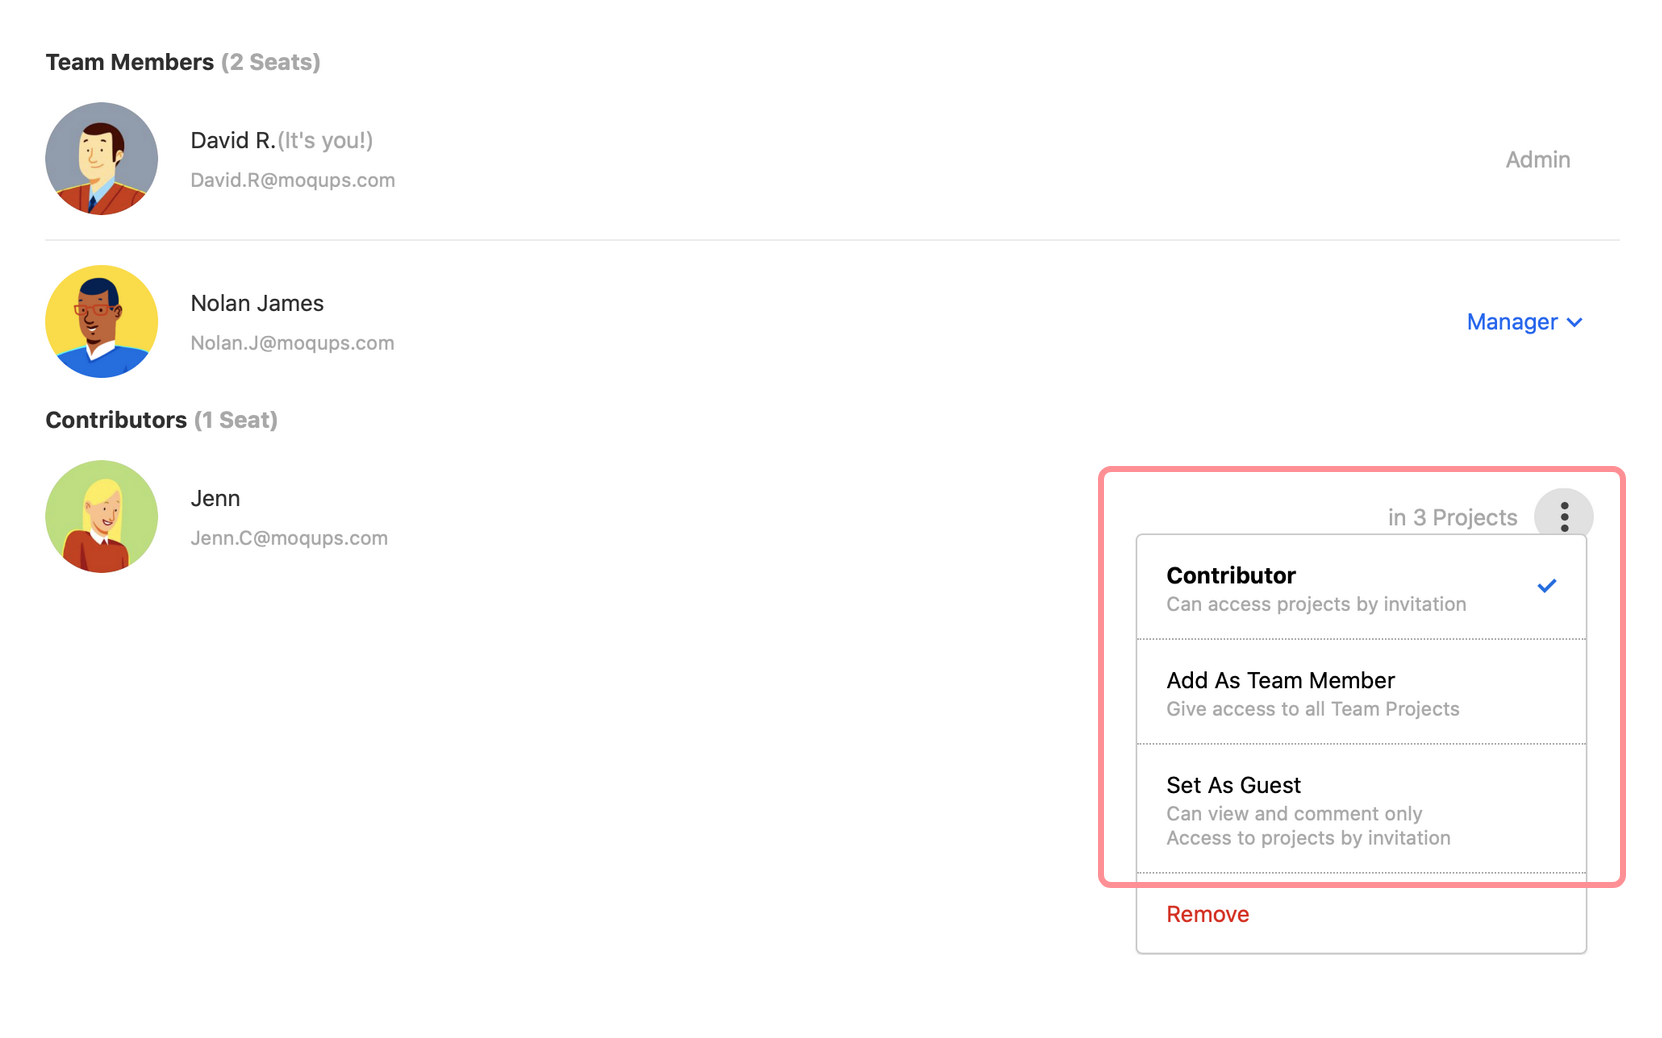
Add outside collaborators and change roles
Outside Collaborators are added to individual projects by team members. This is done, on a project-by-project basis, in the Sharing Window.
The Sharing Window is also where outside collaborator’s individual project permissions can be adjusted, effectively changing their role.
However, Admins and Managers can perform some role changes from the Teams Window itself – most significantly, by adding an outside collaborator to the Team itself.
To change a Contributor or Guest’s role, click the More Actions icon to the far right of their name, and select their new role.
Remove collaborators
To remove a Team Member, Contributor, or Guest, click the Team Role Switcher and select Remove.
When a Team Member is removed, they lose access to all team projects and information. If they’ve shared a private project with other individual team members, those team members retain access to the project even though the project creator has been removed. For projects that are entirely private – i.e. not shared with any team members – access is automatically granted to the team’s Admin.
When an Outside Collaborator is removed, that Contributor or Guest loses access to all the projects they’ve been invited to.
Remove team
If you are the Admin of multiple teams, you can remove a team via its Team Settings. In order to prevent the accidental deletion of important work, you’ll be asked to designate another team to receive the deleted team’s assets before you remove it.
To remove a team:
- From the Teams List, select the team you wish to remove.
- Click the Team Settings button in the upper-right hand corner of the Teams Window.
- Click the red Remove Team button.
- Choose a team to receive the deleted team’s projects and assets.
- Confirm your intention by clicking the Yes, remove team button.
You must retain at least one team; if you don’t want it to be a ‘team’, then simply remove all collaborators except yourself.