In this article:
In Introduction to Pages, we provided an overview of the Pages Panel and of the Page Settings section in the Format Panel.
This article will show you how to create, name, format, search, navigate, duplicate, copy and delete your pages.
The next article, Organize & Folders will explain how to reorganize, nest, pin and hide pages; we’ll also cover how to create folders, and hide pages in Preview.
Create and name
All of these actions are performed from the Pages Panel. To open the Pages Panel, click on the Pages Tab in the left-sidebar.
Create New Pages
To add a new page to your Page Tree:
Click the New page button in the Pages Toolbar.
or
Select the New page option from either the More actions button, or the right-click Context Menu.
You can rearrange both pages and folders by dragging them up and down the list.
Name Pages
There are several ways to name or rename a page:
From the Pages Panel:
Double-click on the page name in the Page Tree, edit the name and hit Enter/Return.
or
Select the Rename option from either the More actions button, or the right-click Context Menu.
From the Top Toolbar:
Click on the Page Name, edit, and hit Enter/Return or click outside the field.
Duplicate pages
To duplicate a page:
Click the Duplicate selected items button in the Pages Toolbar.
or
Choose the Duplicate option from either the More actions button, or the right-click Context Menu.
Your duplicate page will retain all the Page and Workspace settings of the original.
Copy and paste
To copy and paste pages:
- Select the pages you want to copy in the Page Tree of the Pages Panel.
- Choose the Copy Pages option from either the More actions button, or the right-click Context Menu.
- Navigate to the browser window or tab where the destination project is open.
- Click on the Pages Panel of the destination project.
- Choose the Paste Pages option from either the More actions button, or the right-click Context Menu.
To select a sequential series of pages or folders, click the first item; then hold down Shift and click on the last item in the list.
To select multiple pages or folders, hold down the Cmd/Ctrl key, and click on individual items to choose them.
Since the Workspace is project-specific, pages copied and pasted between projects will not retain the original Workspace settings.
Search and navigate
Search Pages
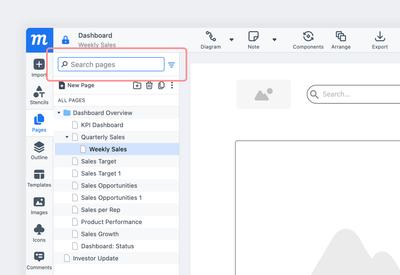
To search for a page or folder, type the name in the Search Pages box at the top of the Pages Panel.
Navigate Pages
Use Fn + Up/Down arrow keys of your keyboard to navigate up and down the Page Tree.
To make navigation more visual, enable the Show page thumbnails on hover feature from the Workspace → Advanced Settings menu.
Format page settings
The Page Settings section of the Format Panel lets you adjust the size, proportion, orientation and background color of your page. You can also lock your page’s aspect ratio, fit the page to existing content, reset your page view, or hide any content outside page margins.
Jump to our Workspace section if you are looking to add grids or guides to your pages, set snapping controls, hide or show page options, or control how your cursor interacts with objects on the page when you hover, select or move them.
To choose your Page Settings, first click on the Format Tab to open the Format Panel. Since the Format Panel is contextual, it will only show the Page Settings when no object on the page has been selected.
Page settings and background color can be applied to either a single page, or a selection of pages. If you choose to format multiple pages, a green banner will appear in the panel to confirm the selection.
Choose Page Size, Orientation, and Aspect Ratio
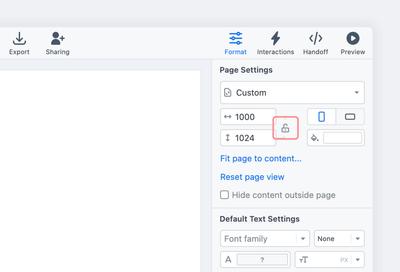
When you first add a page, the Device Dropdown is set to Custom, and the default page size is set to 1000 x 1000 pixels.
You can set the page size by…
- Using the Width and Height inputs to enter custom settings.
- Choosing from the page presets in the Device Dropdown.
- Dragging the Page Adjustment Arrows that appear when you hover over the right and bottom page borders.
You can change the page orientation from portrait to landscape with the Flip Vertically and Flip Horizontally buttons.
The Lock aspect ratio button lets you keep the same aspect ratio as you adjust either of the Width and Height inputs.
Set Page Background Color
To fill your page with color, click on Background Color to open the Color Picker Popover.
Select the Swatches Tab to choose a color scheme from Moqups Classic, Material Design, Bootstrap or iOS 8. This tab also displays the colors you’ve already used in your project.
Select the Picker Tab to create your own custom colors.
In both tabs, you can…
- Enter the Hex value for a color
- Adjust the fill-color opacity
Fit Page to Content
You can quickly fit your page to encompass all the content on the canvas – including objects beyond your page border. You can also shrink a page with too much excess space to bring the focus back on the work at hand.
To fit page to content:
Click the Fit page to content link in the Page Settings section of the Format Panel
or
Right-click anywhere on the page and select the Fit page to content from the Context Menu
Then, enter the amount of pixel space you want around the content. And choose whether you want to consider blurs and drop shadows or hidden objects, as part of your ‘content’.
Reset Page View
Working on a project inevitably means zooming and scrolling around your page. To get back to the default 100% zoom, click on the percentage indicator in the center of the Floating Zoom Control. Reset page view goes further to both reset the zoom to 100% and scroll to the top of the page.
To Reset page view just click the link in the Page Settings section of the Format Panel.
Hide Content Outside Page Borders
The blank area of the Canvas – beyond the margins of the page – is a great place to leave all kinds of related or temporary content that isn’t part of the page itself: notes, experiments, variations, snippets of text, requirements and specifications, models and inspirations.
It’s useful to have this content near at hand when you’re working, but you may want to hide it when presenting, or when you need to focus on the design itself.
In that case, select the Hide content outside page borders checkbox.
Below the Page Settings in the Format Panel, you’ll find the Replace Colors section which lets you replace a color on a page, but also throughout your project.
Trash, restore and delete
The following actions are performed from the Pages Panel. To open the Pages Panel, click on the Pages Tab in the left-sidebar.
Move to Trash
To move pages and folders to the Trash, make your selection and:
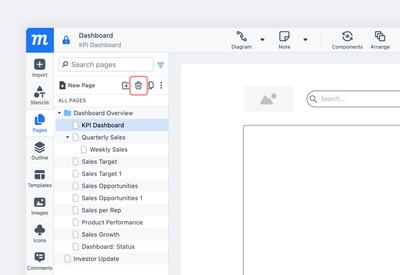
Click the Move to Trash button in the Pages Toolbar.
or
Choose the Move to Trash option from either the More actions button, or the right-click Context Menu.
If you, or any of your collaborators, accidentally remove items from the Page Tree, you can always recover them – until you delete them permanently.
For a few seconds after you use the trash option, a pop-up appears at the bottom of the page and lets you Undo that action.
After the pop-up closes, you can still Restore pages by opening and viewing the Trash.
View Trash
To open the trash, select the View Trash option from either the More actions button, or the right-click Context Menu. You’ll also see a counter of your trashed items next to the option.
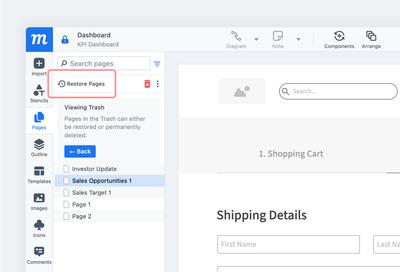
Once the Viewing Trash window is open, you can review the Trash contents, Restore pages or folders, or choose to permanently Delete items.
To return to the Page Tree, click the blue Back button.
Restore Pages and Folders
To restore a page or folder:
-
Use the View Trash option to open the Viewing Trash window
-
Select the pages or folders you want to restore
-
Click the Restore Pages button at the top of the Viewing Trash window
or
Choose the Restore option from either the More actions button, or the right-click Context Menu.
To return to the Page Tree, click the blue Back button.
Delete Pages and Folders
To permanently delete a page or folder:
-
Use the View Trash option to open the Viewing Trash window.
-
Select the pages or folders you want to delete.
-
Click the Delete Permanently button at the top of the Viewing Trash window.
or
Choose the Delete Permanently option from either the More actions button, or the right-click Context Menu.
The Delete page pop-up will ask you to confirm your choice.
To return to the Page Tree, click the blue Back button.
When you select a folder, the Delete permanently option does not delete any pages within it; it deletes the folder only.